The Renowned 190cm Elinchrom Indirect Octa!
In one word – legendary. That’s how I, along with many photographers, would describe the 190cm (75″) Indirect Litemotiv Octa Softbox. If you study behind-the-scenes images from the world’s top photographers, regardless of the brands of lights they use, you will see this modifier popping up everywhere, and you can rent one from almost every equipment rental house. The reason why is simple: the light from this modifier is nothing short of beautiful!
When I bought one in 2015, it was a game changer. At the time, I was using Profoto lights, and their 150cm Octabox just didn’t cut it. For the first time in my life, I felt like I had the ability to create window light anywhere, anytime.
“For the first time in my life, I felt like I had the ability to create window light anywhere, anytime.”
But that isn’t all this modifier can do. Indirect means the light points away from the subject, allowing you to take off the outer diffusion and use the modifier like a giant silver reflector. The light it produces is high contrast, yet somewhat soft due to its size. You can use it whenever you want the feeling of sunlight but with more pleasing skin texture.
Now that I’ve extolled the virtues of this modifier, I want to share with you four different ways you can use it to produce Rembrandt lighting, skylight lighting, rim lighting, and high contrast direct lighting.
Rembrandt Lighting
When I bought this modifier, I was in a phase dedicated to replicating window light, and this softbox excelled in this regard. That’s why I have recommended it time and time again!
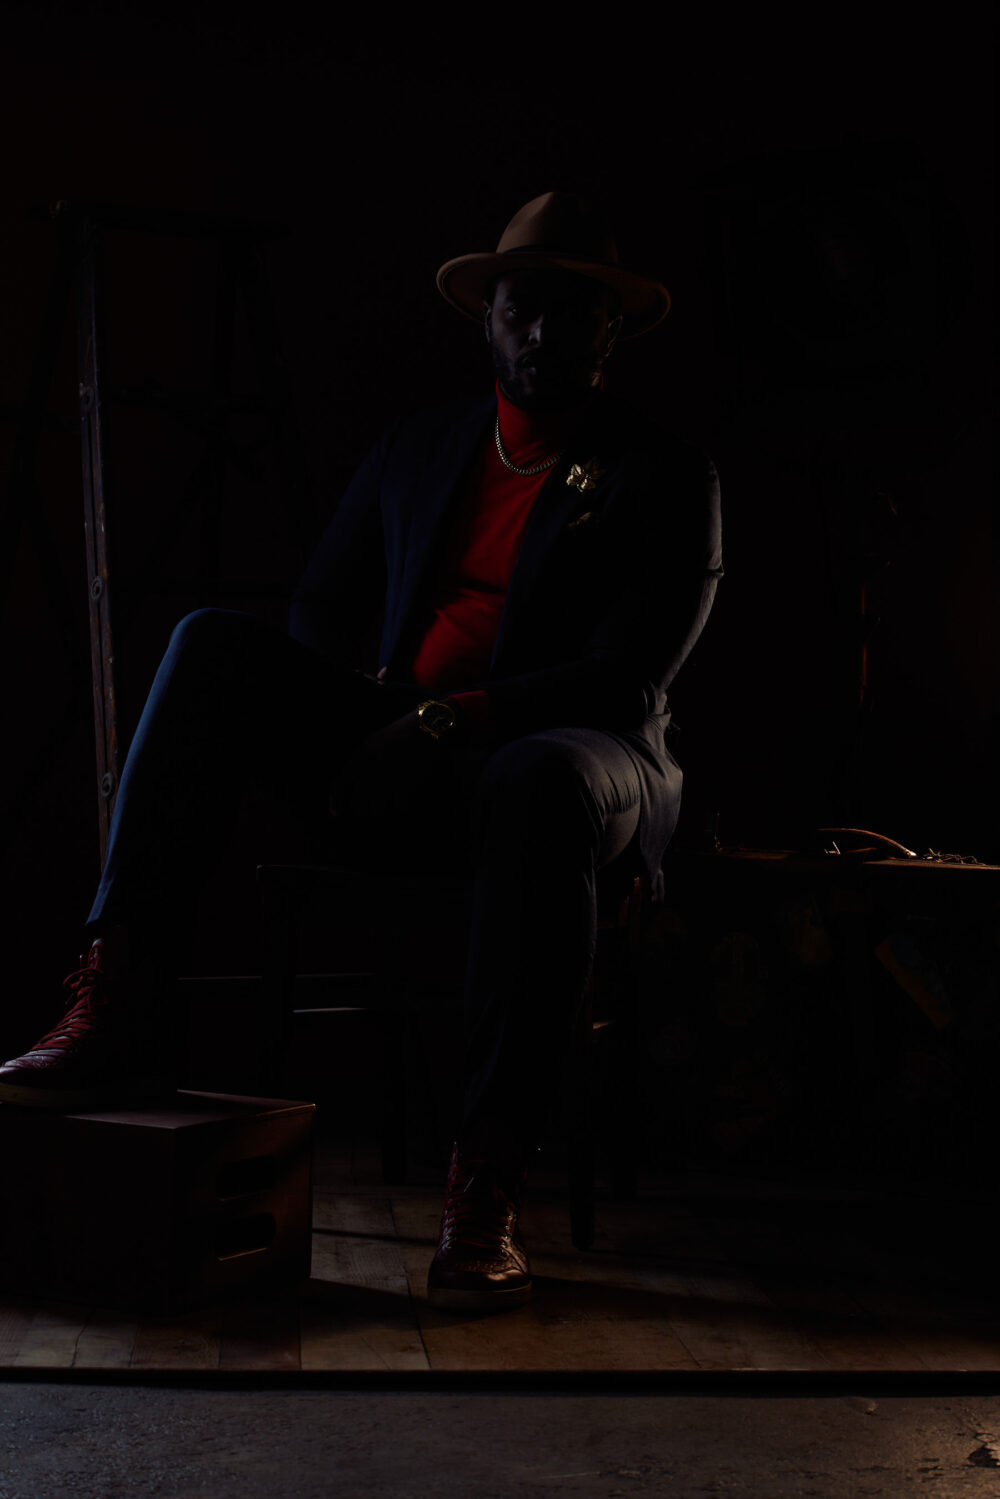
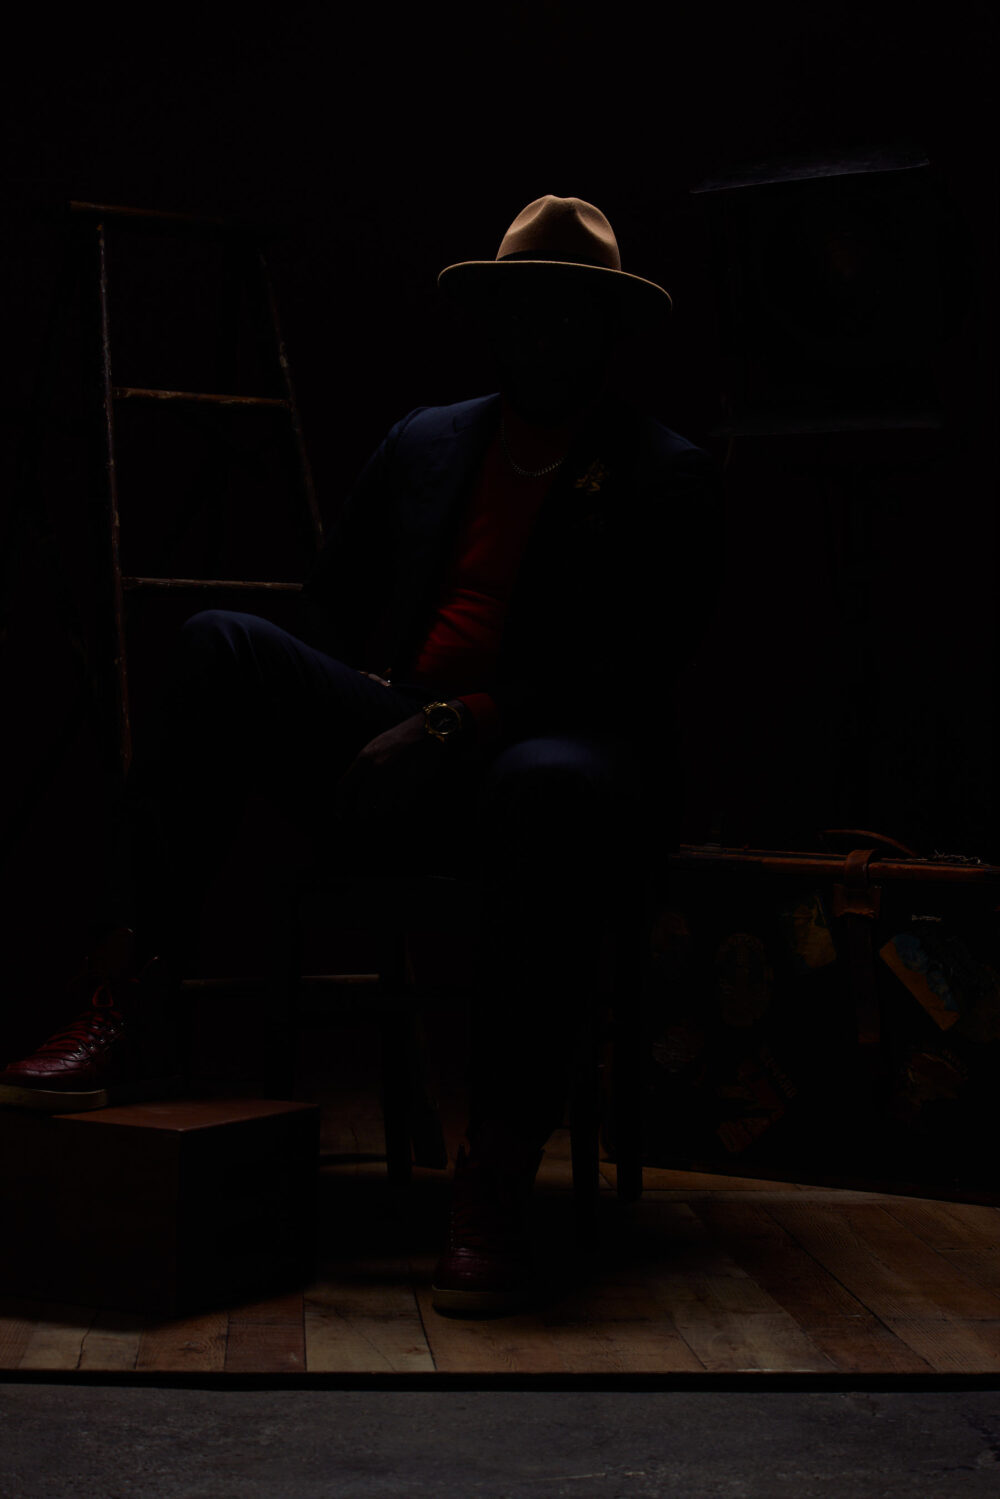
Rembrandt lighting involves positioning the light to the side of the subject, casting a shadow from their nose that completely traverses their face, culminating in the creation of a trademark triangle of light beneath the eye farthest from the modifier. This technique draws inspiration from the works of the Dutch painter, after whom it is named, who would often angle his subjects slightly towards a window. To replicate this effect, the modifier is placed to the left or right of the subject, almost perpendicular to them. This softbox does have the ability to achieve this lighting pattern, but positioning it too close to the subject may result in light wrapping around the nose, leading some to argue that it resembles loop lighting.
The light emitted by this modifier is immediately reminiscent of window light on an overcast day, thanks to its directionality and overall softness. To optimize this effect, the light should be feathered and aimed towards a spot a few feet in front of the subject.
“you can usually think about a softbox like a firehose of light”
Not to mix metaphors, but you can usually think about a softbox like a firehose of light. If you point it at the person, they are going to be drenched and in pain, but if you point it in front of them on a hot day, they will just be cooled off by the mist of light (water) coming off the side of the beam. This will create very even light from one side of the face to the other. The second thing you want to consider is that you have the bottom of the light at jaw level so all the shadows go down. If it’s too low the light may start to come from below which will start to evoke an unnatural and ominous feeling.
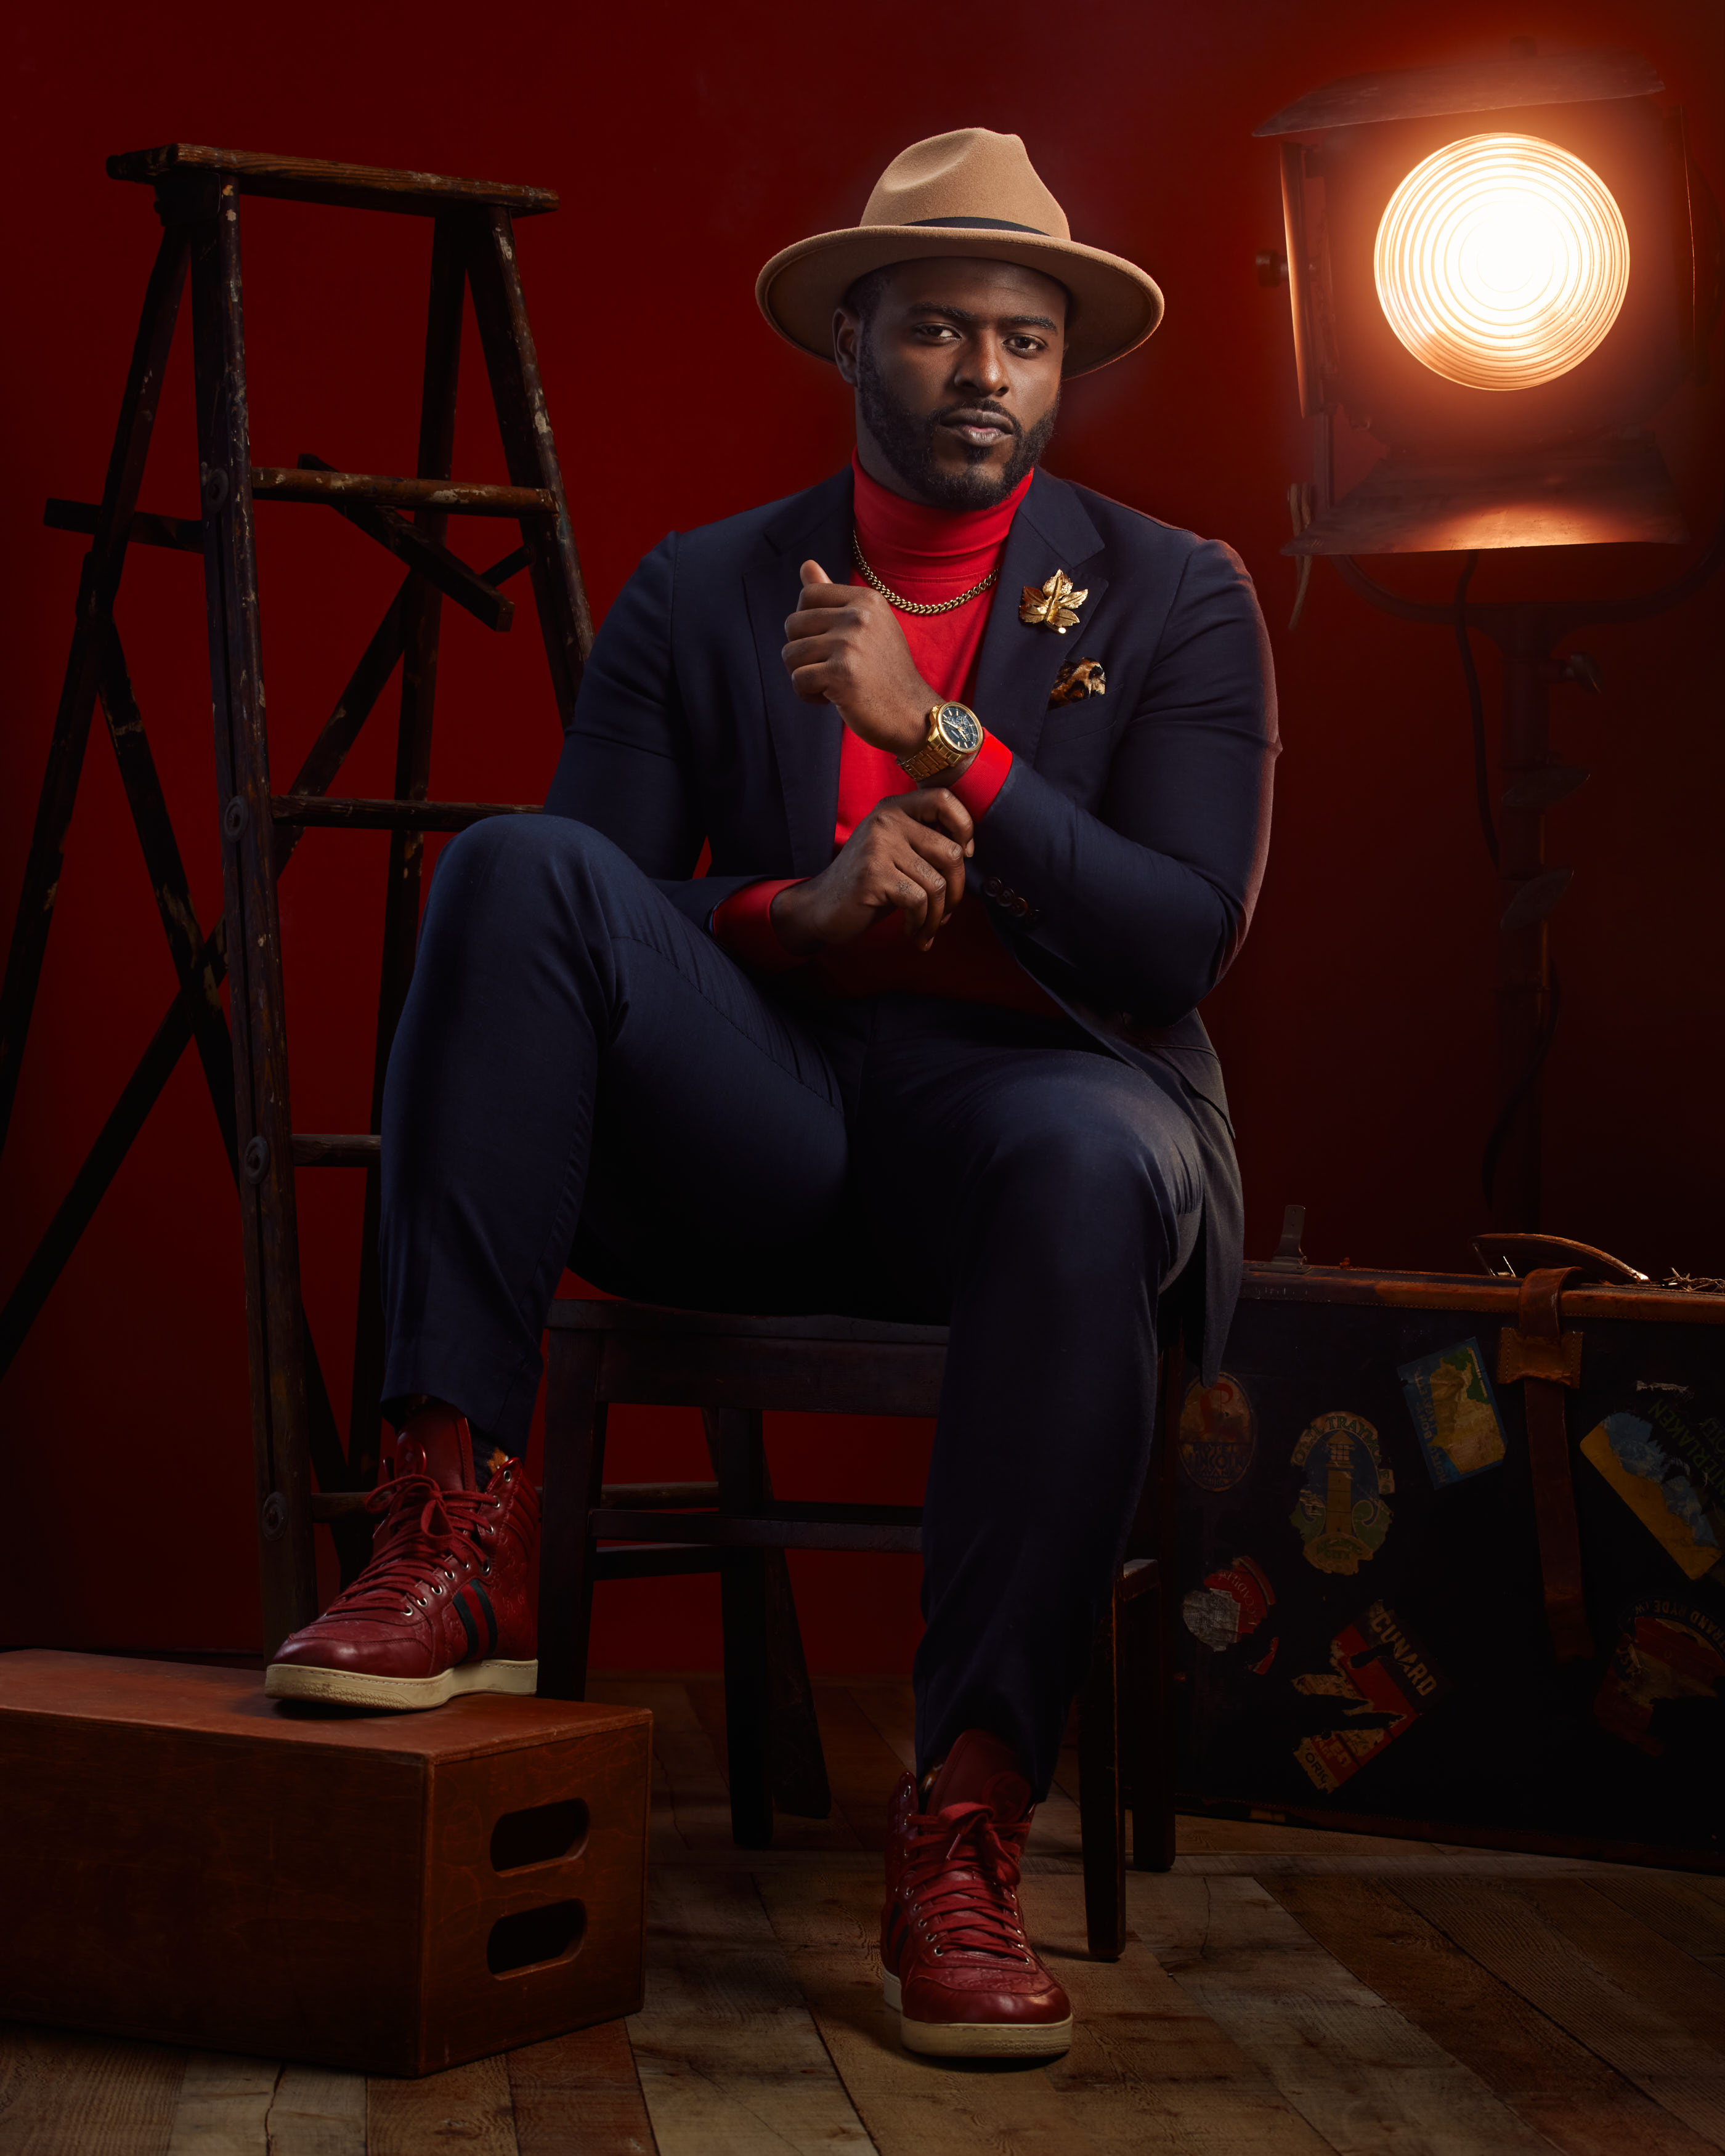
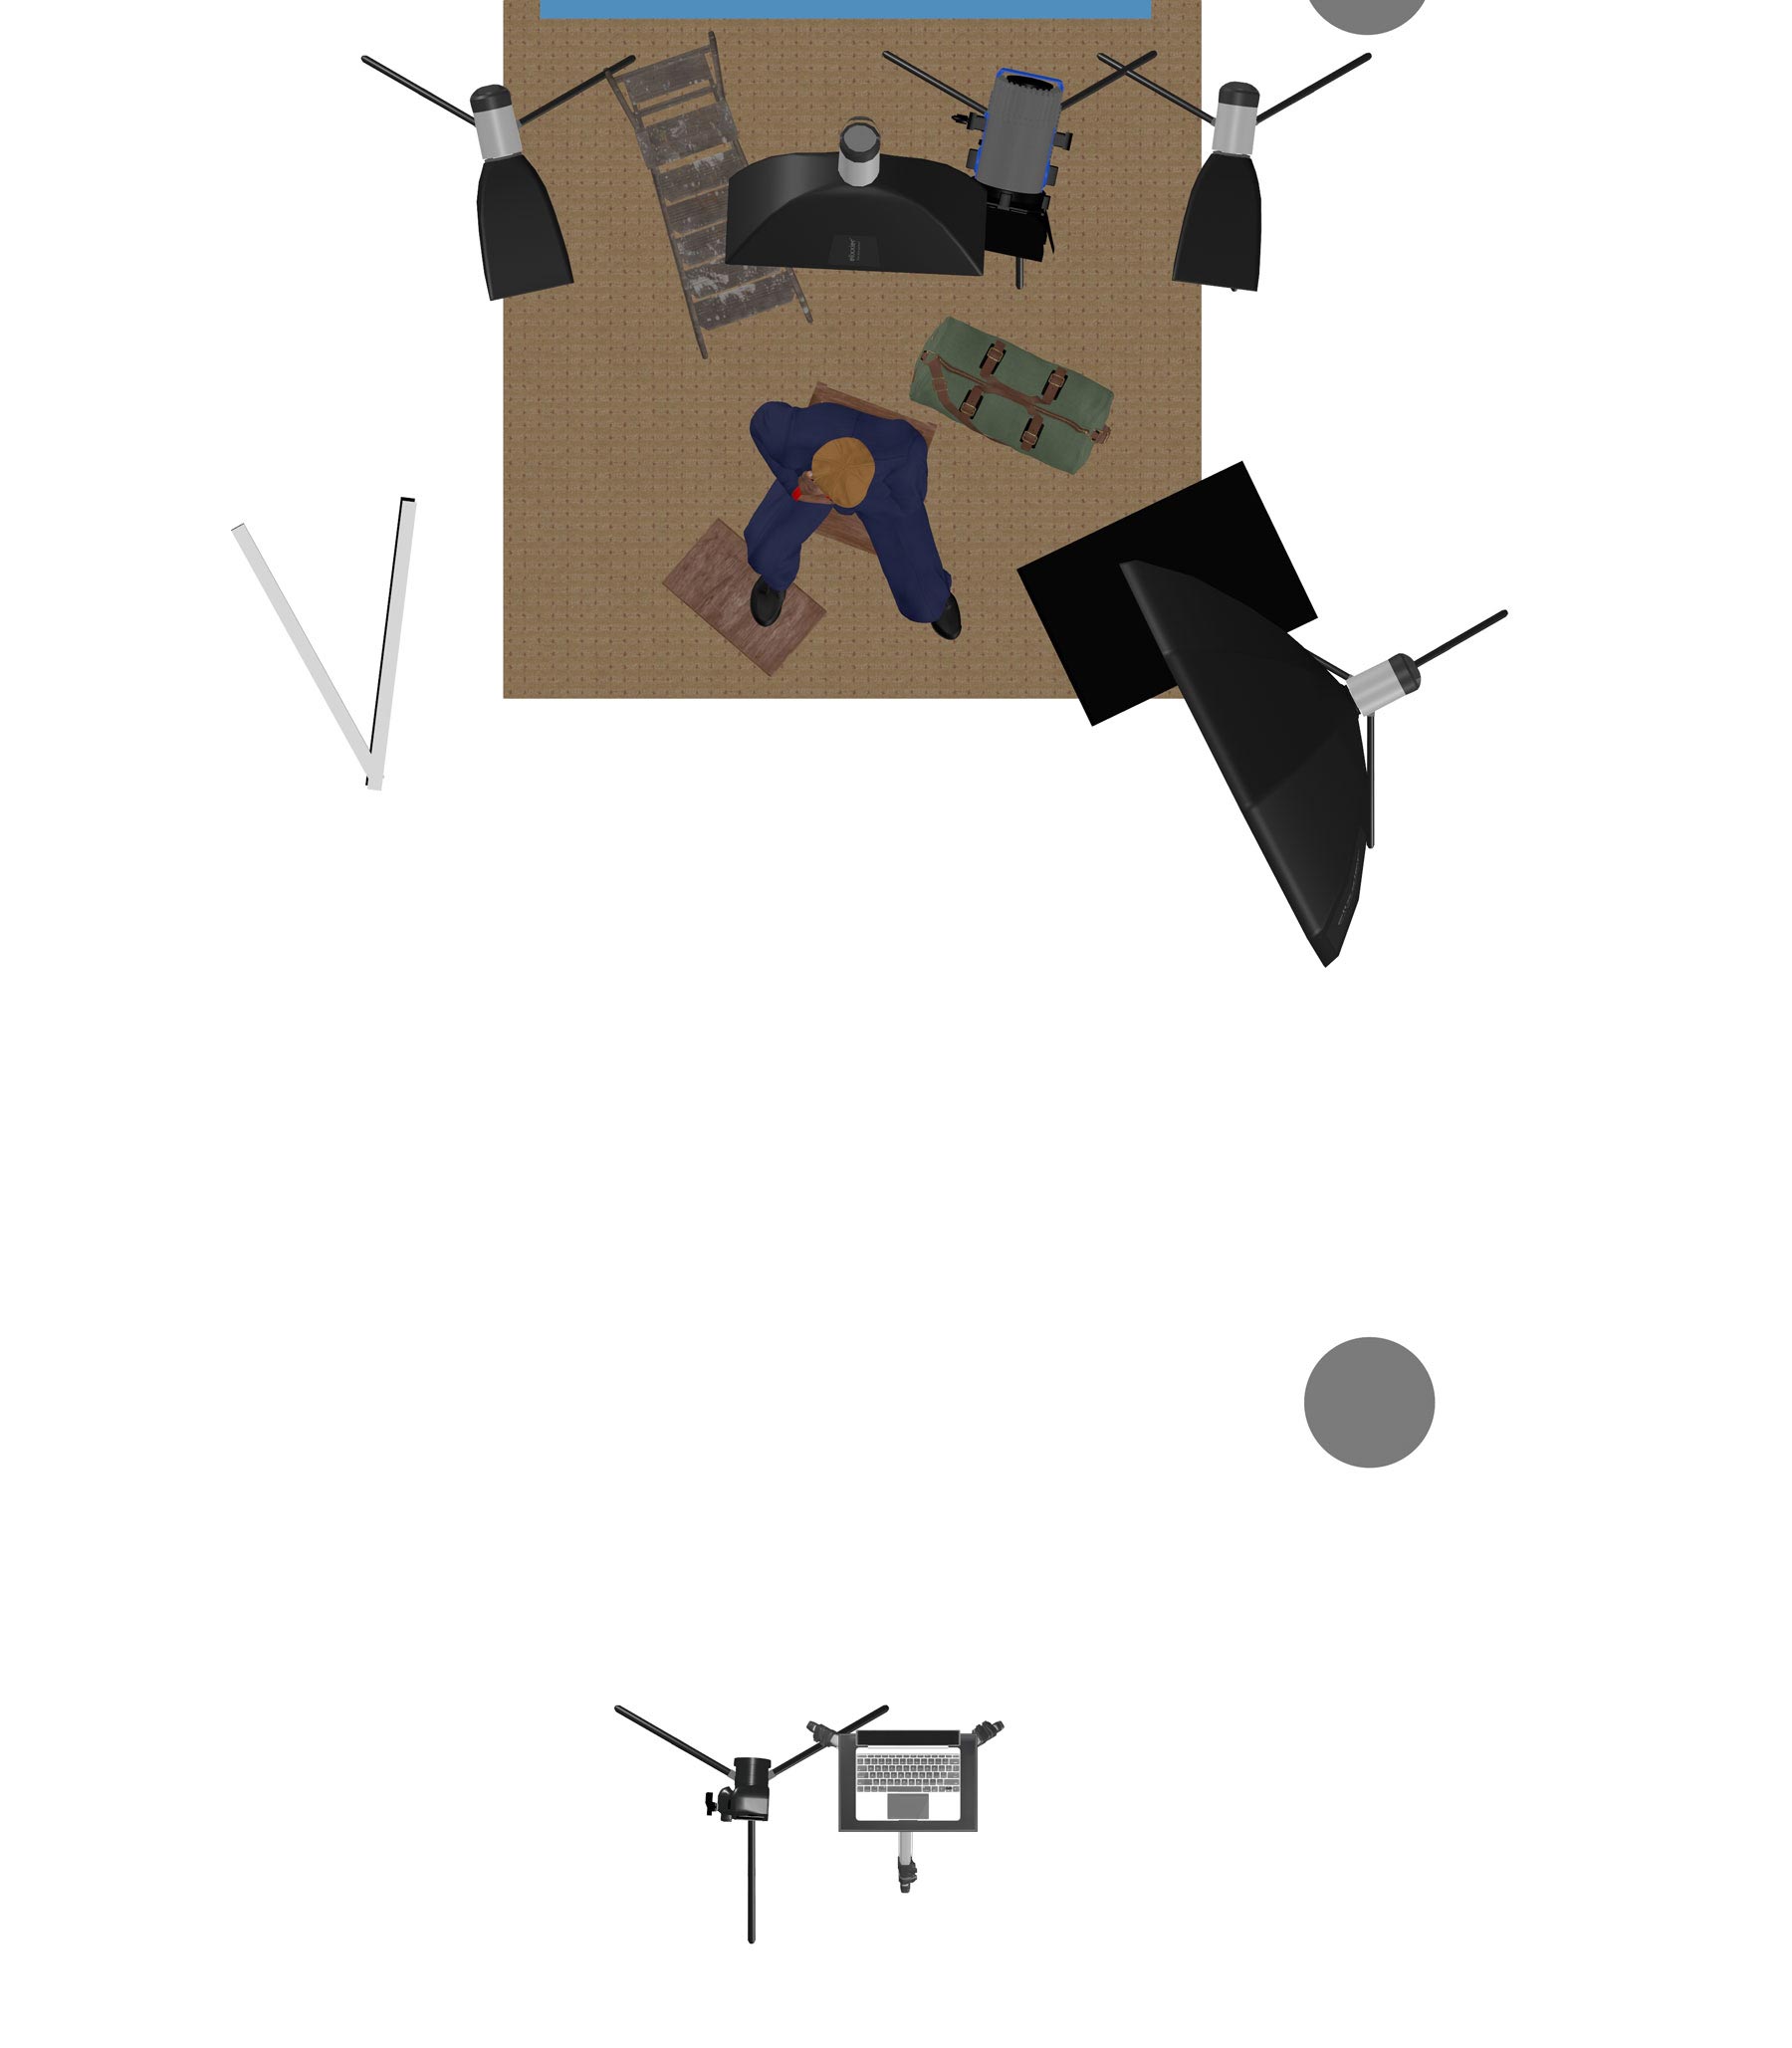
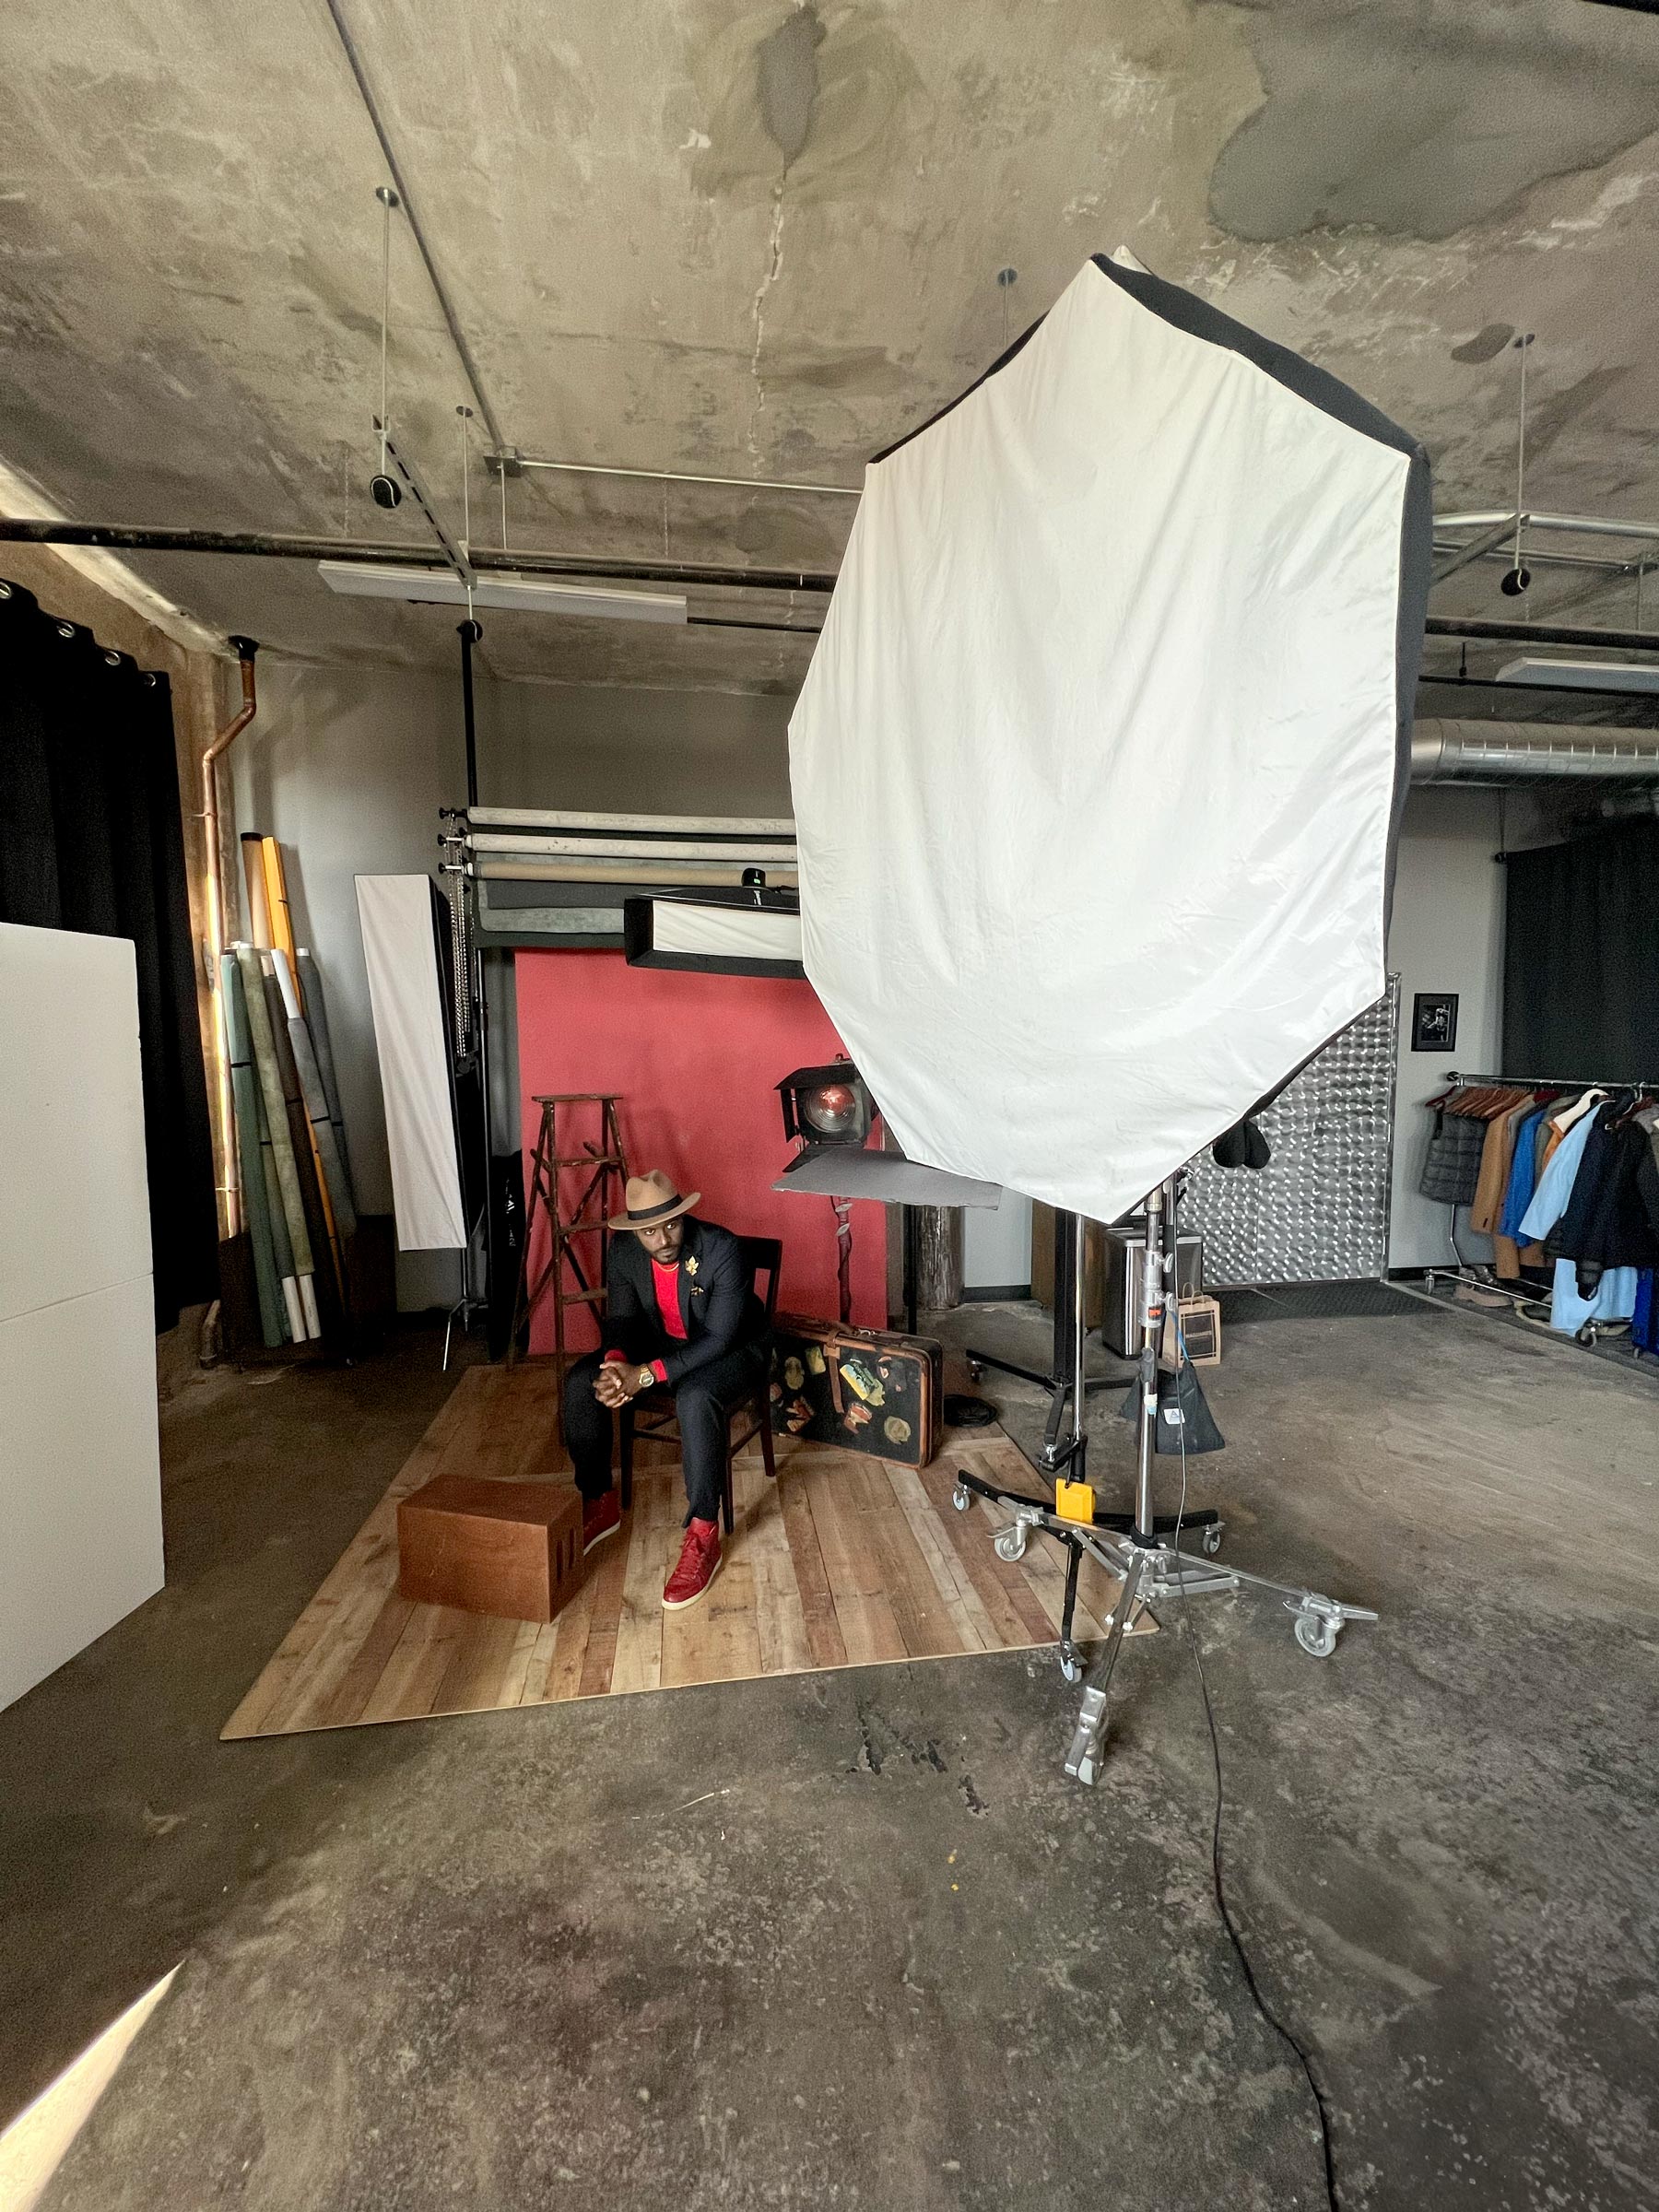
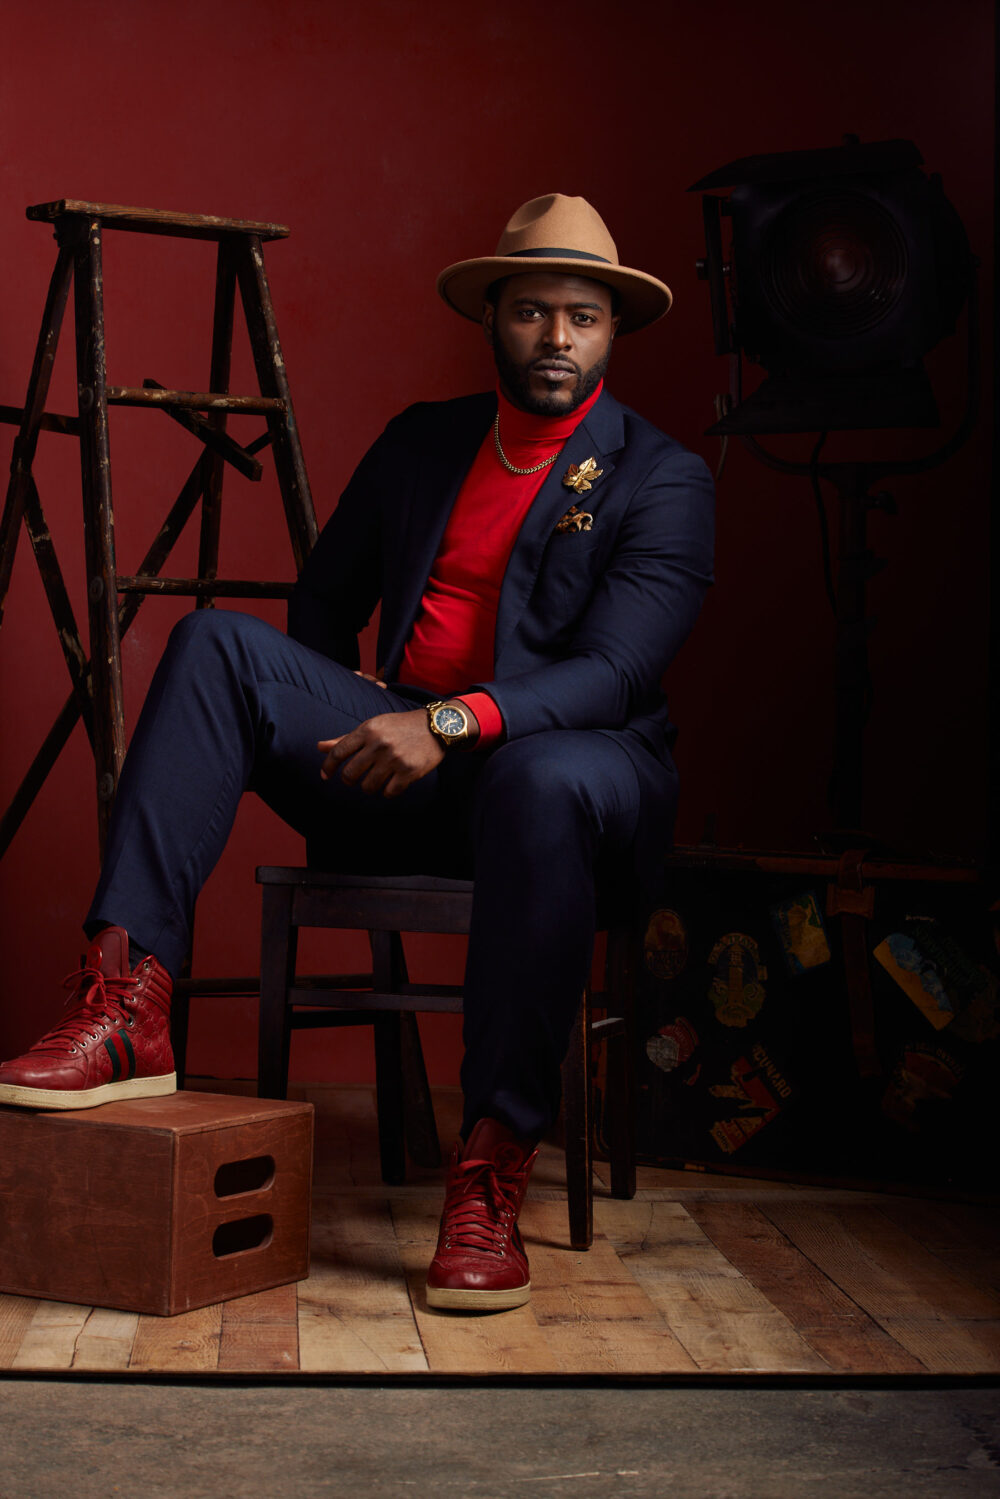
In this image featuring Dyren, I employed extensive feathering of the lighting, directing it more towards the camera to achieve a softer effect. Additionally, the light bounced off a V-Flat positioned to the left of the camera, effectively filling in any shadows. Looking back, I think I might have angled the light too much, since I had to fix the right side of the backdrop in post.
To separate Dyren from the background, I set up four lights in the back. The most important one was also a prop. I nestled an Elinchrom ONE, covered with a double CTO gel, snugly inside a vintage 2000-watt Mole Richardson fresnel movie light, model #412. With the gels, it gave off a warm glow reminiscent of an old-fashioned tungsten bulb. These lights used to be called “hot lights” because they emitted a lot of heat, but by swapping the bulb with a strobe, we can control the brightness without melting the models!
Because the fresnel has a focused beam, I added an Elinchrom Indirect Litemotiv Strip Softboxes, 33x175cm (13 x 69”), on both sides of the set to create highlights on Dyren’s arms and legs. To match the warmth of the fresnel, I placed a CTO gel inside the strip on the right. Additionally, I positioned a Rotalux Strip Softbox, 35x100cm (14×39”), on a boom to act as a hat light.
Stopping Movement
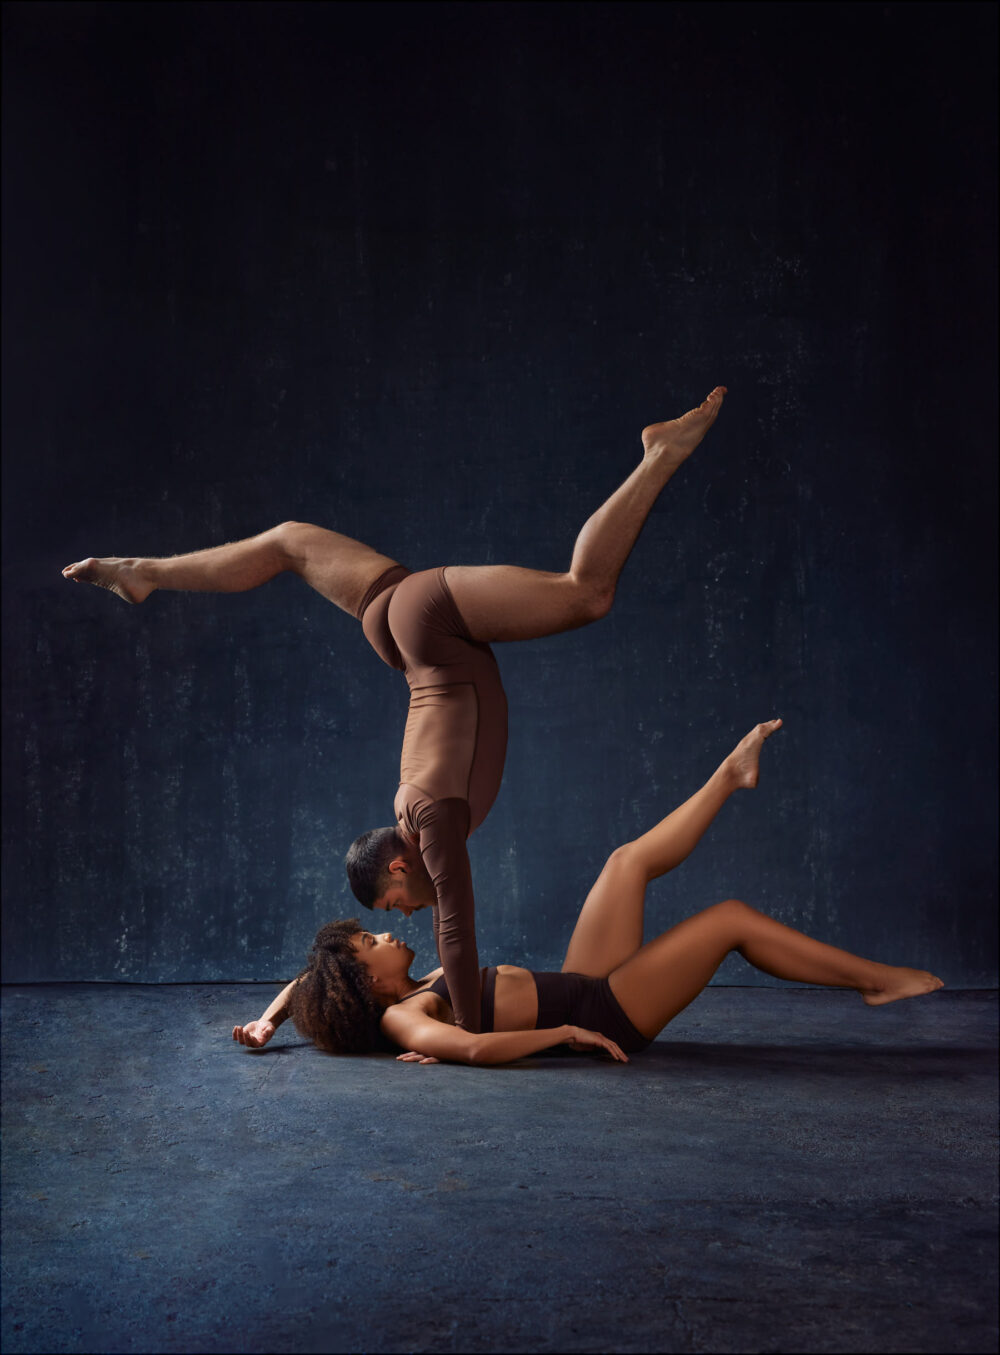
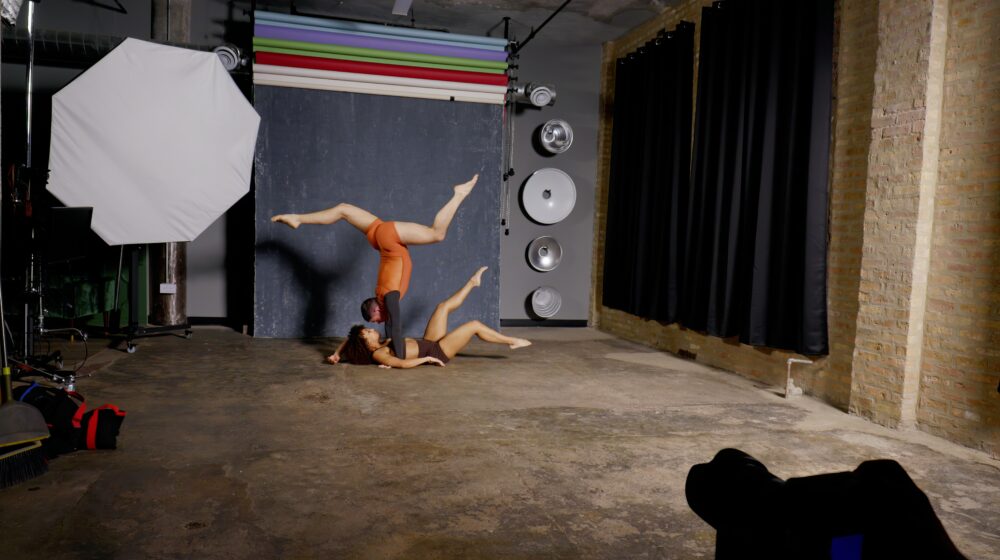
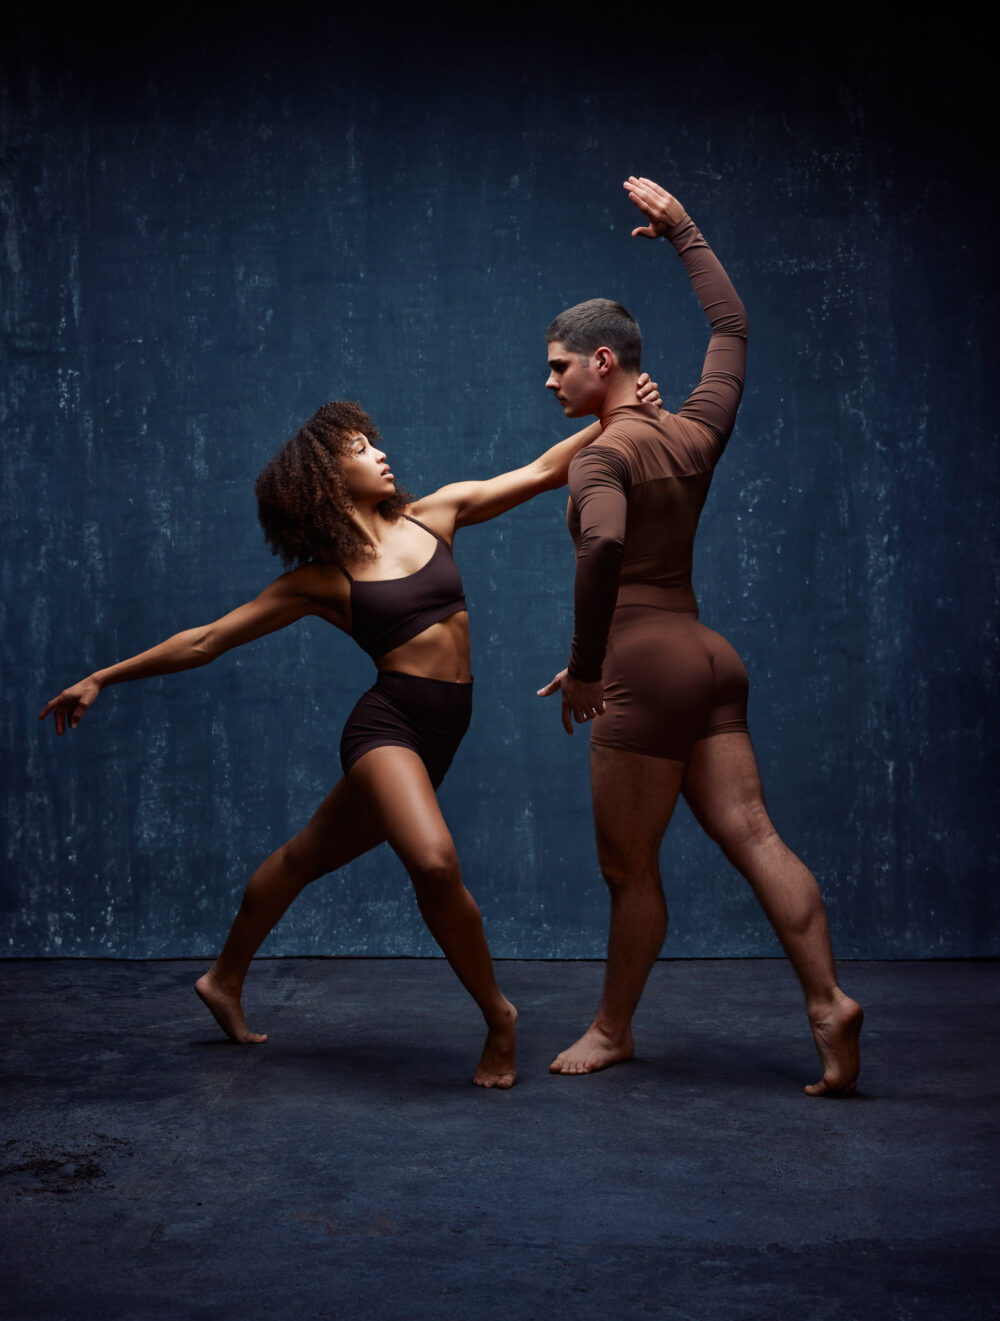
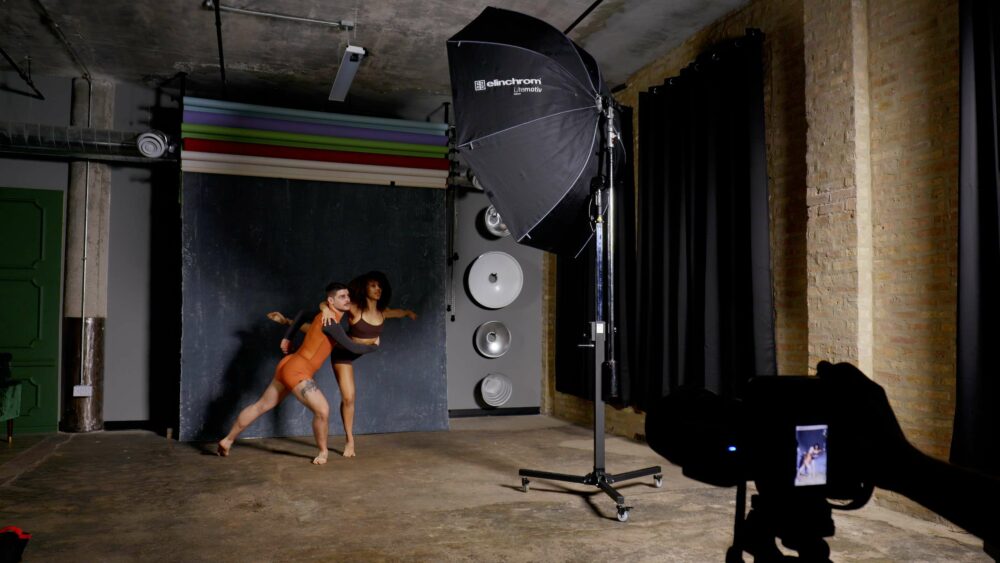
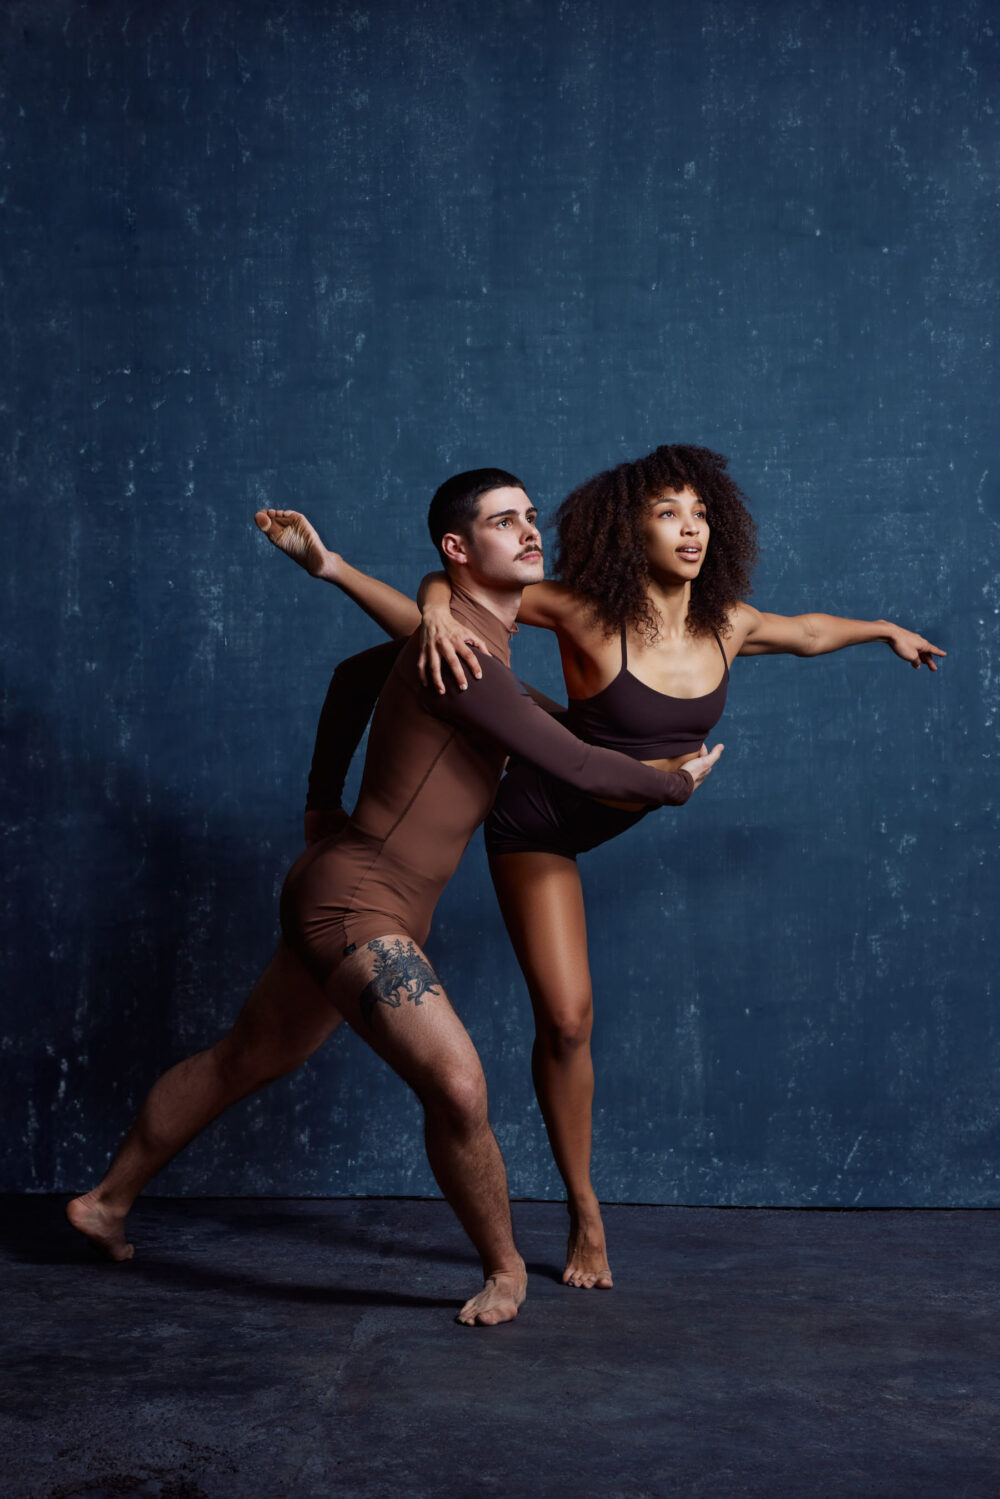
When you light your subject generally from behind and have them turn to the side the resulting lighting pattern is called short lighting. When you create short lighting, you can also create Rembrandt lighting at the same time. In this example featuring models Zach and Mya, I positioned the 190cm octabox almost even with the backdrop and directed it towards the camera. The light outlined their bodies on camera left and then bounced off the ceiling and floor, filling in the shadows.
In the studio environment, flash is typically fired at your camera’s sync speed (traditional flash), where the brief burst of light from the flash stops movement rather than the shutter speed.
While High-Speed Sync (HSS) allows shooting above the sync speed, it often results in lower overall light brightness, higher ISOs, and reduced depth of field when compared to traditional flash. Flash duration refers to the time it takes for the flash to discharge its volume of light. By reducing the power settings, you can shorten the flash duration on most strobes.
Begin by setting your current professional Elinchrom monolight to Action mode, which provides the fastest flash duration while trading a bit of color temperature stability. Then, decrease the flash power until achieving a flash duration of around 1/3000 of a second or slightly faster.
“Personally, I’ve found that a t.1 flash duration of 1/3000 of a second, coupled with overpowering the light but 2-3 stops, yields great results when photographing dancers and athletes.”
Fortunately, Elinchrom lights display flash duration on their back LCDs. Next take a photo without flash at your current settings and make sure that the image is mostly blank, if you’re seeing a lot of details, then decrease the ambient light in the room. If it is blank and for some reason you still have motion blur in your images, reduce the power of your light to shorten the flash duration and change your camera settings accordingly. Personally, I’ve found that a t.1 flash duration of 1/3000 of a second, coupled with overpowering the light but 2-3 stops, yields great results when photographing dancers and athletes.
For the images featuring Zach and Mya in this article, I set my Elinchrom FIVE to Action mode and reduced the power to 3.1, resulting in a flash duration of 1/3270. My camera settings were 1/200 f/8 ISO 400.
Skylight Lighting
I don’t know if anyone else uses this term, so I might have just made this up. This lighting pattern is close to butterfly lighting but it doesn’t have to be inline with the camera. It’s basically when you boom a light over the set so it simulates illumination emanating from a skylight.
When using this lighting setup, there are a few things to keep in mind. Firstly, be cautious of ceiling fans! Secondly, avoid placing any part of your subject’s body too close to the softbox, as it may result in uneven lighting across the shot. Ideally, ensure that the light is positioned at least about 60cm (2′) away from the subject. Due to the inverse square law, this will result in more even lighting from head to toe. If you have a ceiling height of 3m (10′) or higher, it can be a beautiful way to utilize this modifier.
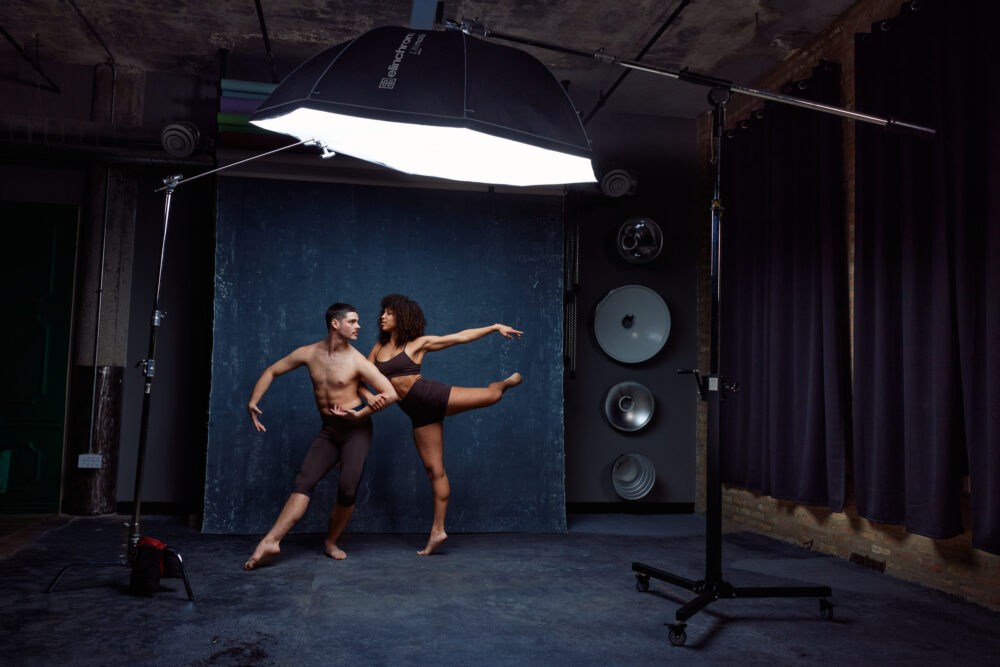
For this image of Zach and Mya, I boomed the light over my set from camera right. Then, I used a C-Stand and grip arm on camera left to tilt the side of the octabox furthest from the camera upwards. I did this to lighten the backdrop and increase the likelihood that my subjects’ eyes would have a catchlight. Then, I positioned the dancers so they were generally in line with the C-stand.
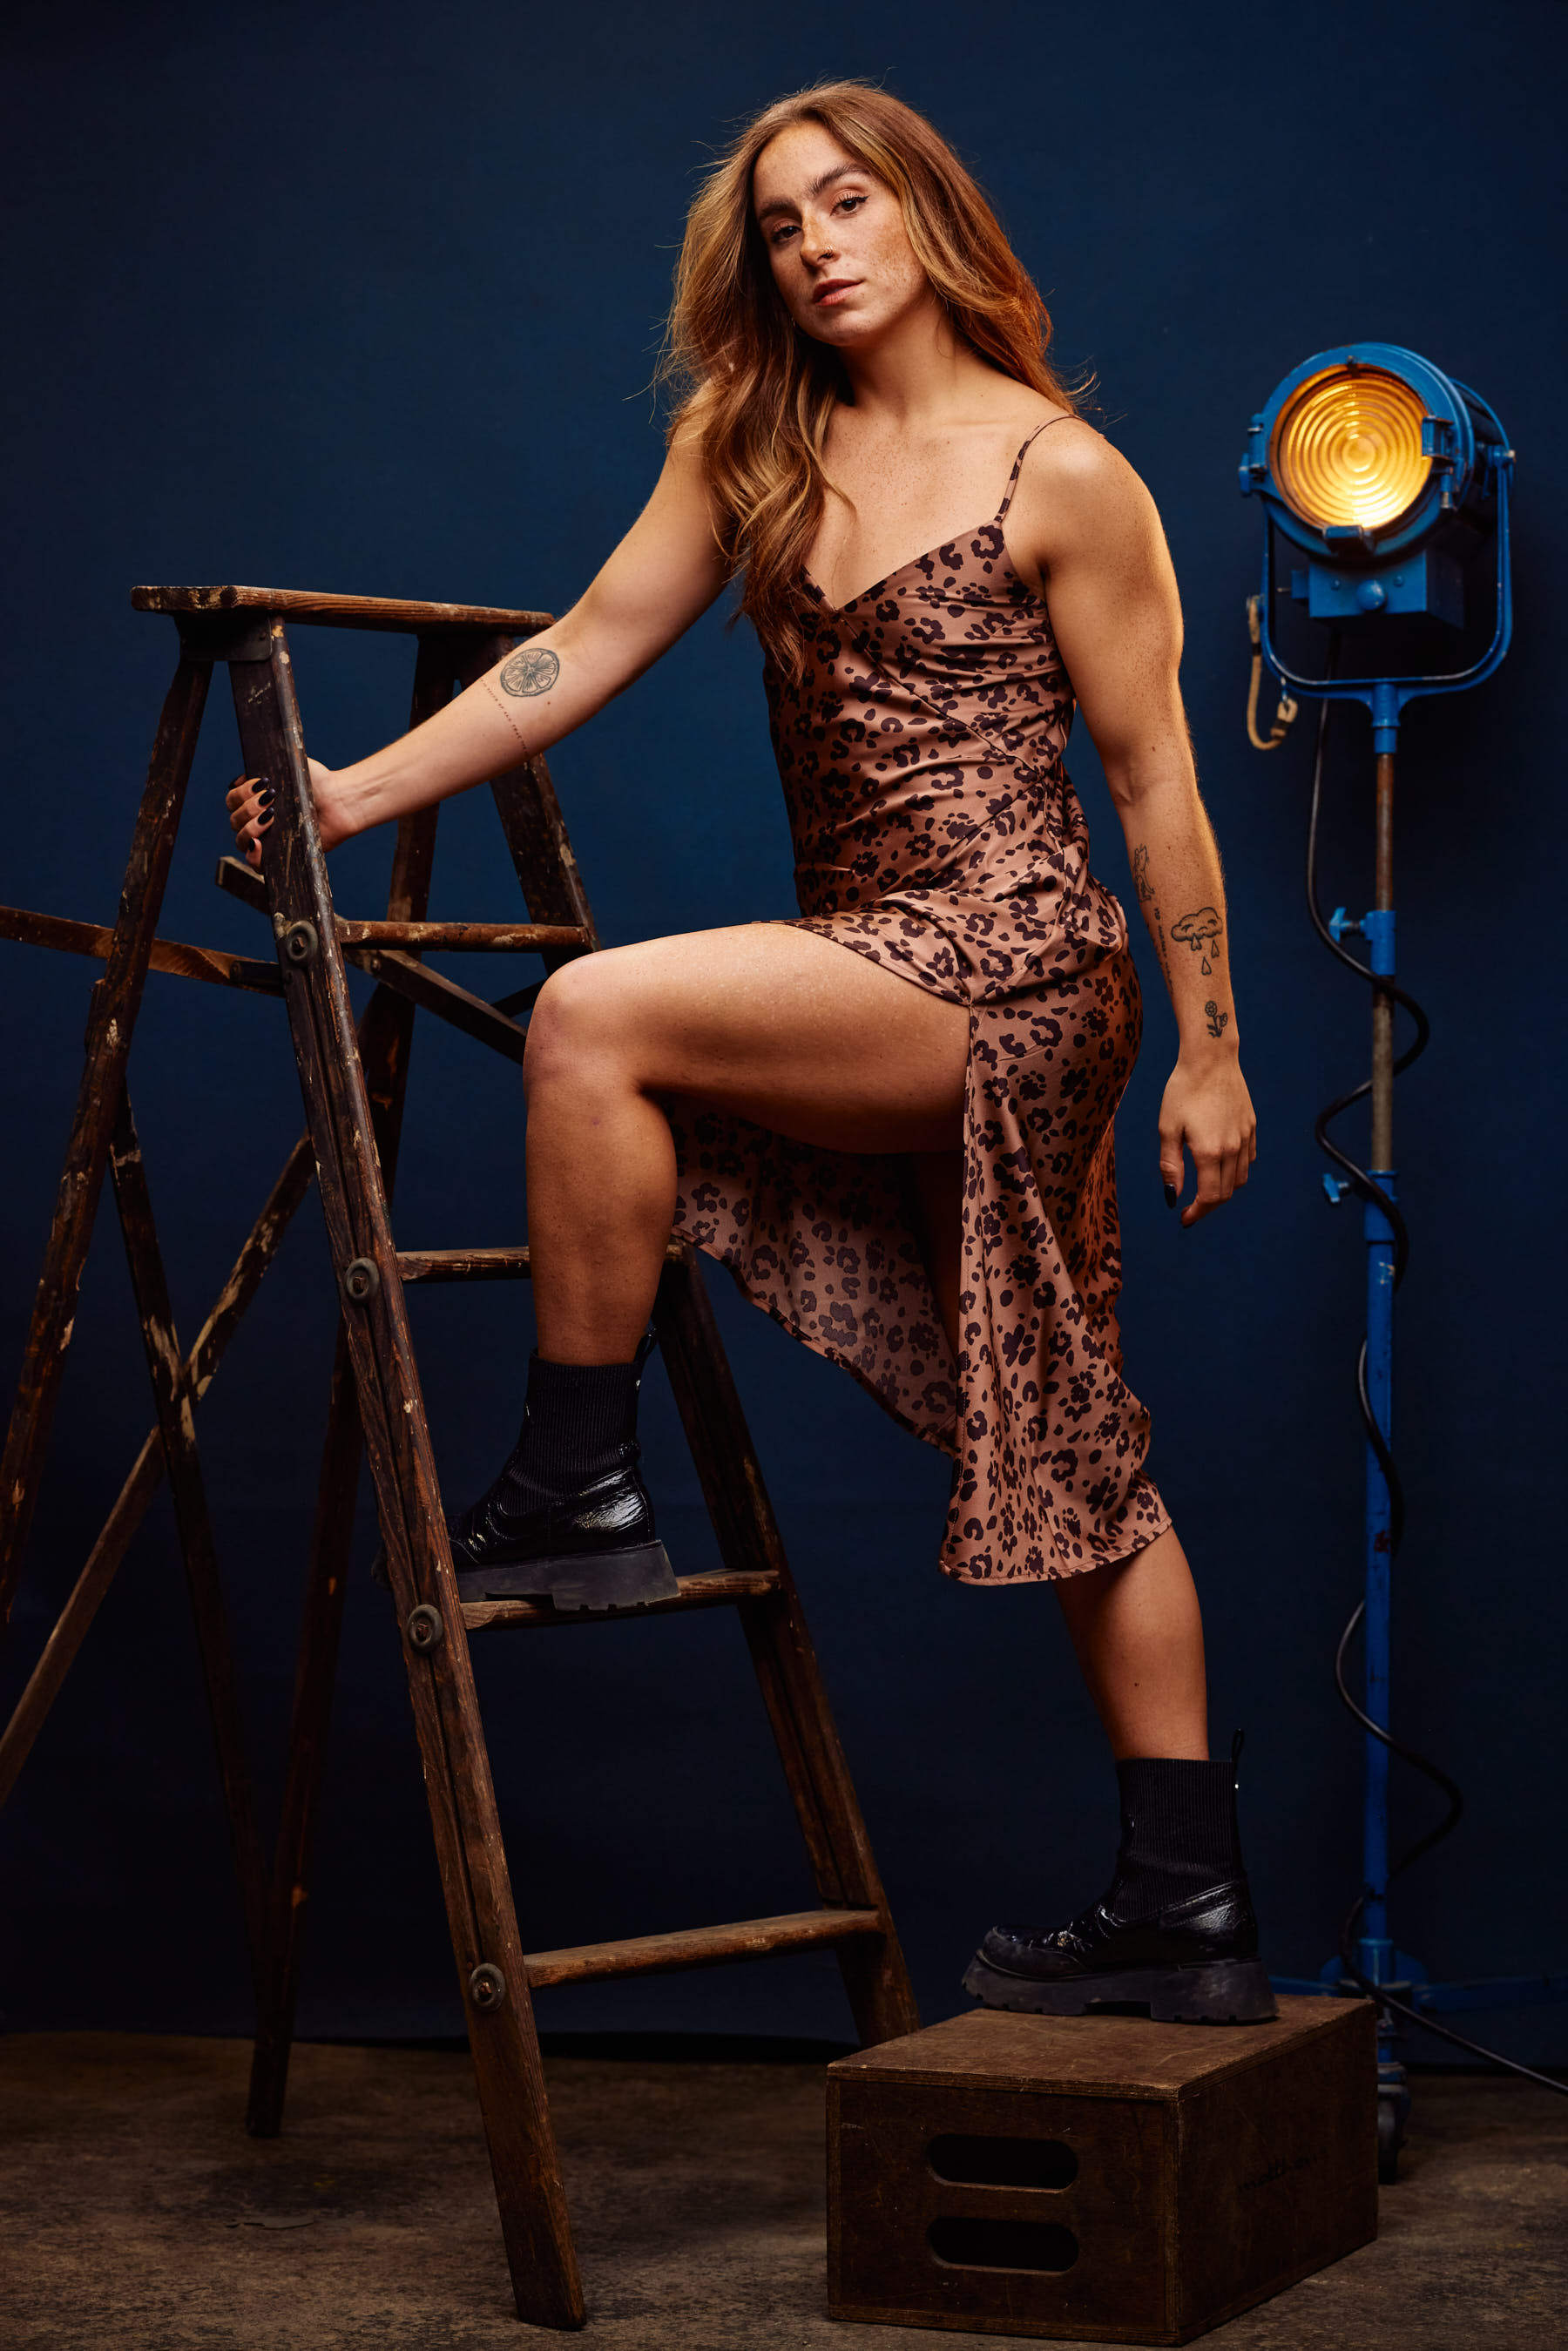
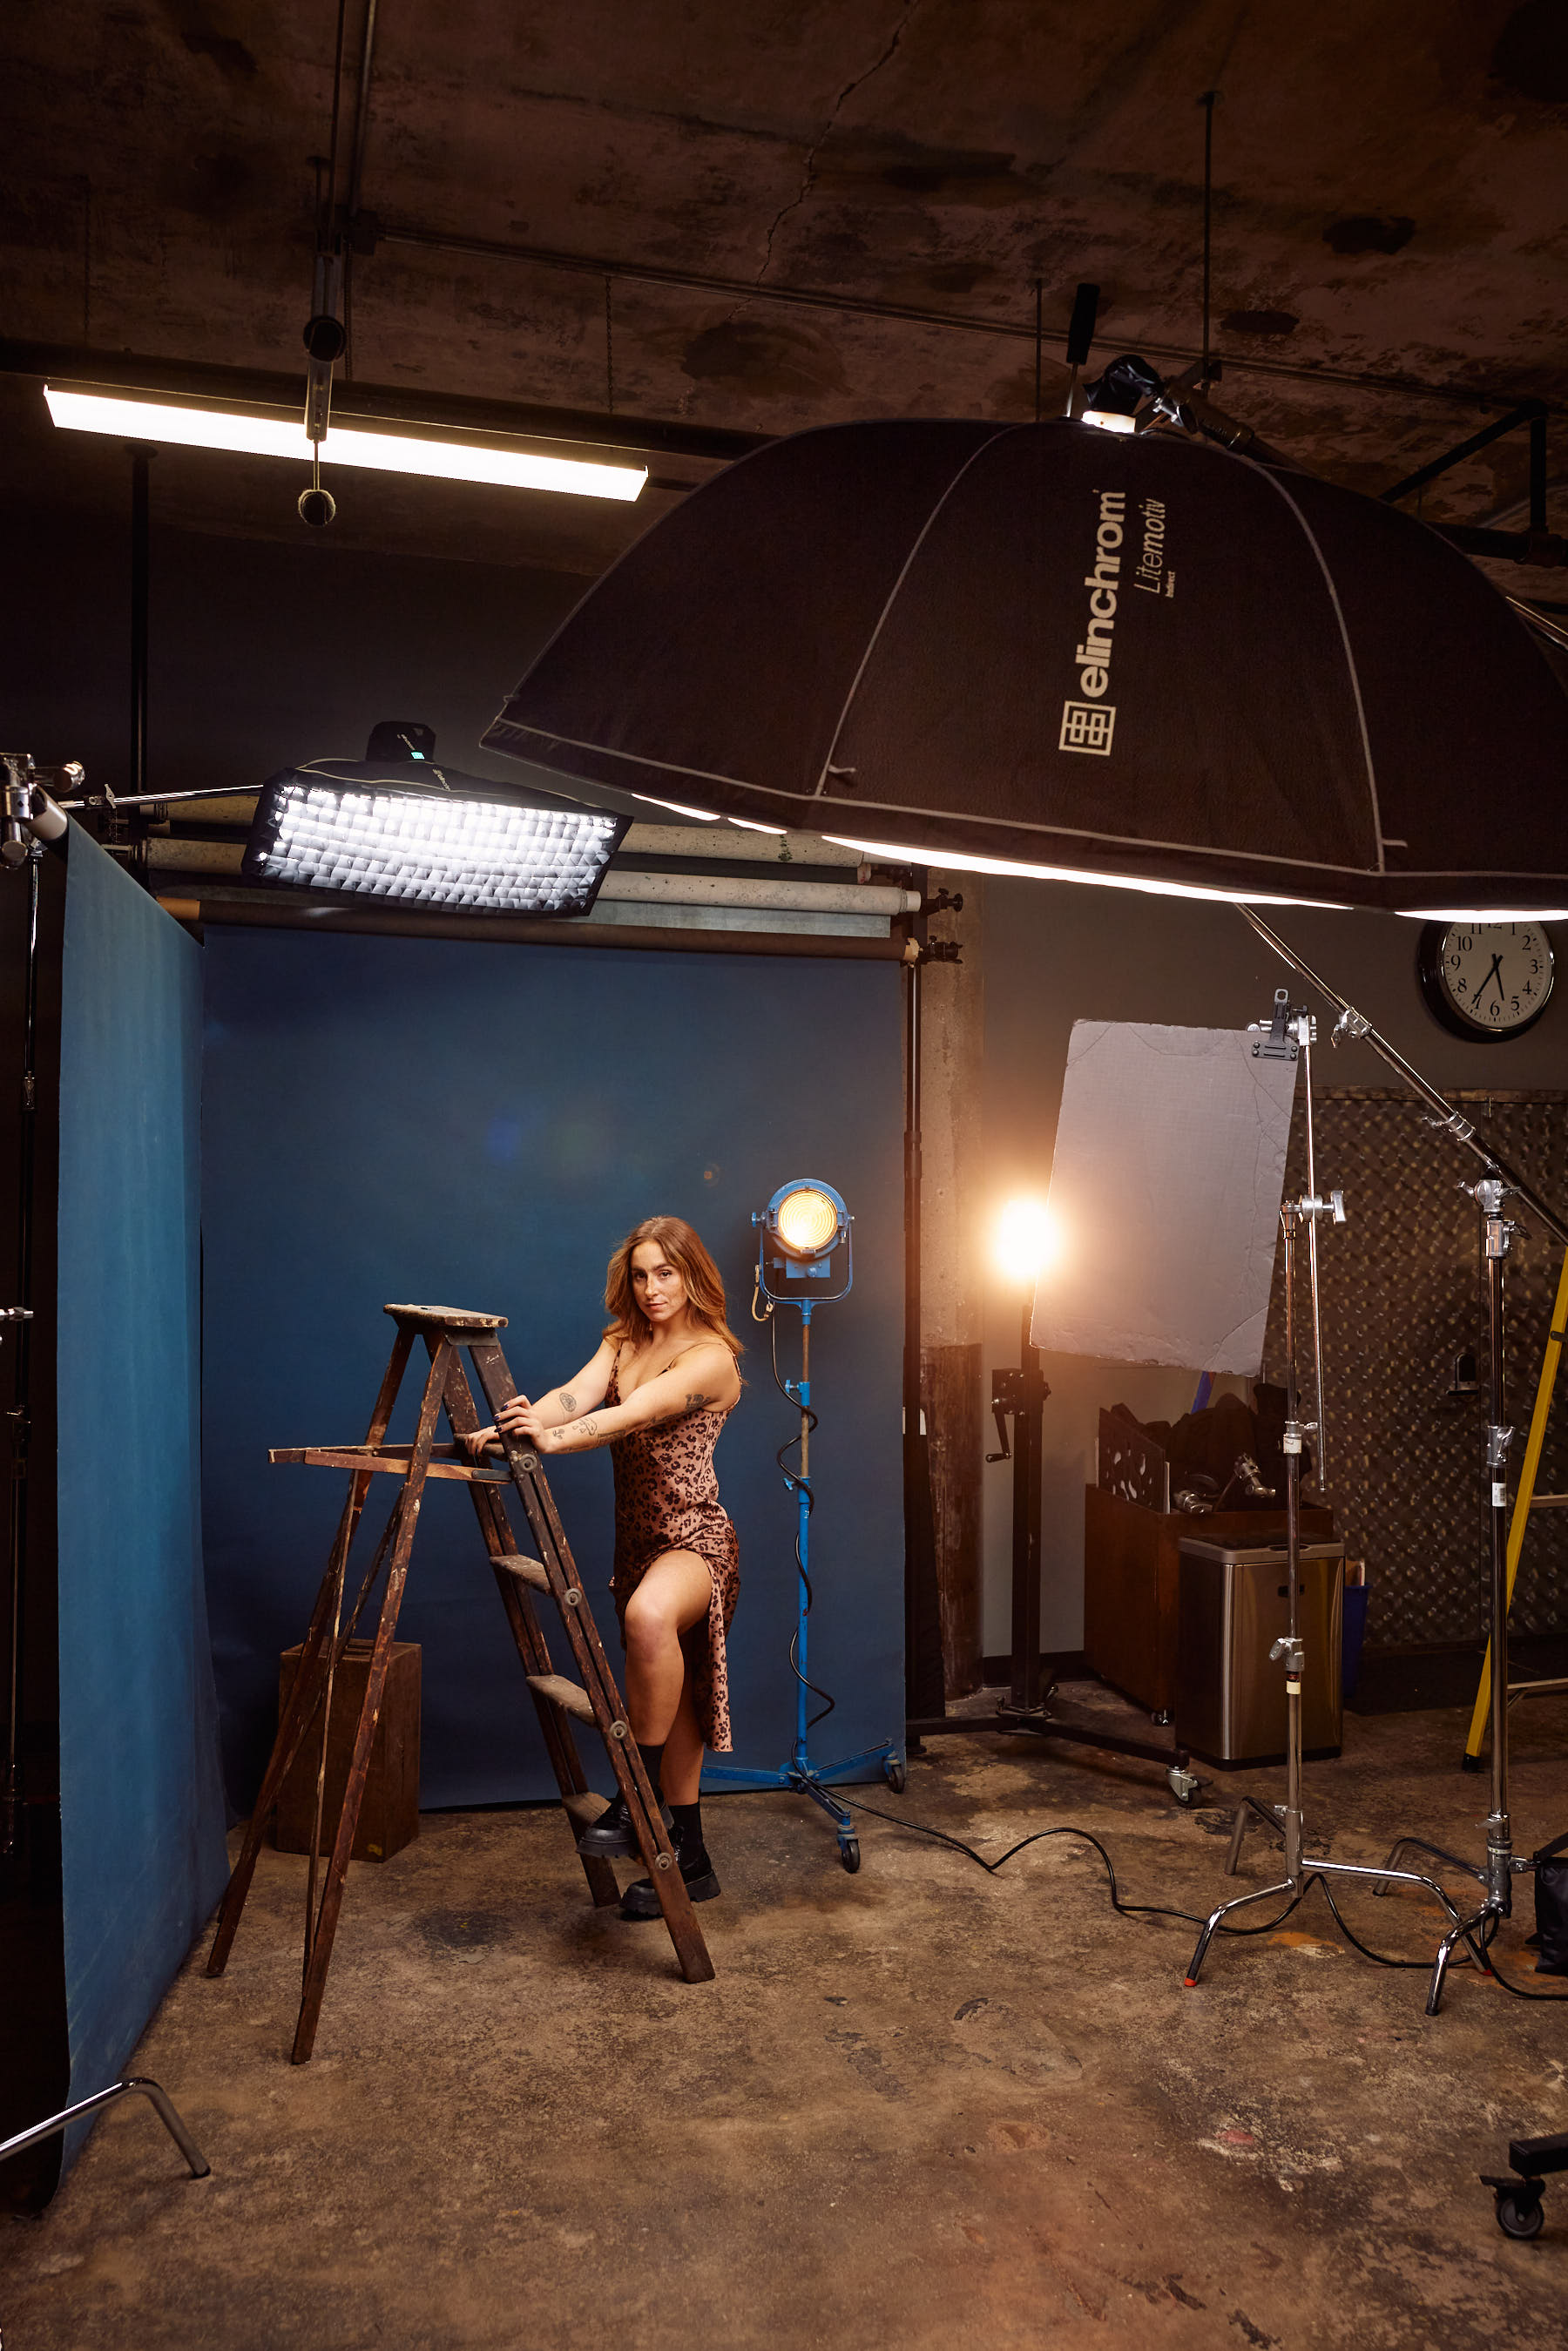
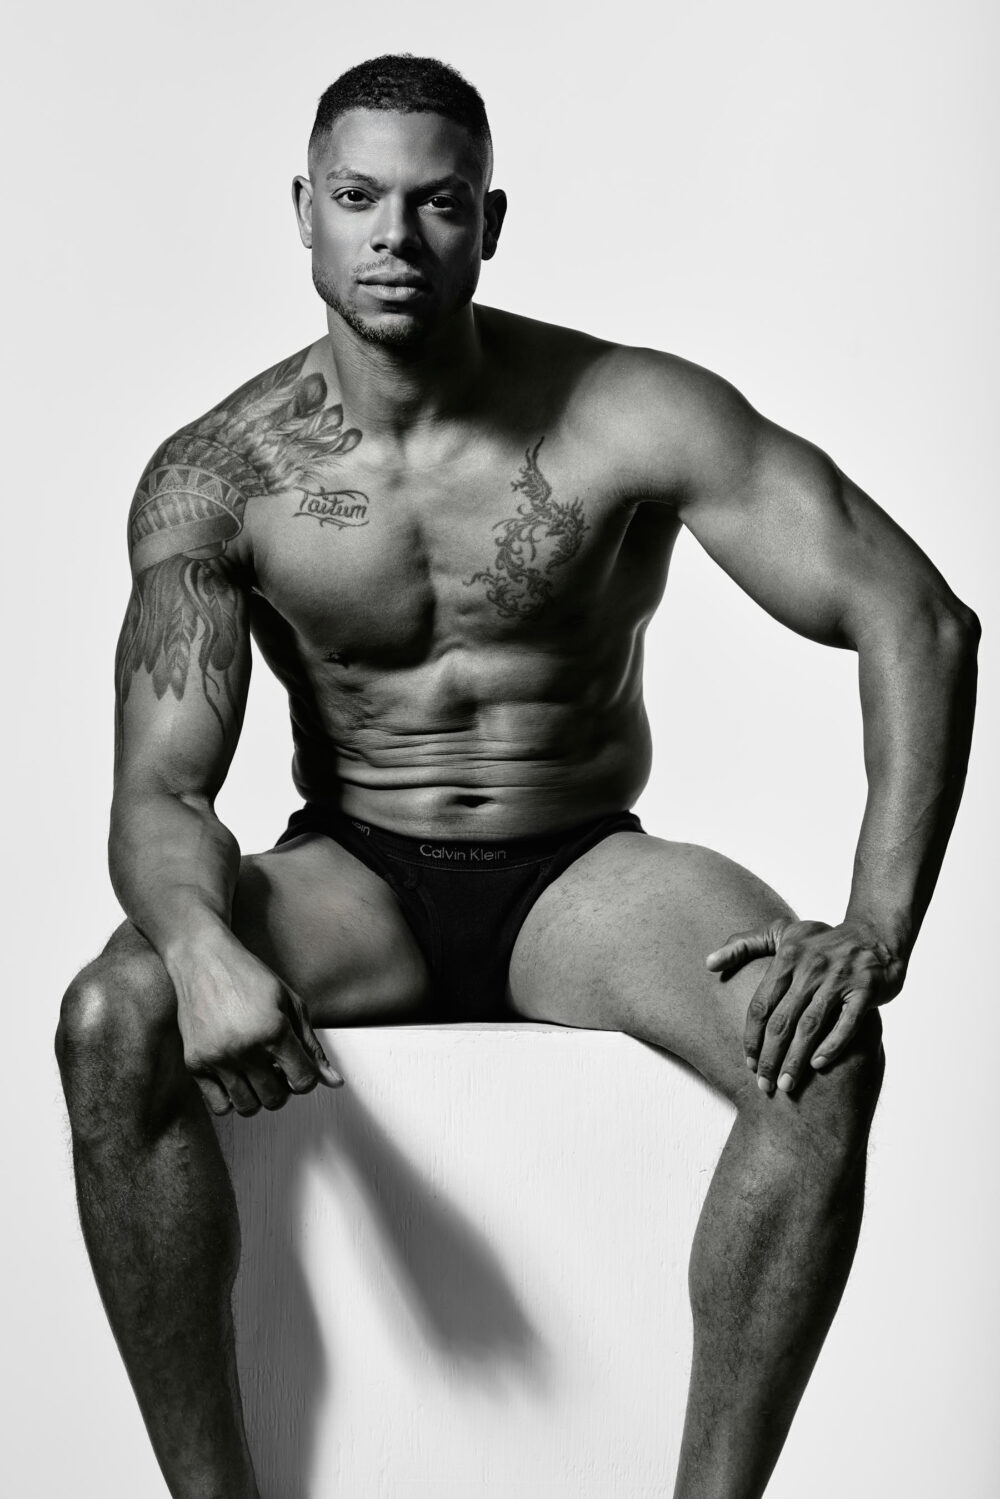
I approached this image of Coleen similarly to how I approached the first image with Dyren. However, this time, I positioned the octa overhead and utilized a Mole Richardson 407, which was too small to put a ONE inside. So, I plugged it in and used its 300-watt bulb as part of the lighting setup. Additionally, I placed a light off-set on camera right with a grid reflector and a CTO gel. This combination mimicked the light from the vintage fresnel. To prevent lens flare, I used a 50x75cm (20-30”) piece of foam core to flag the lens. Finally, I positioned a Rotalux Strip Softbox 35x100cm (14×39”) with a grid on a boom and used it for a hair light. This time, I used the grid to ensure the light from this modifier wouldn’t brighten the two canvas backdrops.
Rim Lighting
Rim lighting is when you place a light behind your subject creating an outline all around their body.
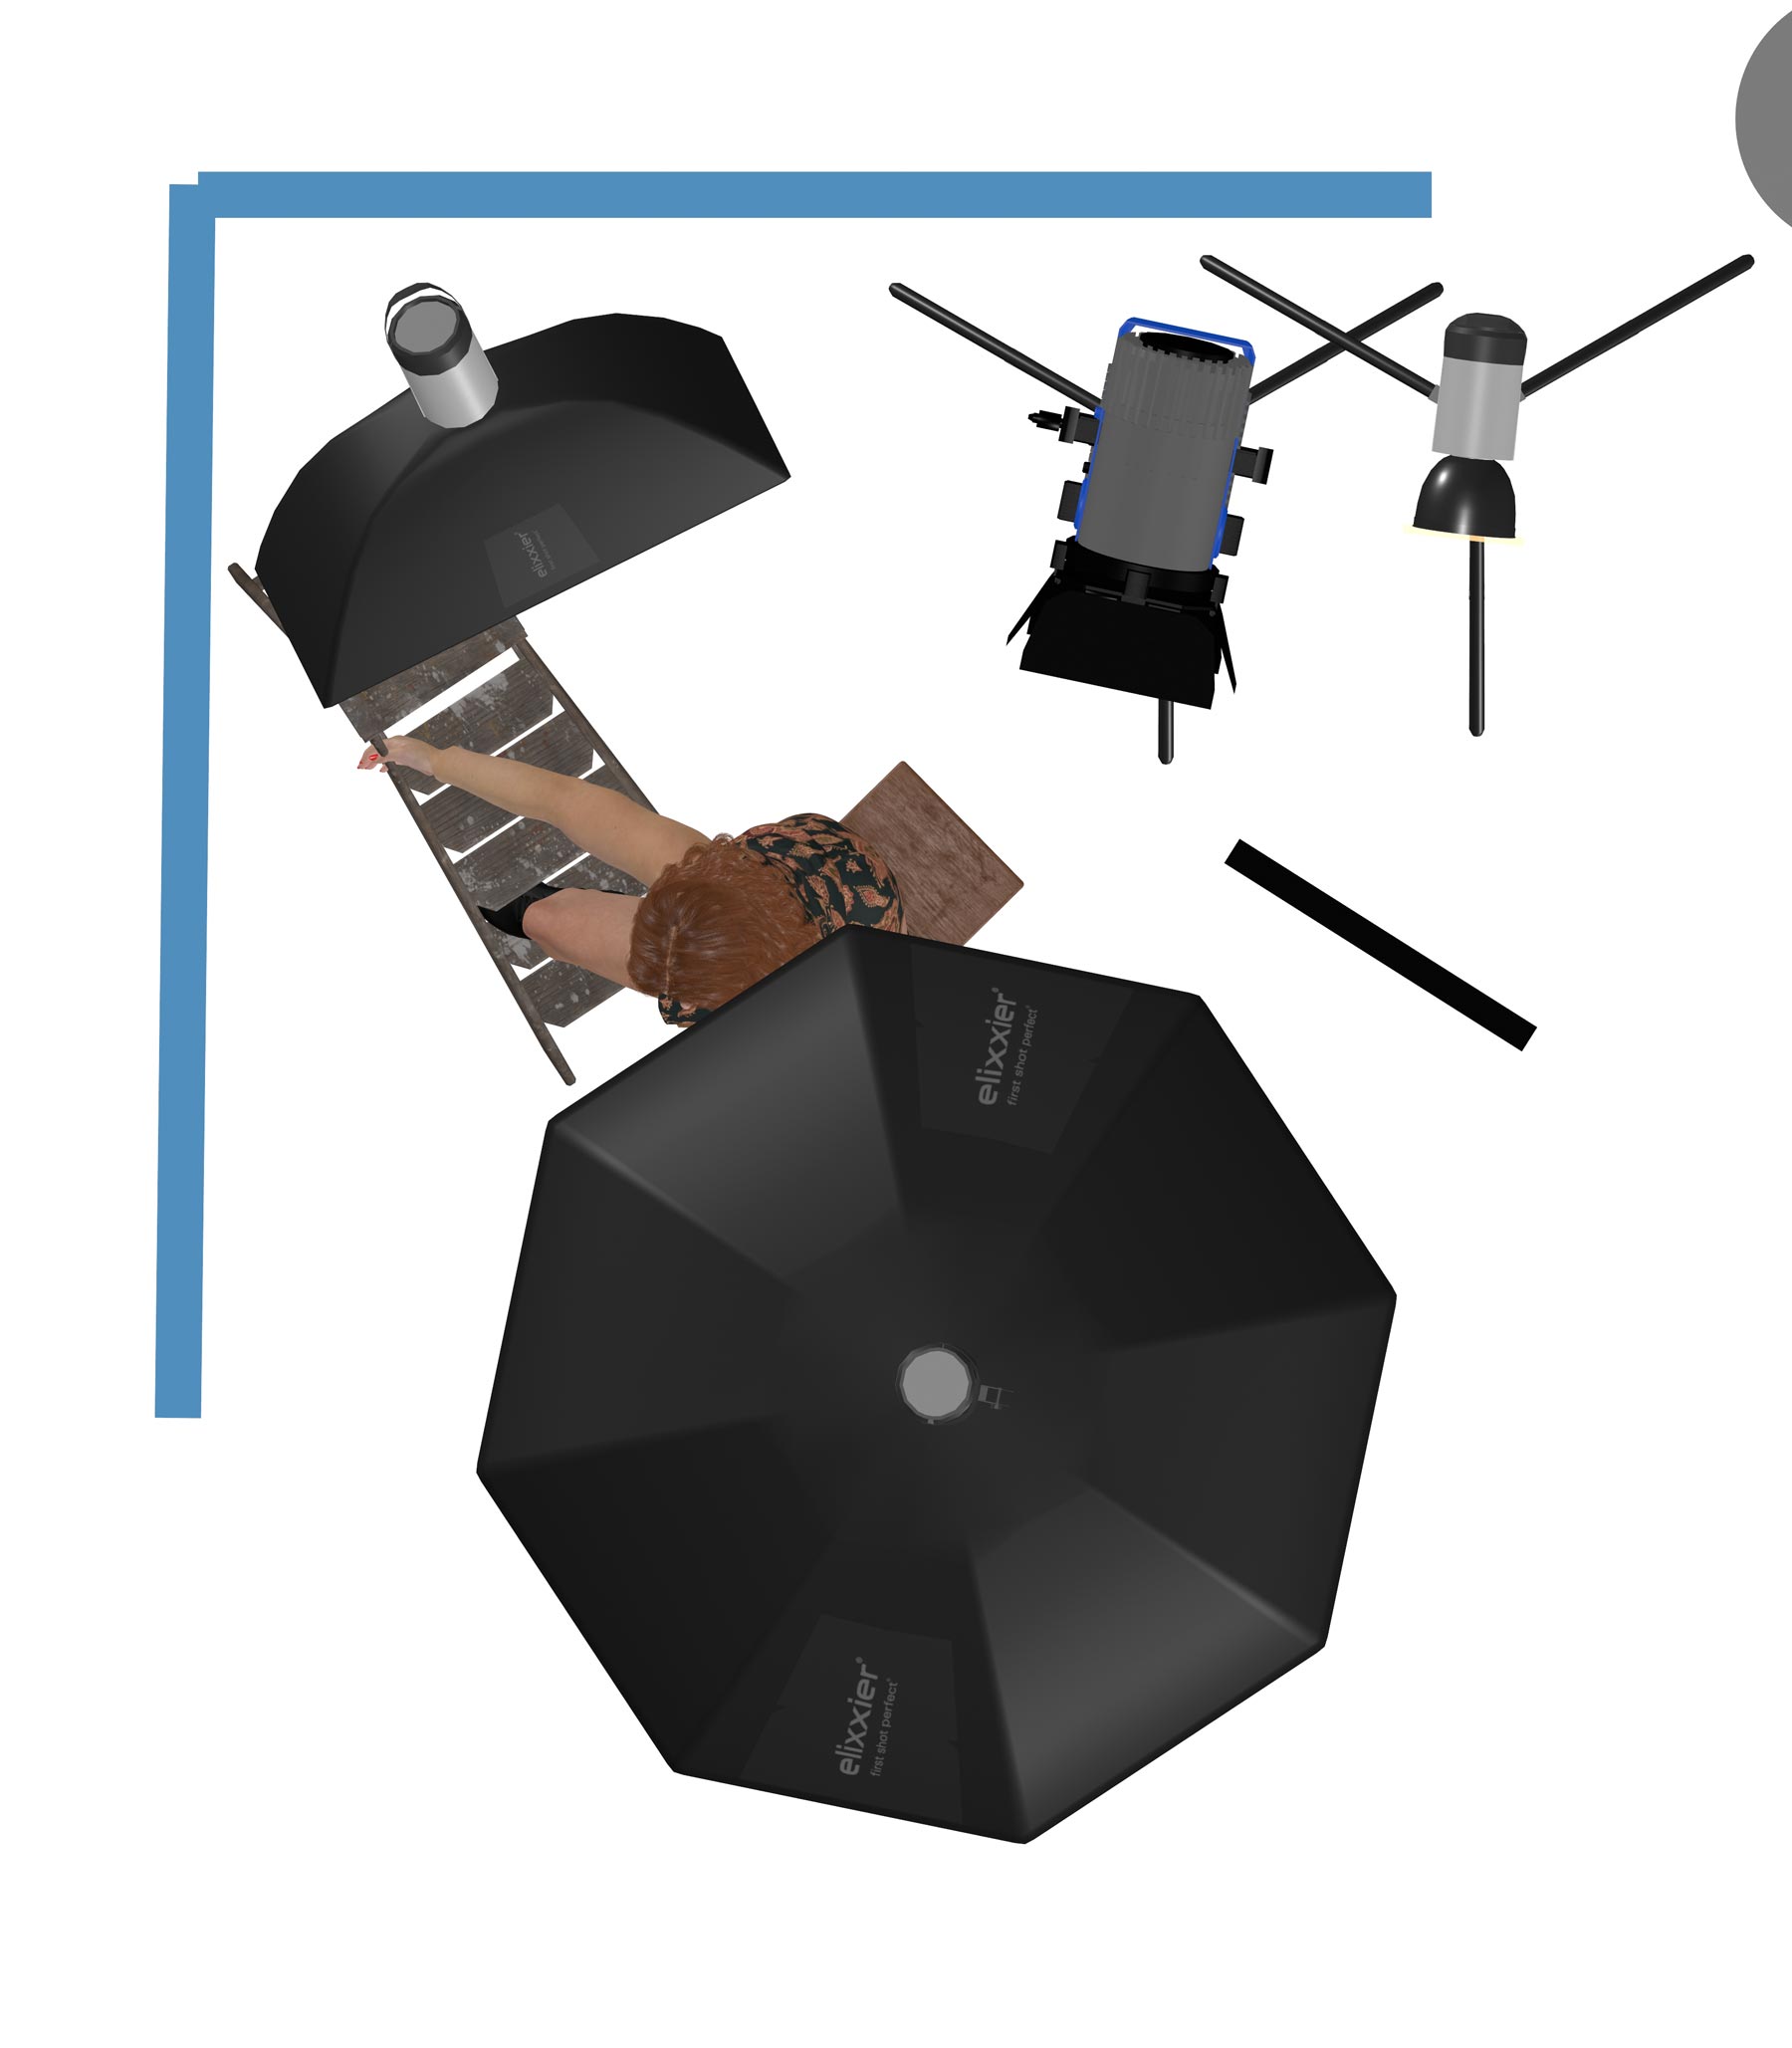
To execute this setup, I maneuvered the giant Octa to the rear of the set and aimed it towards the camera. Subsequently, I leaned a 1m (39″) V-flat against its face and then positioned the subject between the modifier and the camera. This configuration effectively transformed my single light source into three strip softboxes. An average softbox cannot create this effect because it’s not big enough.
No matter the setup, take a moment to stand in the position of the subject. If you can see the white surface of the softbox, then the light can see you. If you can’t see it, on this particular setup, then step closer to the camera.
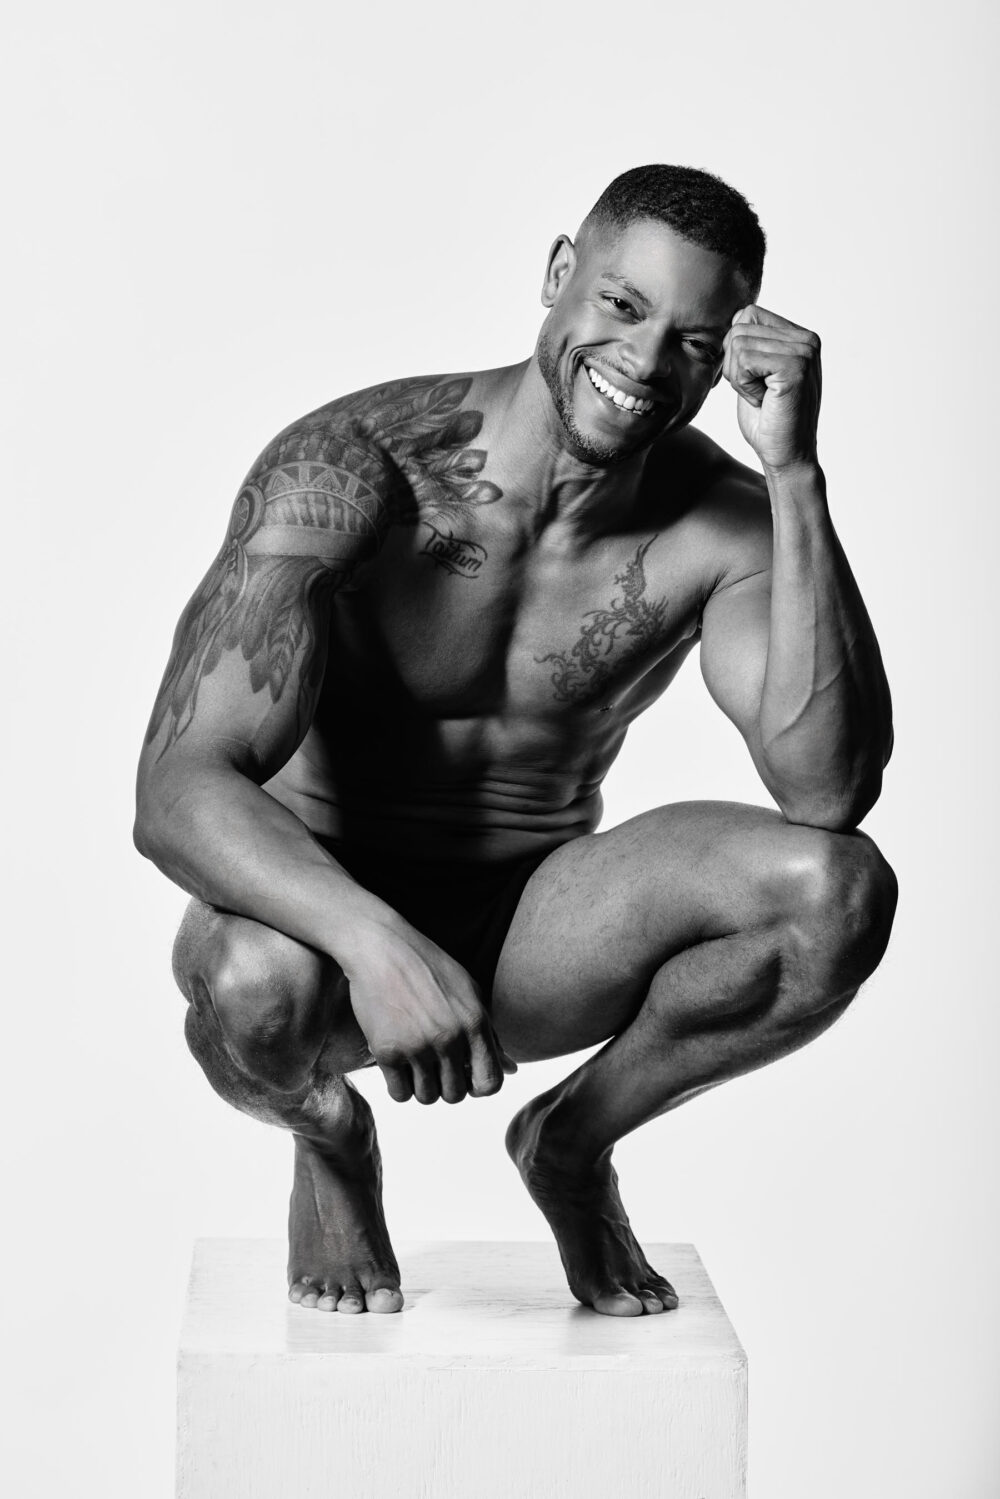
To control the amount of hair light or in this case, hat light, all you have to do is move the light up or down on the stand. Exposing more or less of the white surface above the black card. When photographing a bald subject keep the stand low, so none of the white is peaking over the top, and if they have matte black hair, or a hat, keep it high.
Extra Crispy
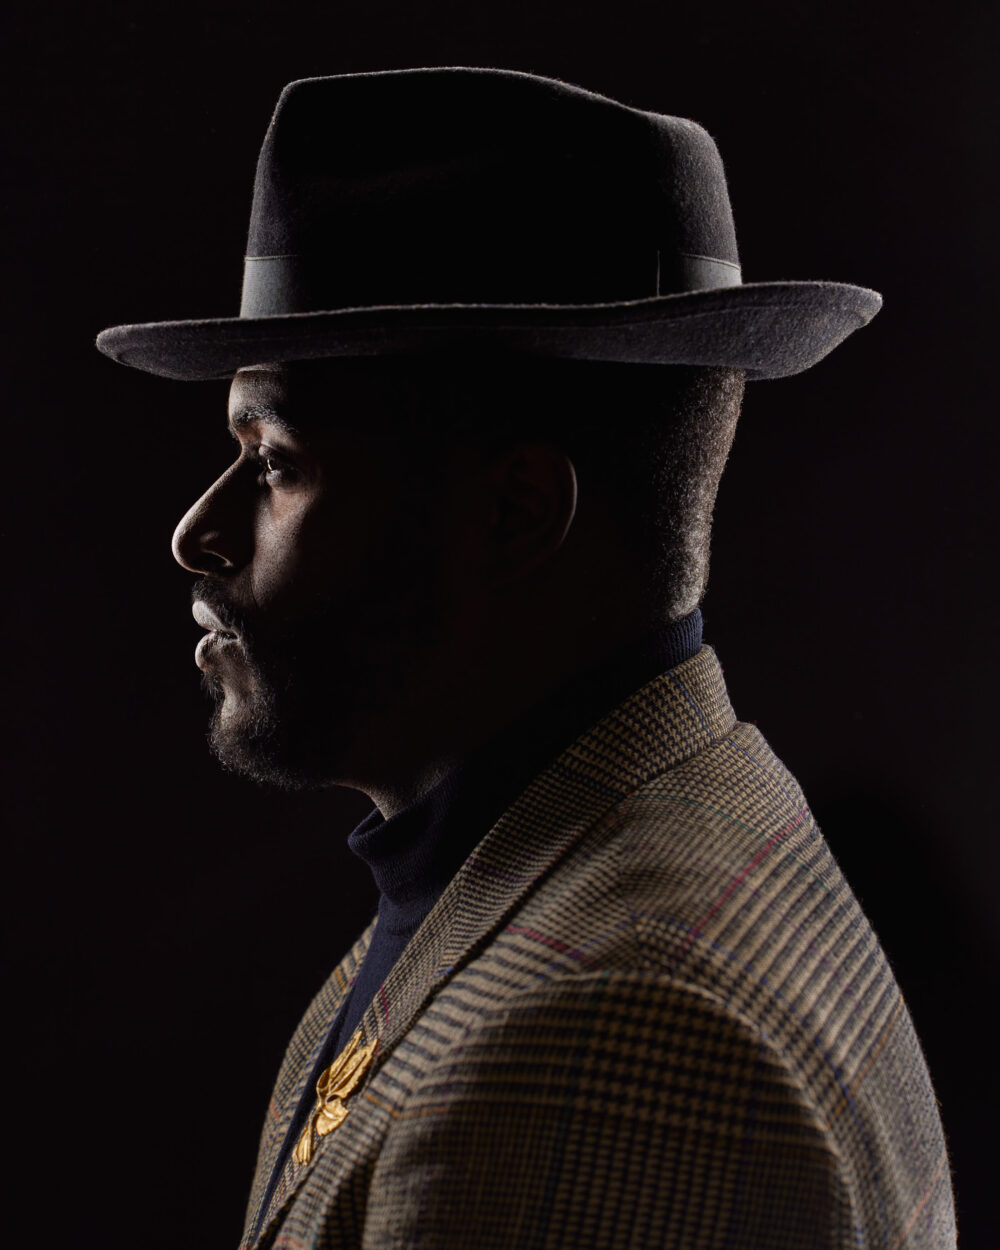
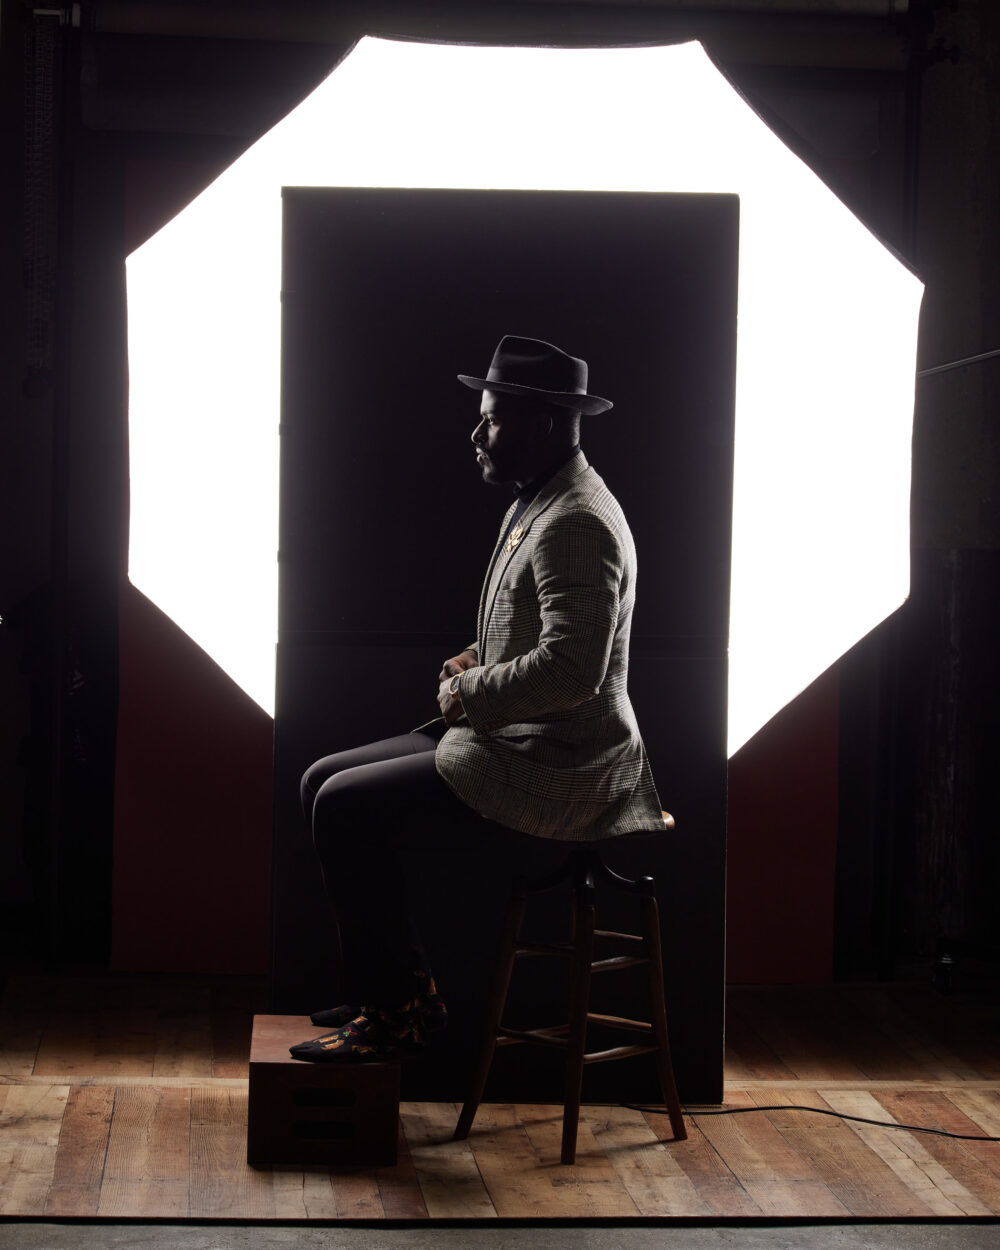
For a high-contrast look, remove the diffusion layer and point the indirect modifier directly at your subject. Feathering probably won’t work when the diffusion is removed.
This type of lighting is also great for black and white images. For this series with Jason, I removed the diffusion and then lit the background with two Elinchrom Indirect Litemotiv Strip Softboxes, each measuring 33x175cm (13 x 69”). How I lit the background isn’t too important. You can achieve it with two umbrellas or two lights bouncing off v-lats. Just make sure that the light from these modifiers doesn’t strike your subject.
In Conclusion
There’s a lot you can do with this modifier! Whether your studio has lofty ceilings or not, the 190cm (75’’) Indirect Litemotiv Octa Softbox proves to be an invaluable asset. With its ability to replicate window light and versatility across various lighting setups, this modifier paves the way for photographers to be… legendary.
Voir cette publication sur Instagram