Hard Light Hacks: Four Accessories That Will Up Your Lighting Game
When photographers begin their lighting journey, they typically start with soft light, often experimenting with modifiers like umbrellas or small softboxes. As they progress to the next level, they venture into the realm of hard light. In this article, I will explore four essential accessories that will help you modify, shape and control hard light: reflectors, grids, barndoors, and gels. After delving into how each of these tools can be utilized, I will provide nine illustrative examples.
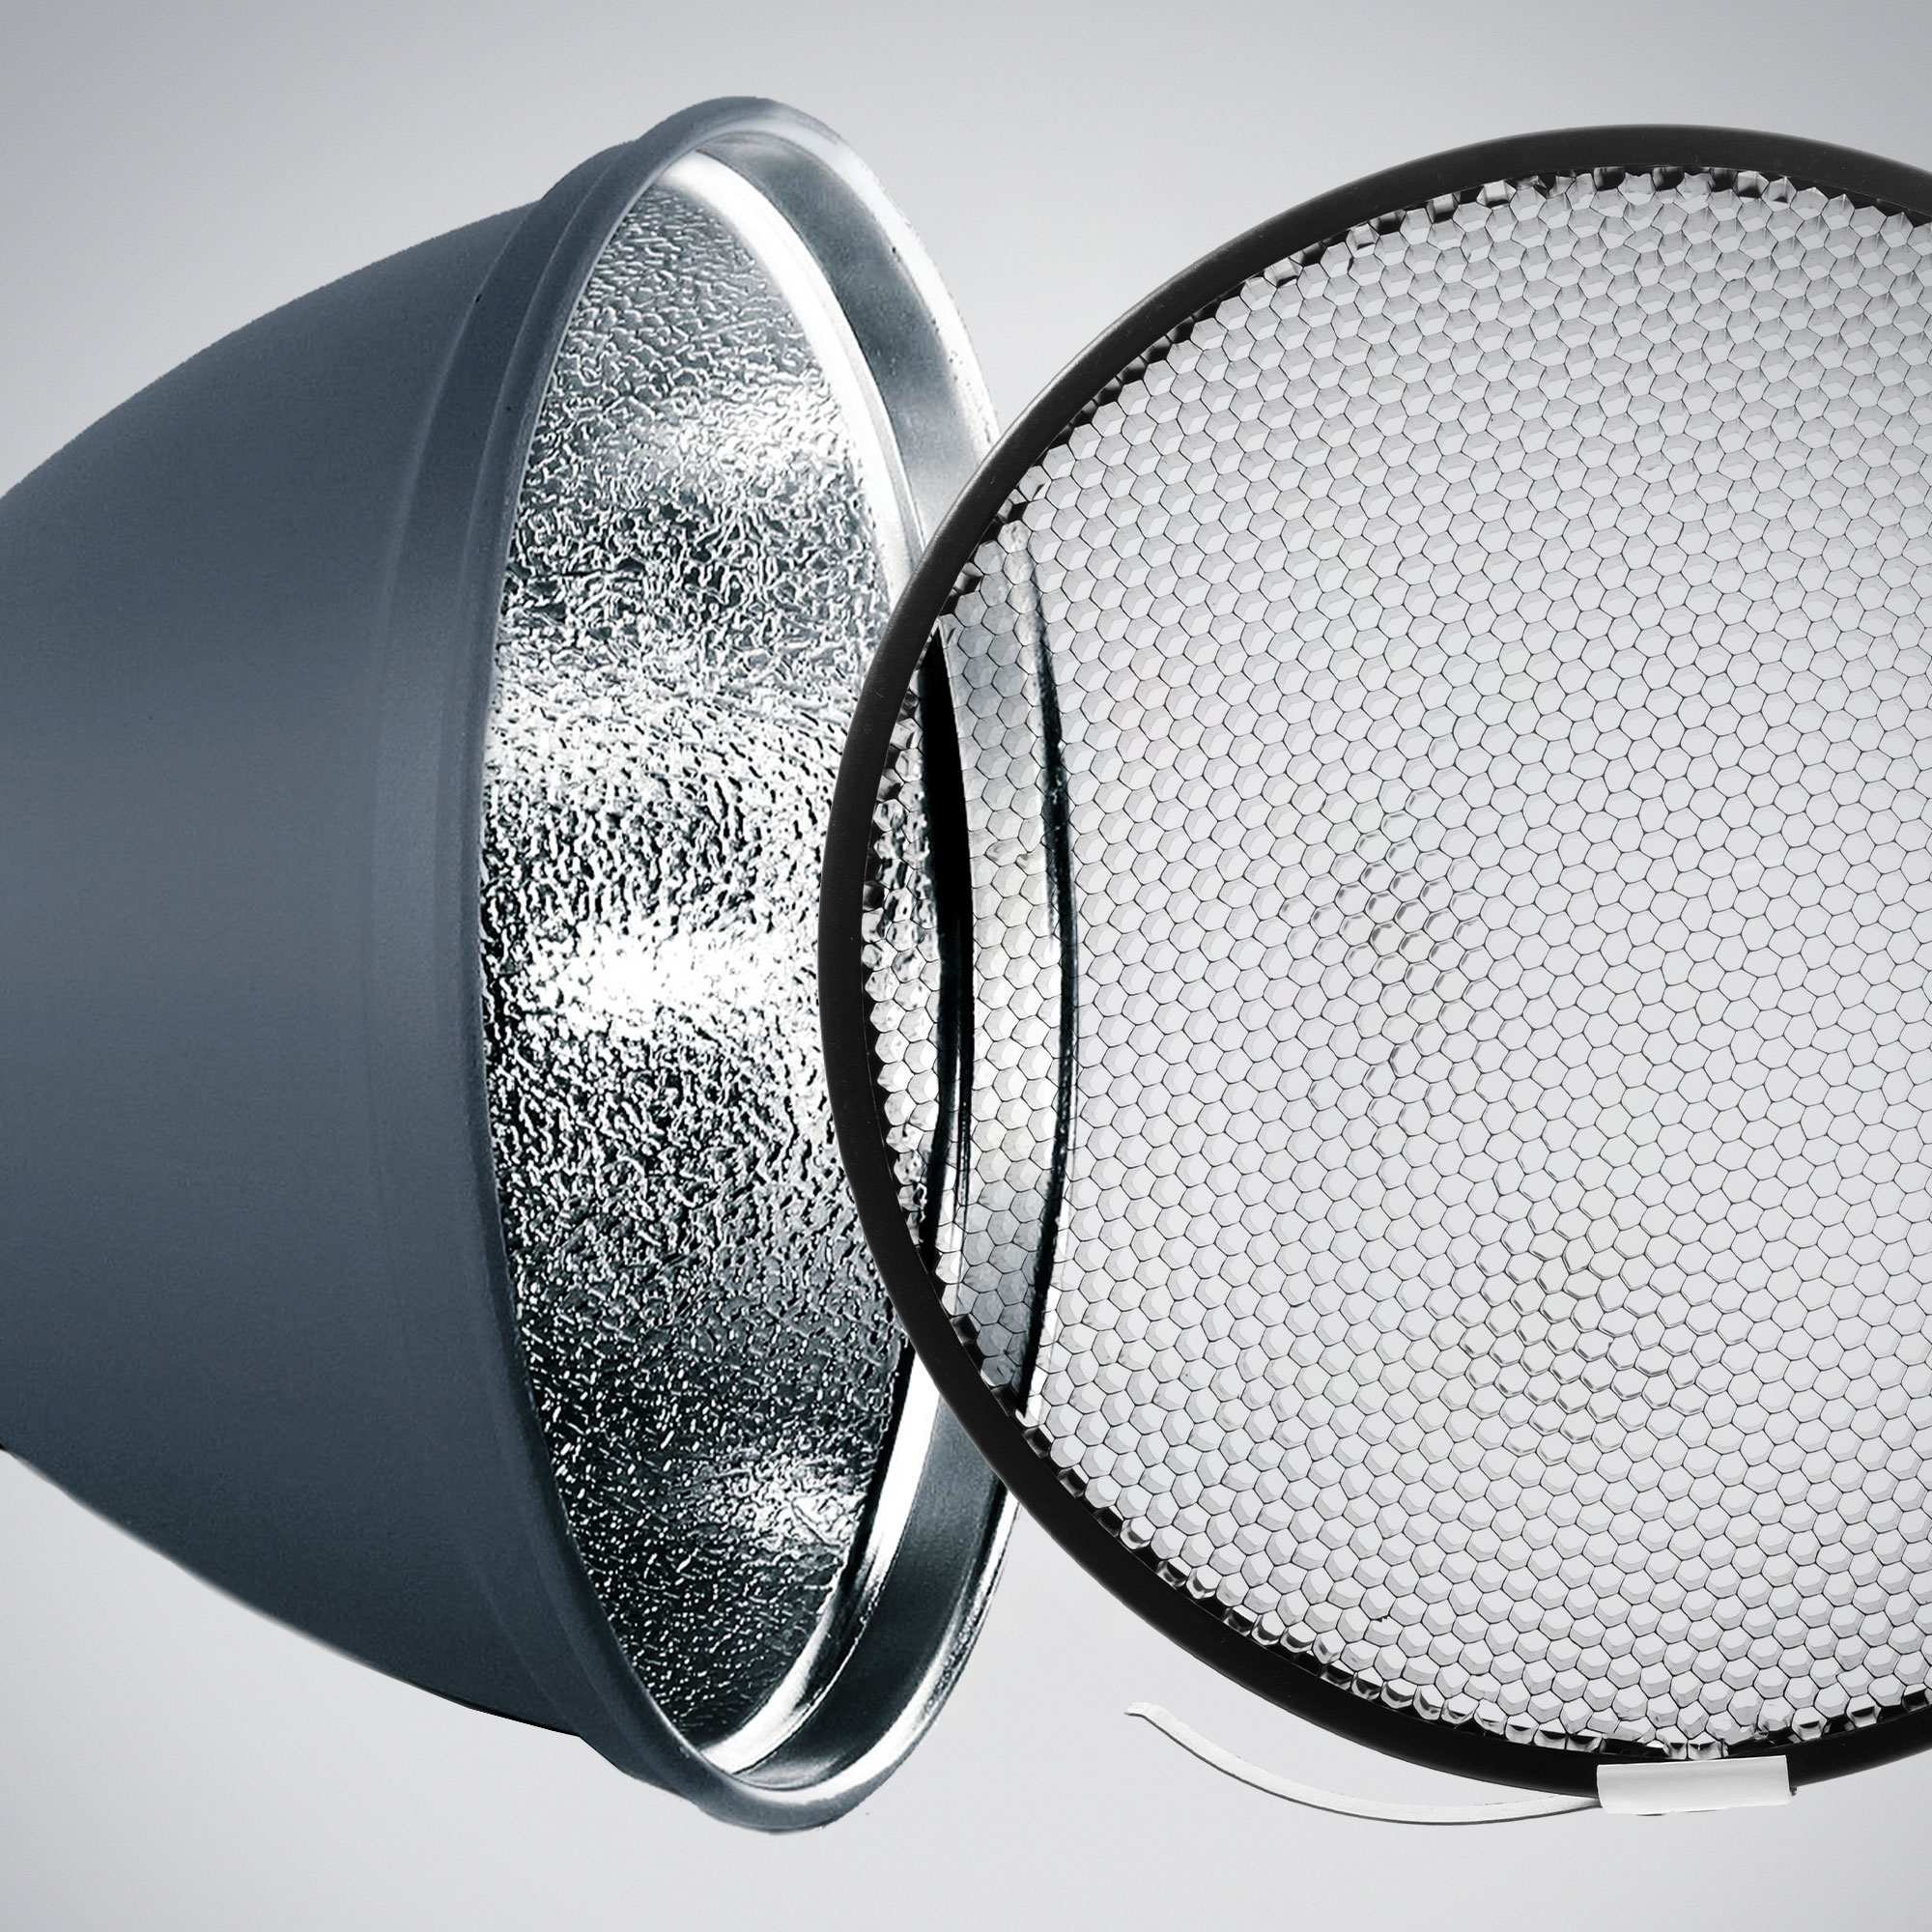
Grid Reflectors
Grids are invaluable whenever you are working with hard light, making them an indispensable tool in your kit. In my lighting case for every shoot, I always include multiple grid reflectors. These highly efficient modifiers shape your light into approximately a 50° beam, utilizing a shiny silver surface to boost the output of your strobes. By incorporating grids, you can further fine-tune the beam spread and exert precise control over the light on set.
Elinchrom offers both 18cm and 21cm versions of these reflectors. The 18cm reflector comes with a grid, while the 21cm version can be purchased separately or with a 30-degree grid included. Additionally, you can opt for The Elinchrom Grid Kit 21cm (8.3’’), which includes a 30°, 20°, and 12° grid, complete with a convenient carrying bag. Each grid angle plays a crucial role in regulating the spread of the light, with narrower angles resulting in more tightly restricted beams
Barn Doors
Barndoors function similarly to grids, but they serve more like four miniature flags on our lights, offering flexibility in customizing the spread of our light.
Using barndoors asymmetrically allows you to restrict the beam spread on one side of the set, unlike grids. They are versatile enough to keep light from hitting a background or to shape light hitting a subject or background.
Used alone or in concert with grids to further control the light, the Elinchrom Barndoor 21cm (8.3″) set attaches to the front of the Standard Reflector 21cm (8.3”).
Gels
You can add gels to your grid reflectors to create color effects on your models or intriguing patterns on backgrounds.
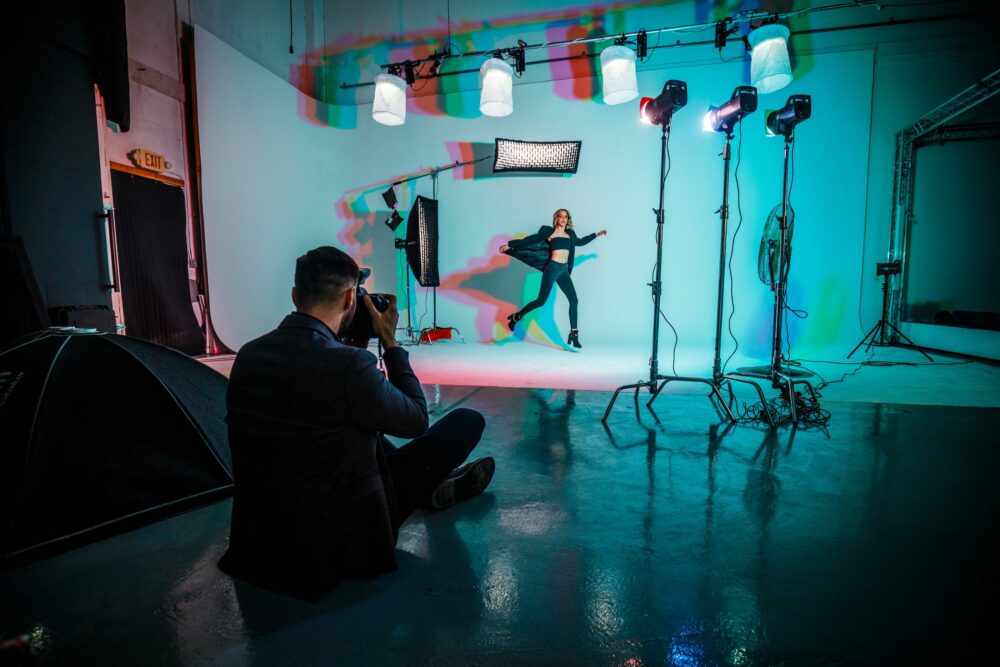
Chasing Colleen’s Shadow
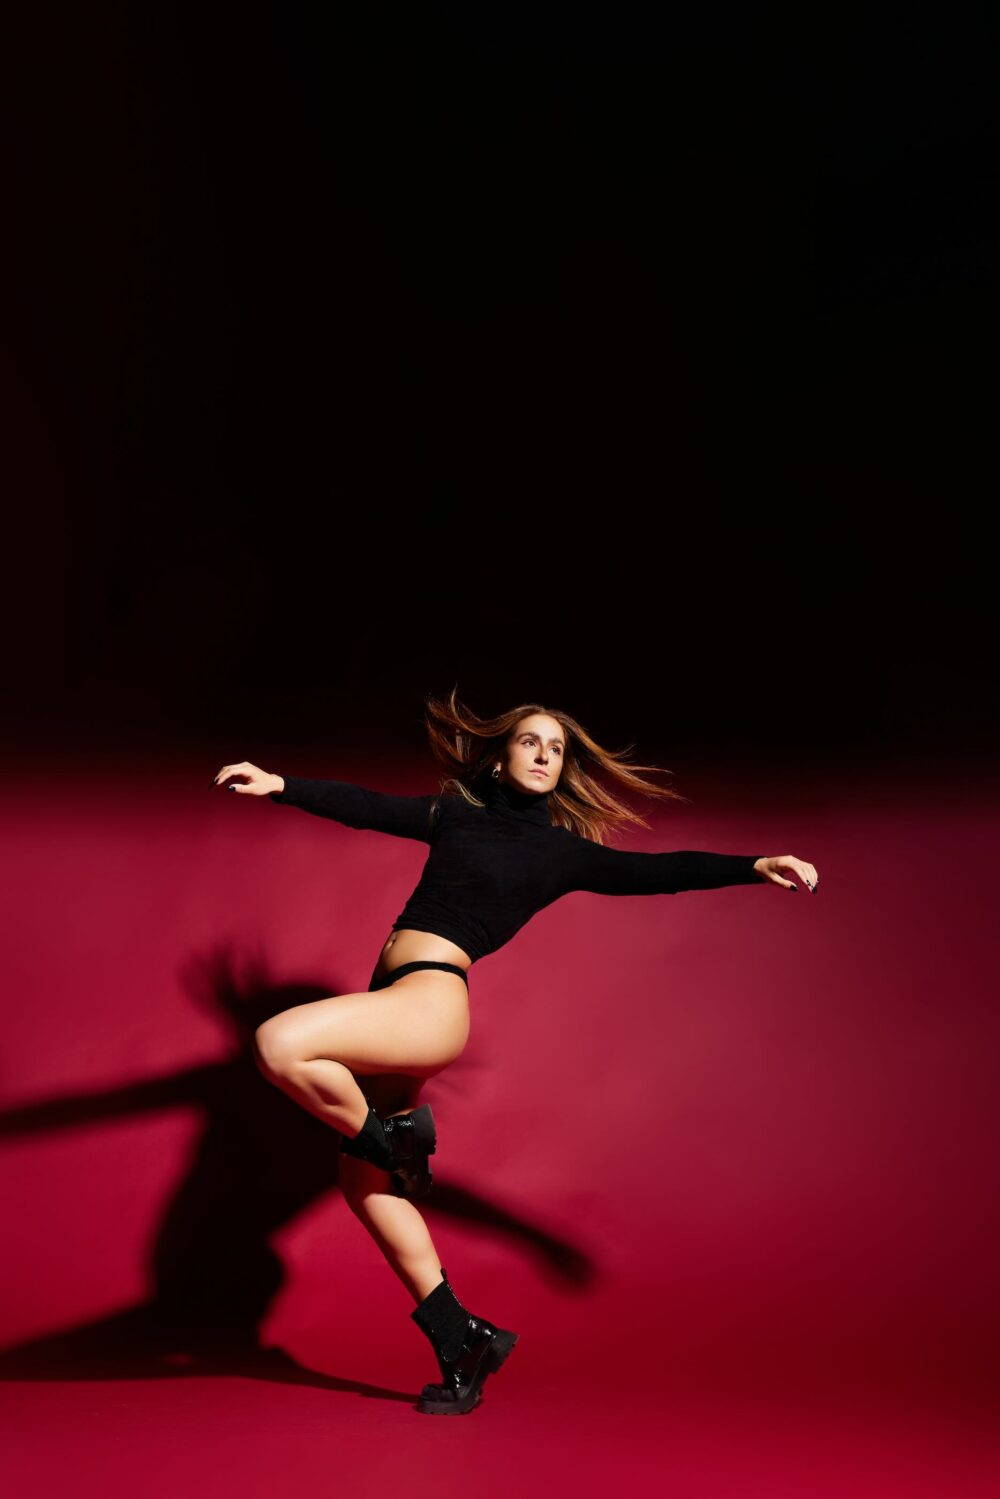
For this setup with Colleen, I utilized the Elinchrom Standard Reflector 21cm (8.3”) to bathe the set with high-contrast light. To further refine the beam, I positioned a flag between the light and the model to cast a shadow on the upper portion of the backdrop.
“The placement of the flag determines the softness or sharpness of the shadow’s edge.”
The placement of the flag determines the softness or sharpness of the shadow’s edge. If the flag is closer to the subject, the shadow will be sharper. If the flag is closer to the light, the shadow will be softer. I would encourage you to turn on the modeling light on your strobe in a dark room and try this out so you can get a sense of how flags affect hard light. Once you have decided on an ideal distance, play with the height of your light and flag until the shadows fall precisely where you desire.
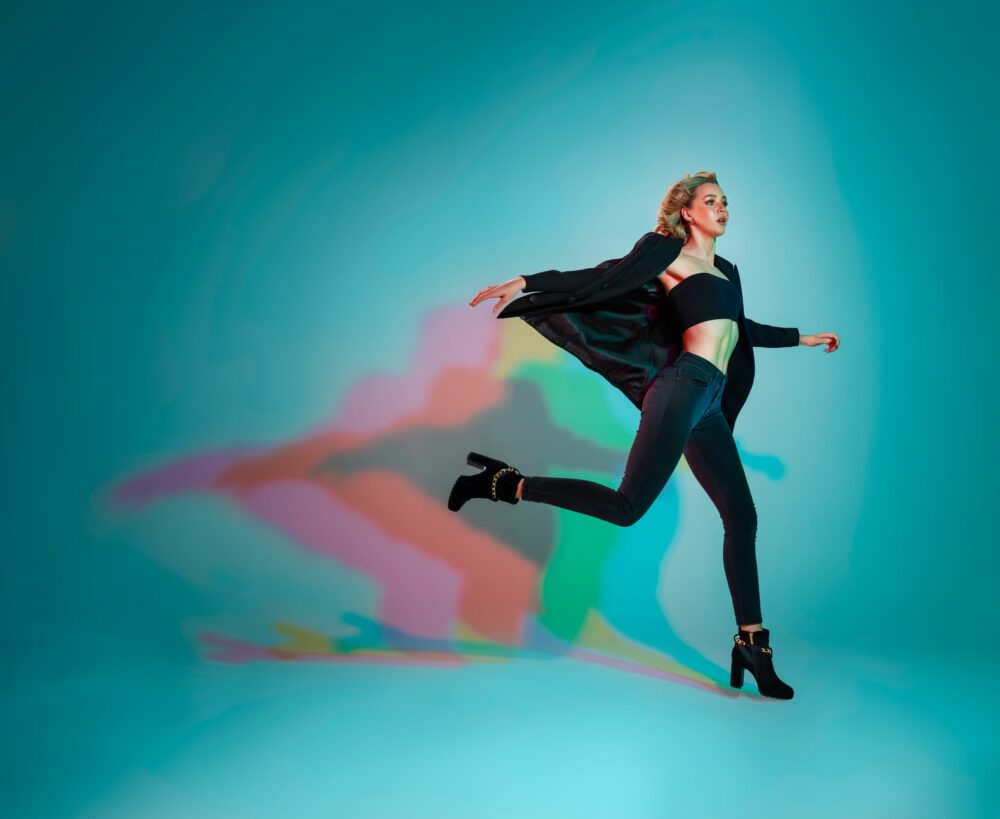
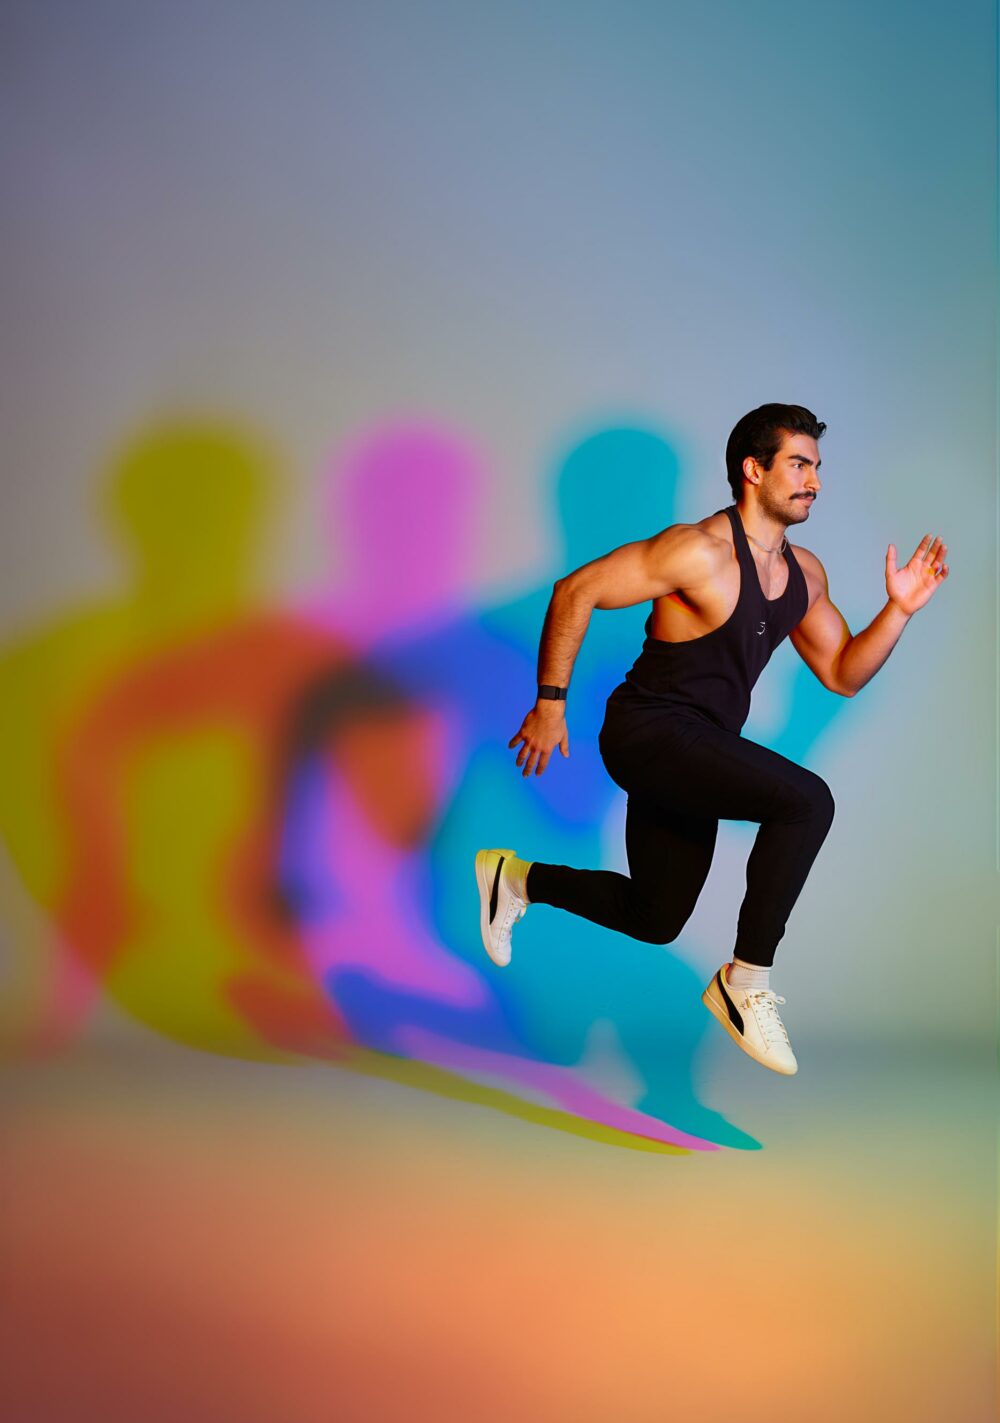
In the studio environment, flash is typically fired at your camera’s sync speed (traditional flash), where the brief burst of light from the flash stops movement rather than the shutter speed.
While High-Speed Sync (HSS) allows you to shoot above the sync speed, it often results in lower overall light brightness, higher ISOs, and reduced depth of field when compared to traditional flash. Flash duration refers to the time it takes for the flash to discharge its volume of light. By reducing the power settings, you can shorten the flash duration on most strobes.
Begin by setting your current professional Elinchrom monolight to Action mode, which provides the fastest flash duration while trading a bit of color temperature stability. Then, decrease the flash power until achieving a flash duration of around 1/3000 of a second or slightly faster.
Fortunately, Elinchrom’s lights display flash duration on their back LCDs. Next take a photo without flash at your current settings and make sure that the image is mostly blank, if you are seeing many details, then decrease the ambient light in the room. If it is blank and for some reason you still have motion blur in your images, reduce the power of your light to shorten the flash duration and change your camera settings accordingly. Personally, I have found that a t.1 flash duration of 1/3000 of a second, coupled with overpowering the light but 2-3 stops, yields great results when photographing dancers and athletes.
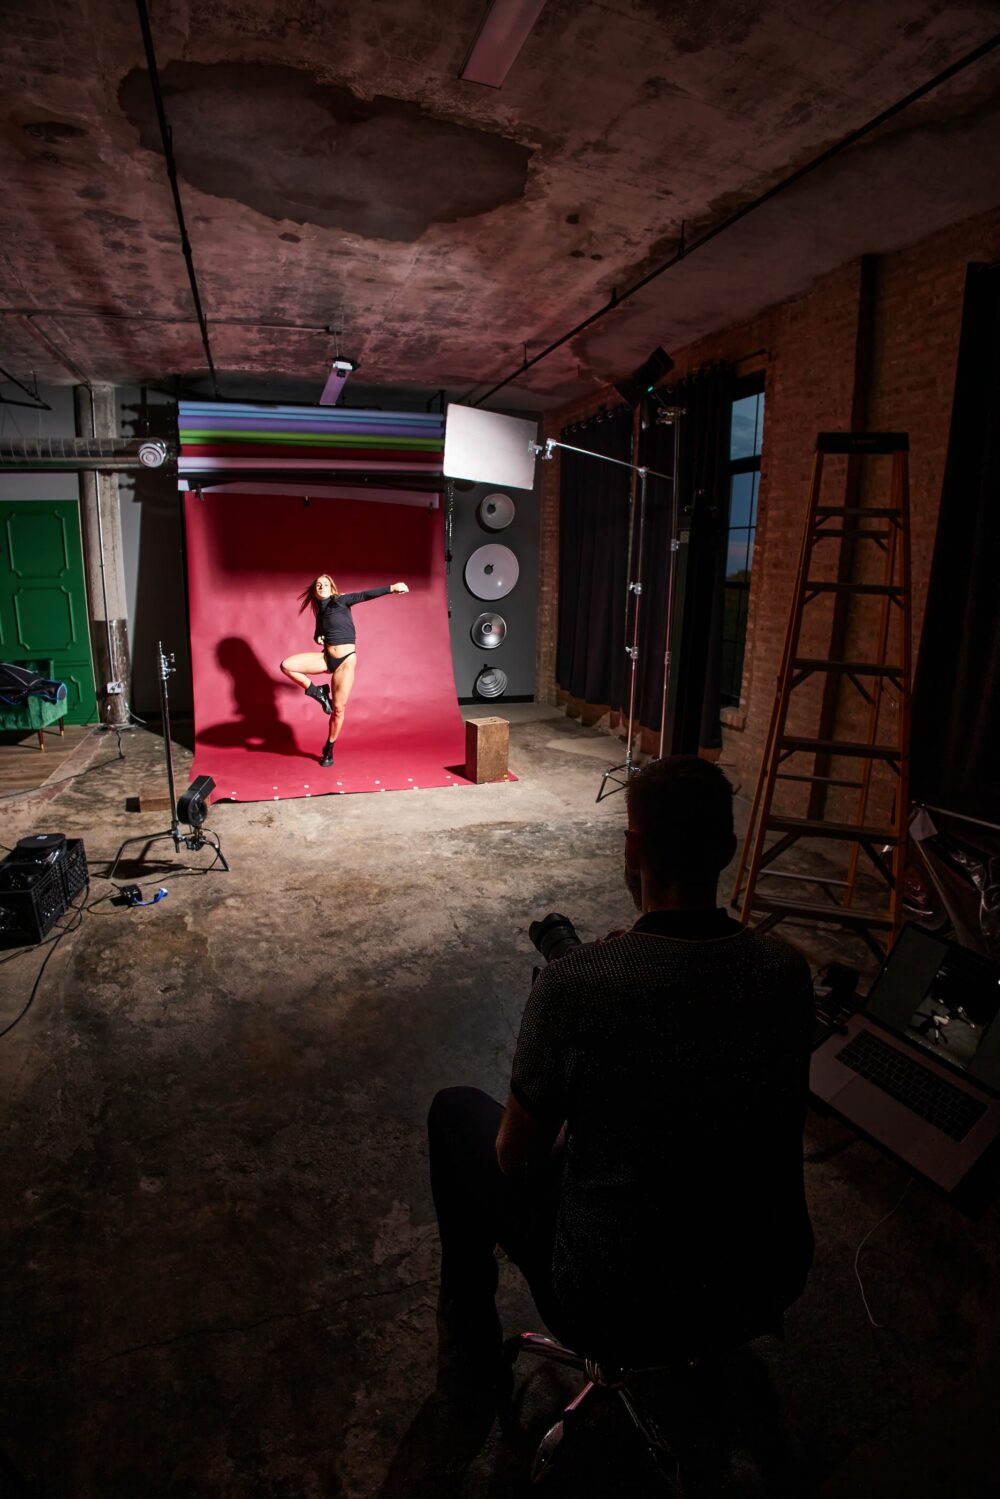
Exploring Grids with Xander
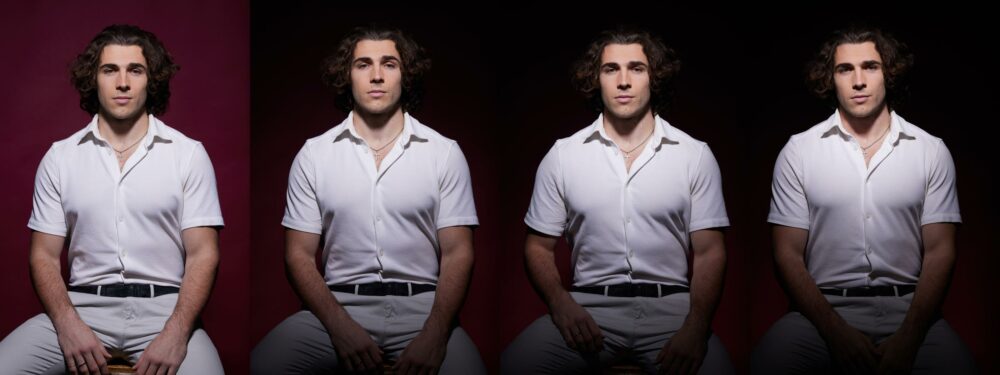
21CM GRID REFLECTOR, W/30, W/20, W/12
In this series featuring Xander, I experimented with grids positioned approximately 1.5 meters (5 feet) from the model. Beginning on the left, I used a grid reflector, then I added a 30-degree grid, which I then swapped out for a 20-degree grid, and finally, on the right, I employed a grid reflector with a 12-degree grid. Using my light meter, I meticulously measured and adjusted the brightness of the light both with and without the grids to ensure a correct exposure. The results were striking: not only did the grids effectively narrow the beam spread, but they also blocked almost a full stop of light.
“The results were striking: not only did the grids effectively narrow the beam spread, but they also blocked almost a full stop of light.”
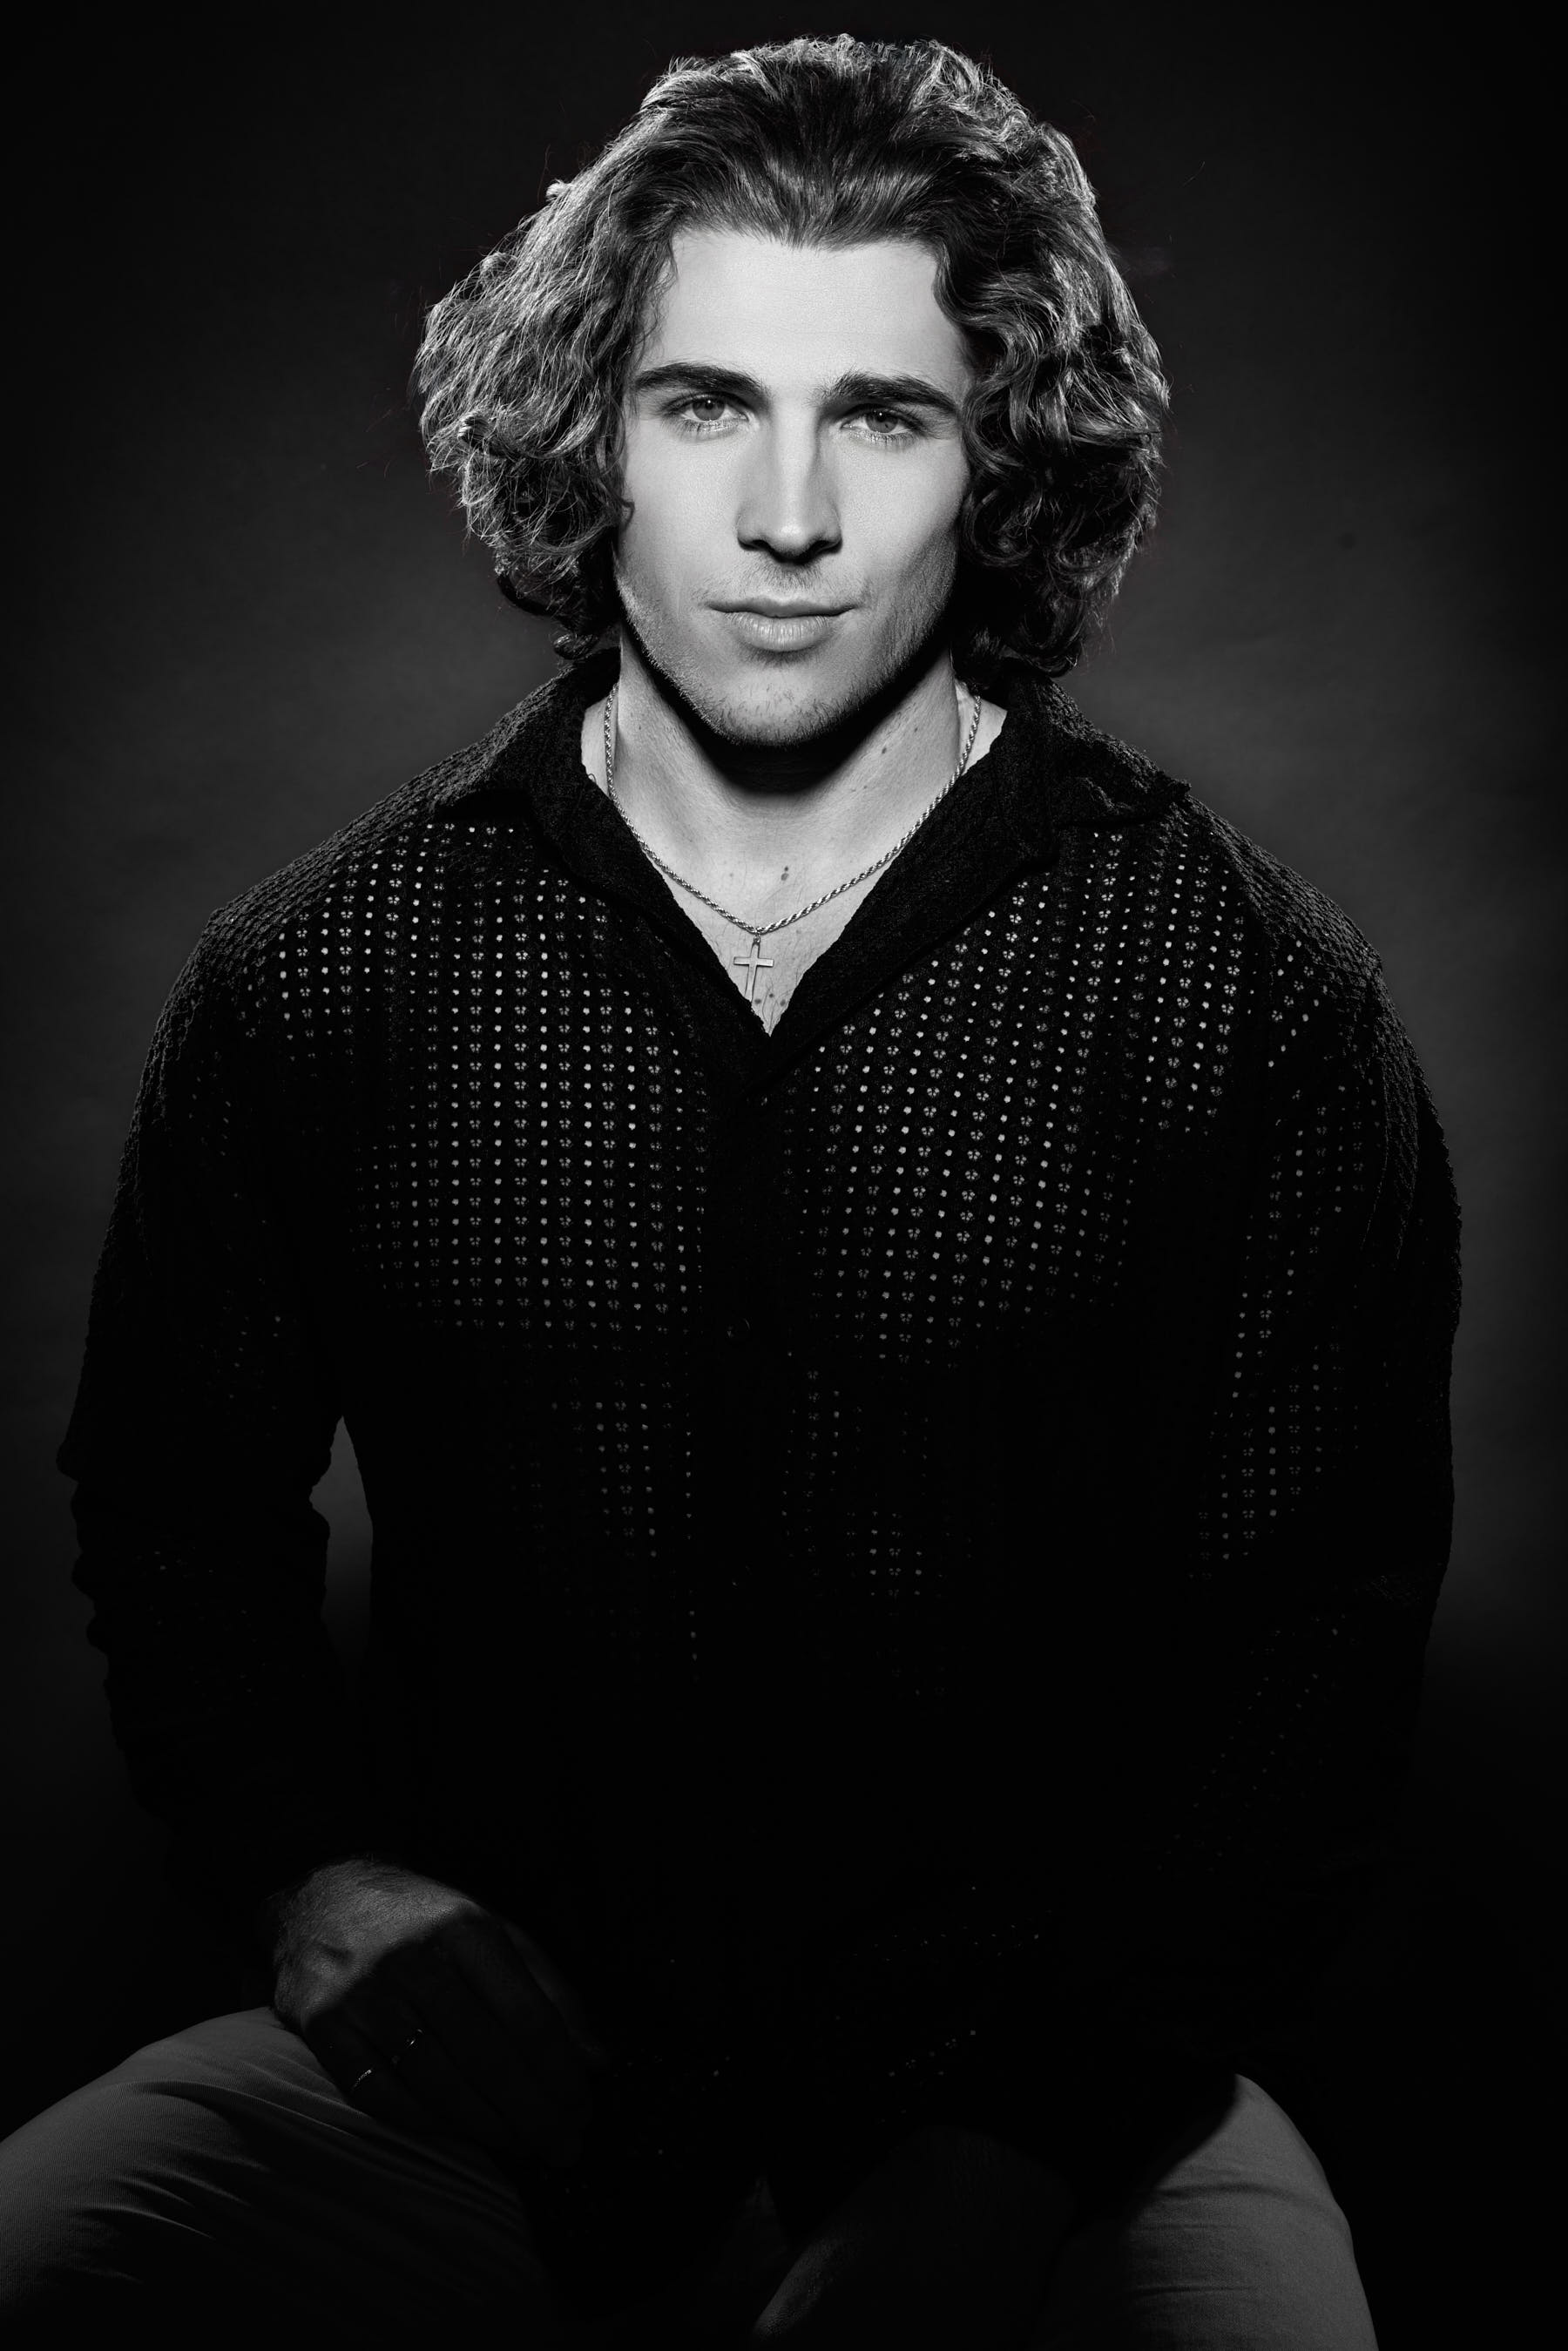
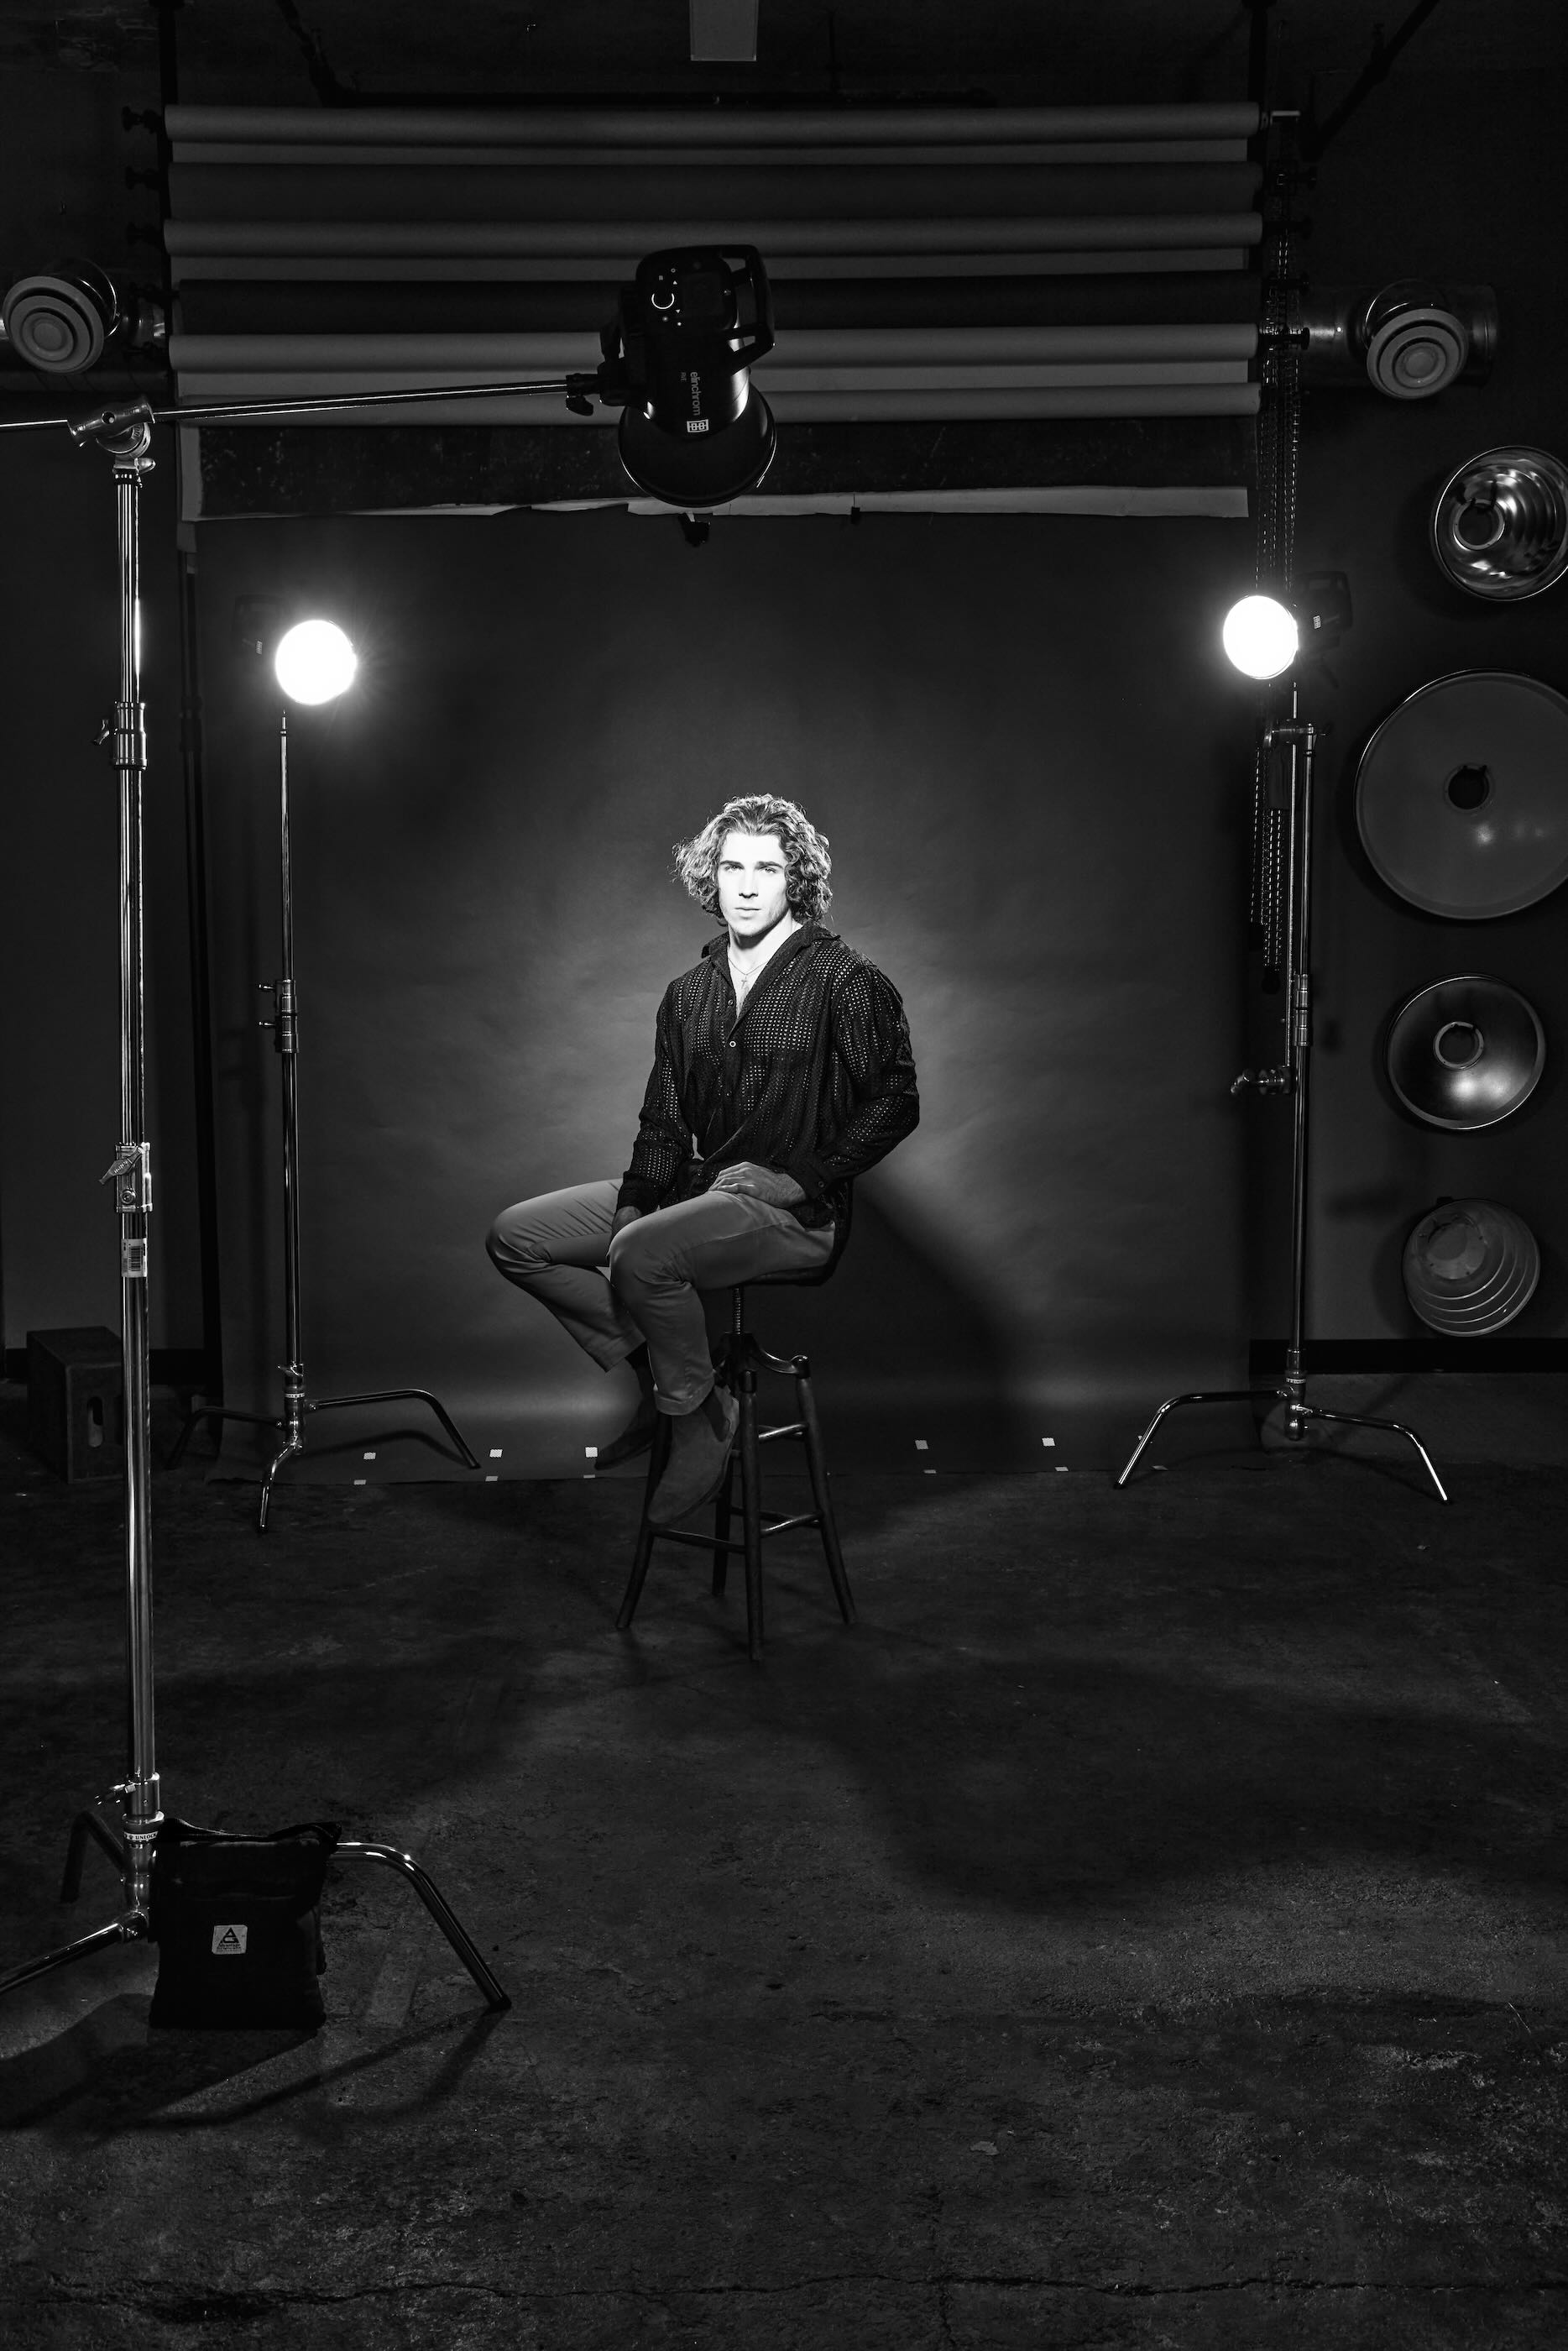
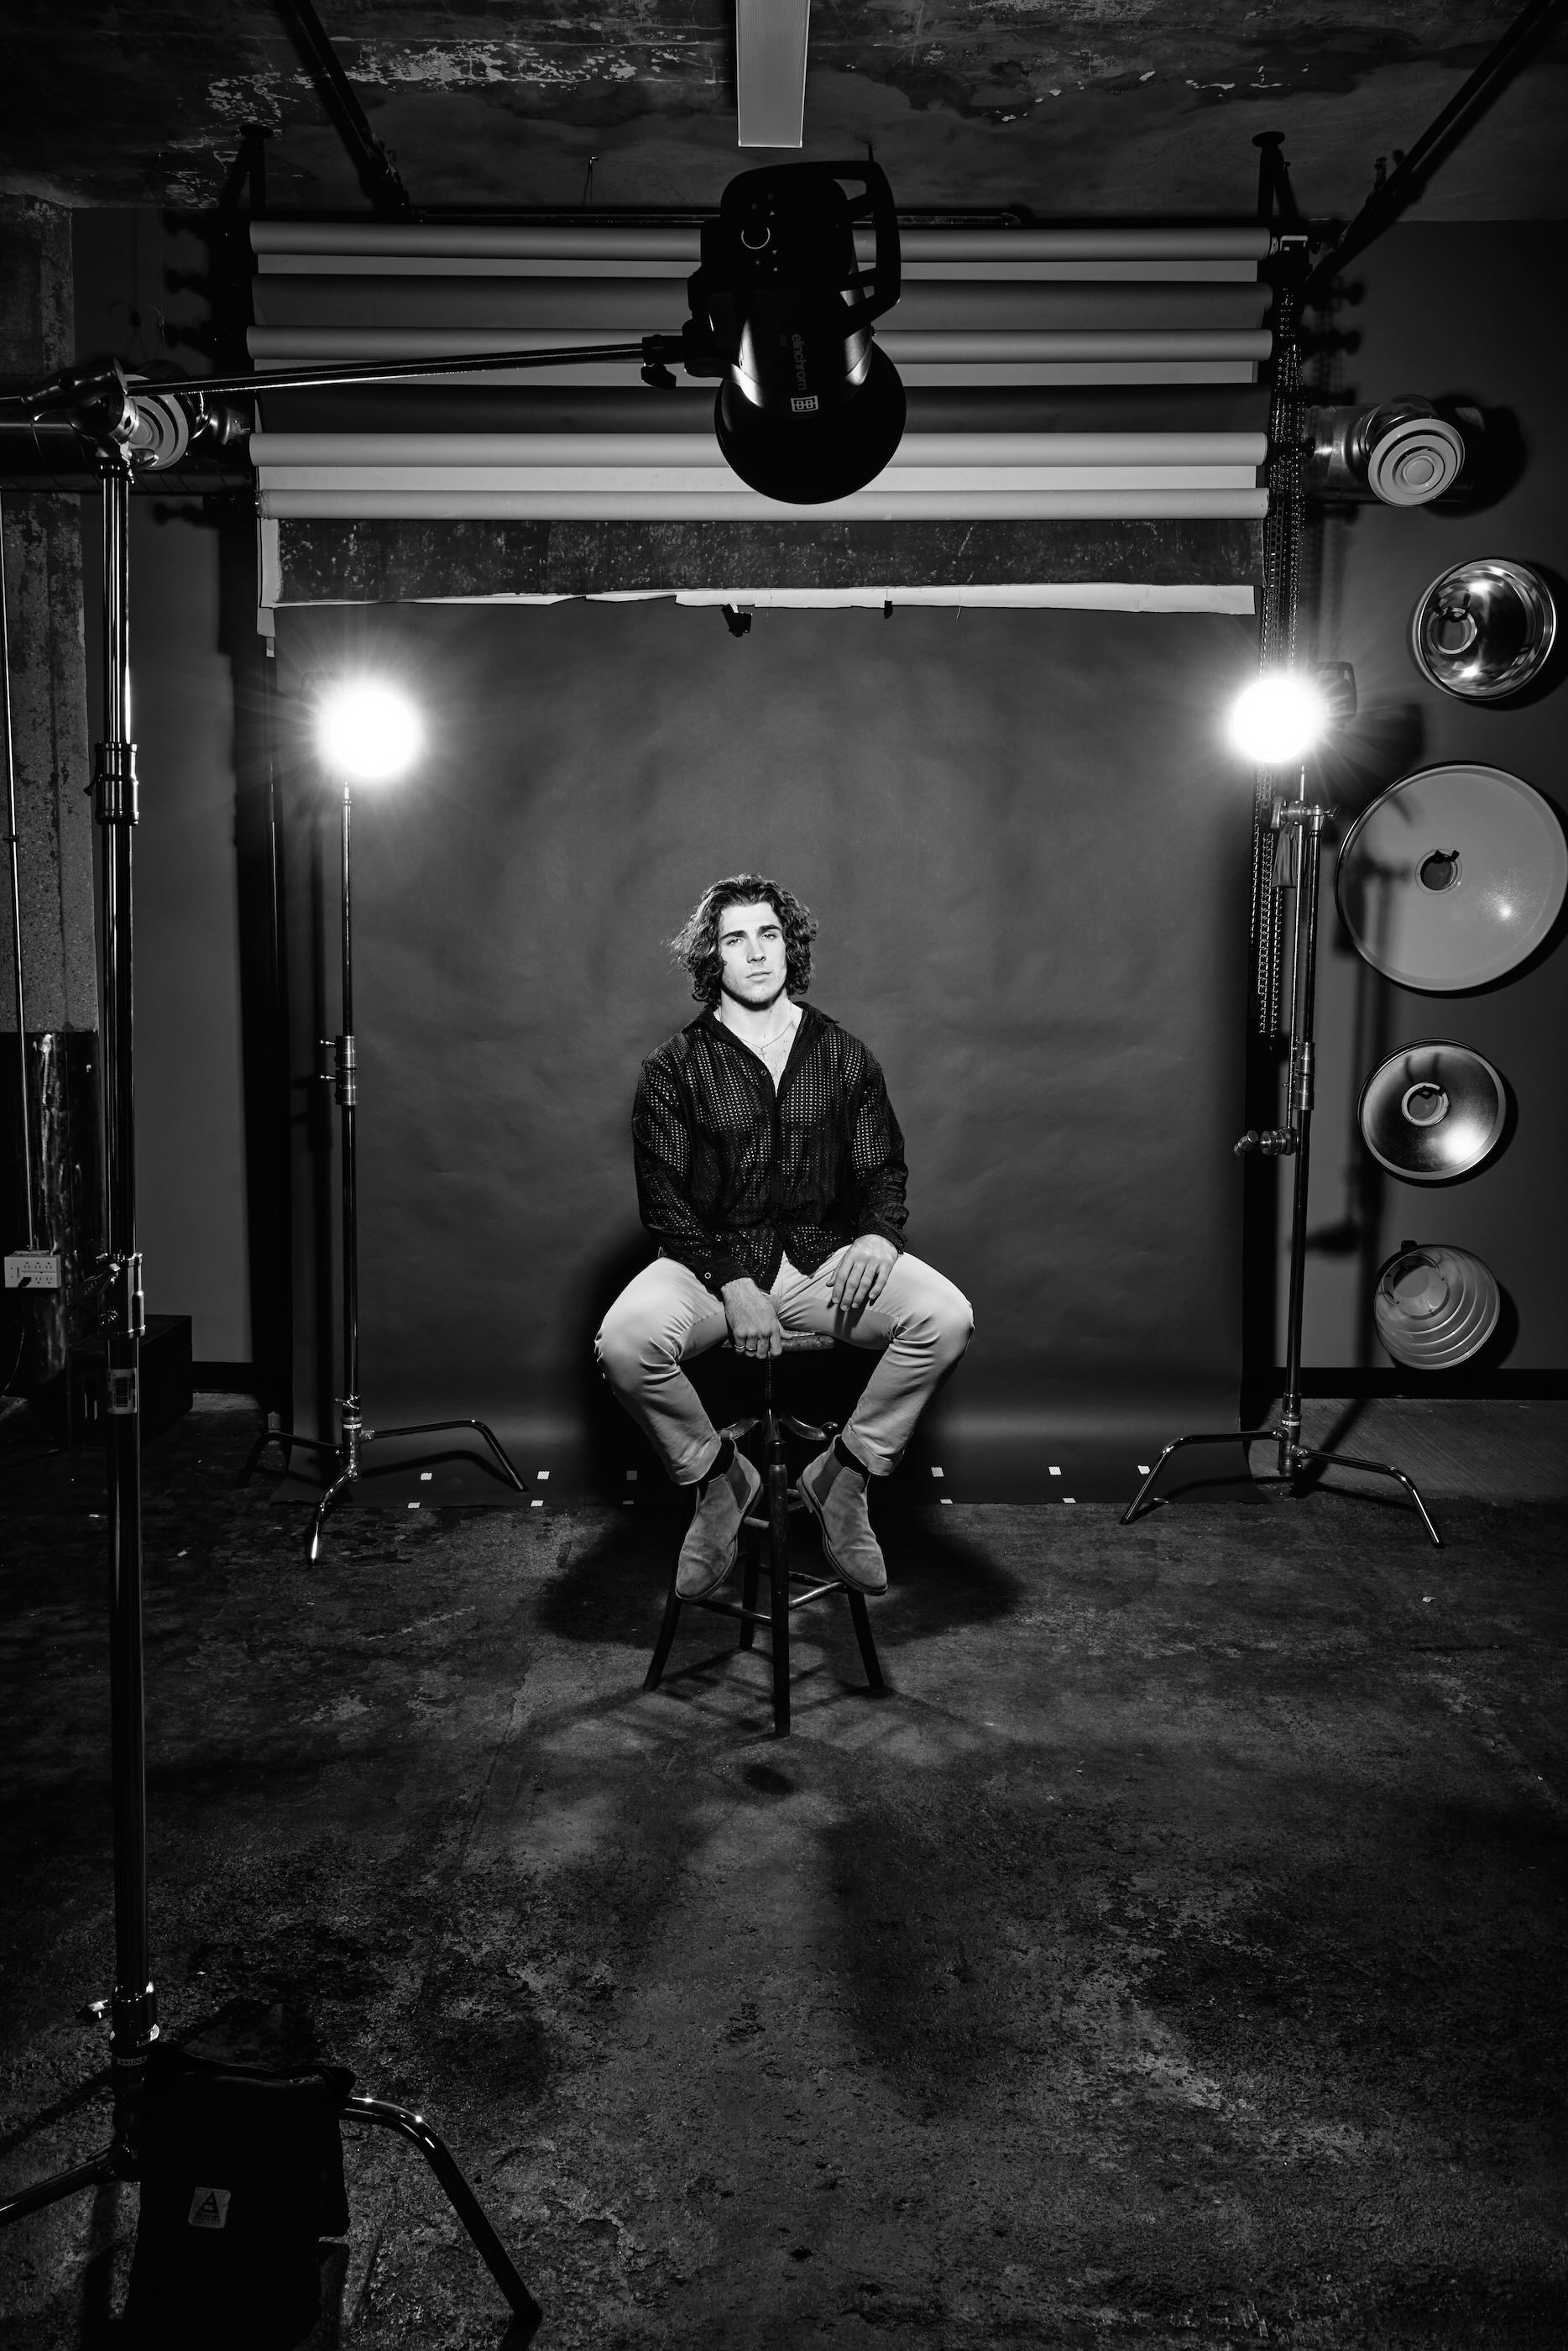
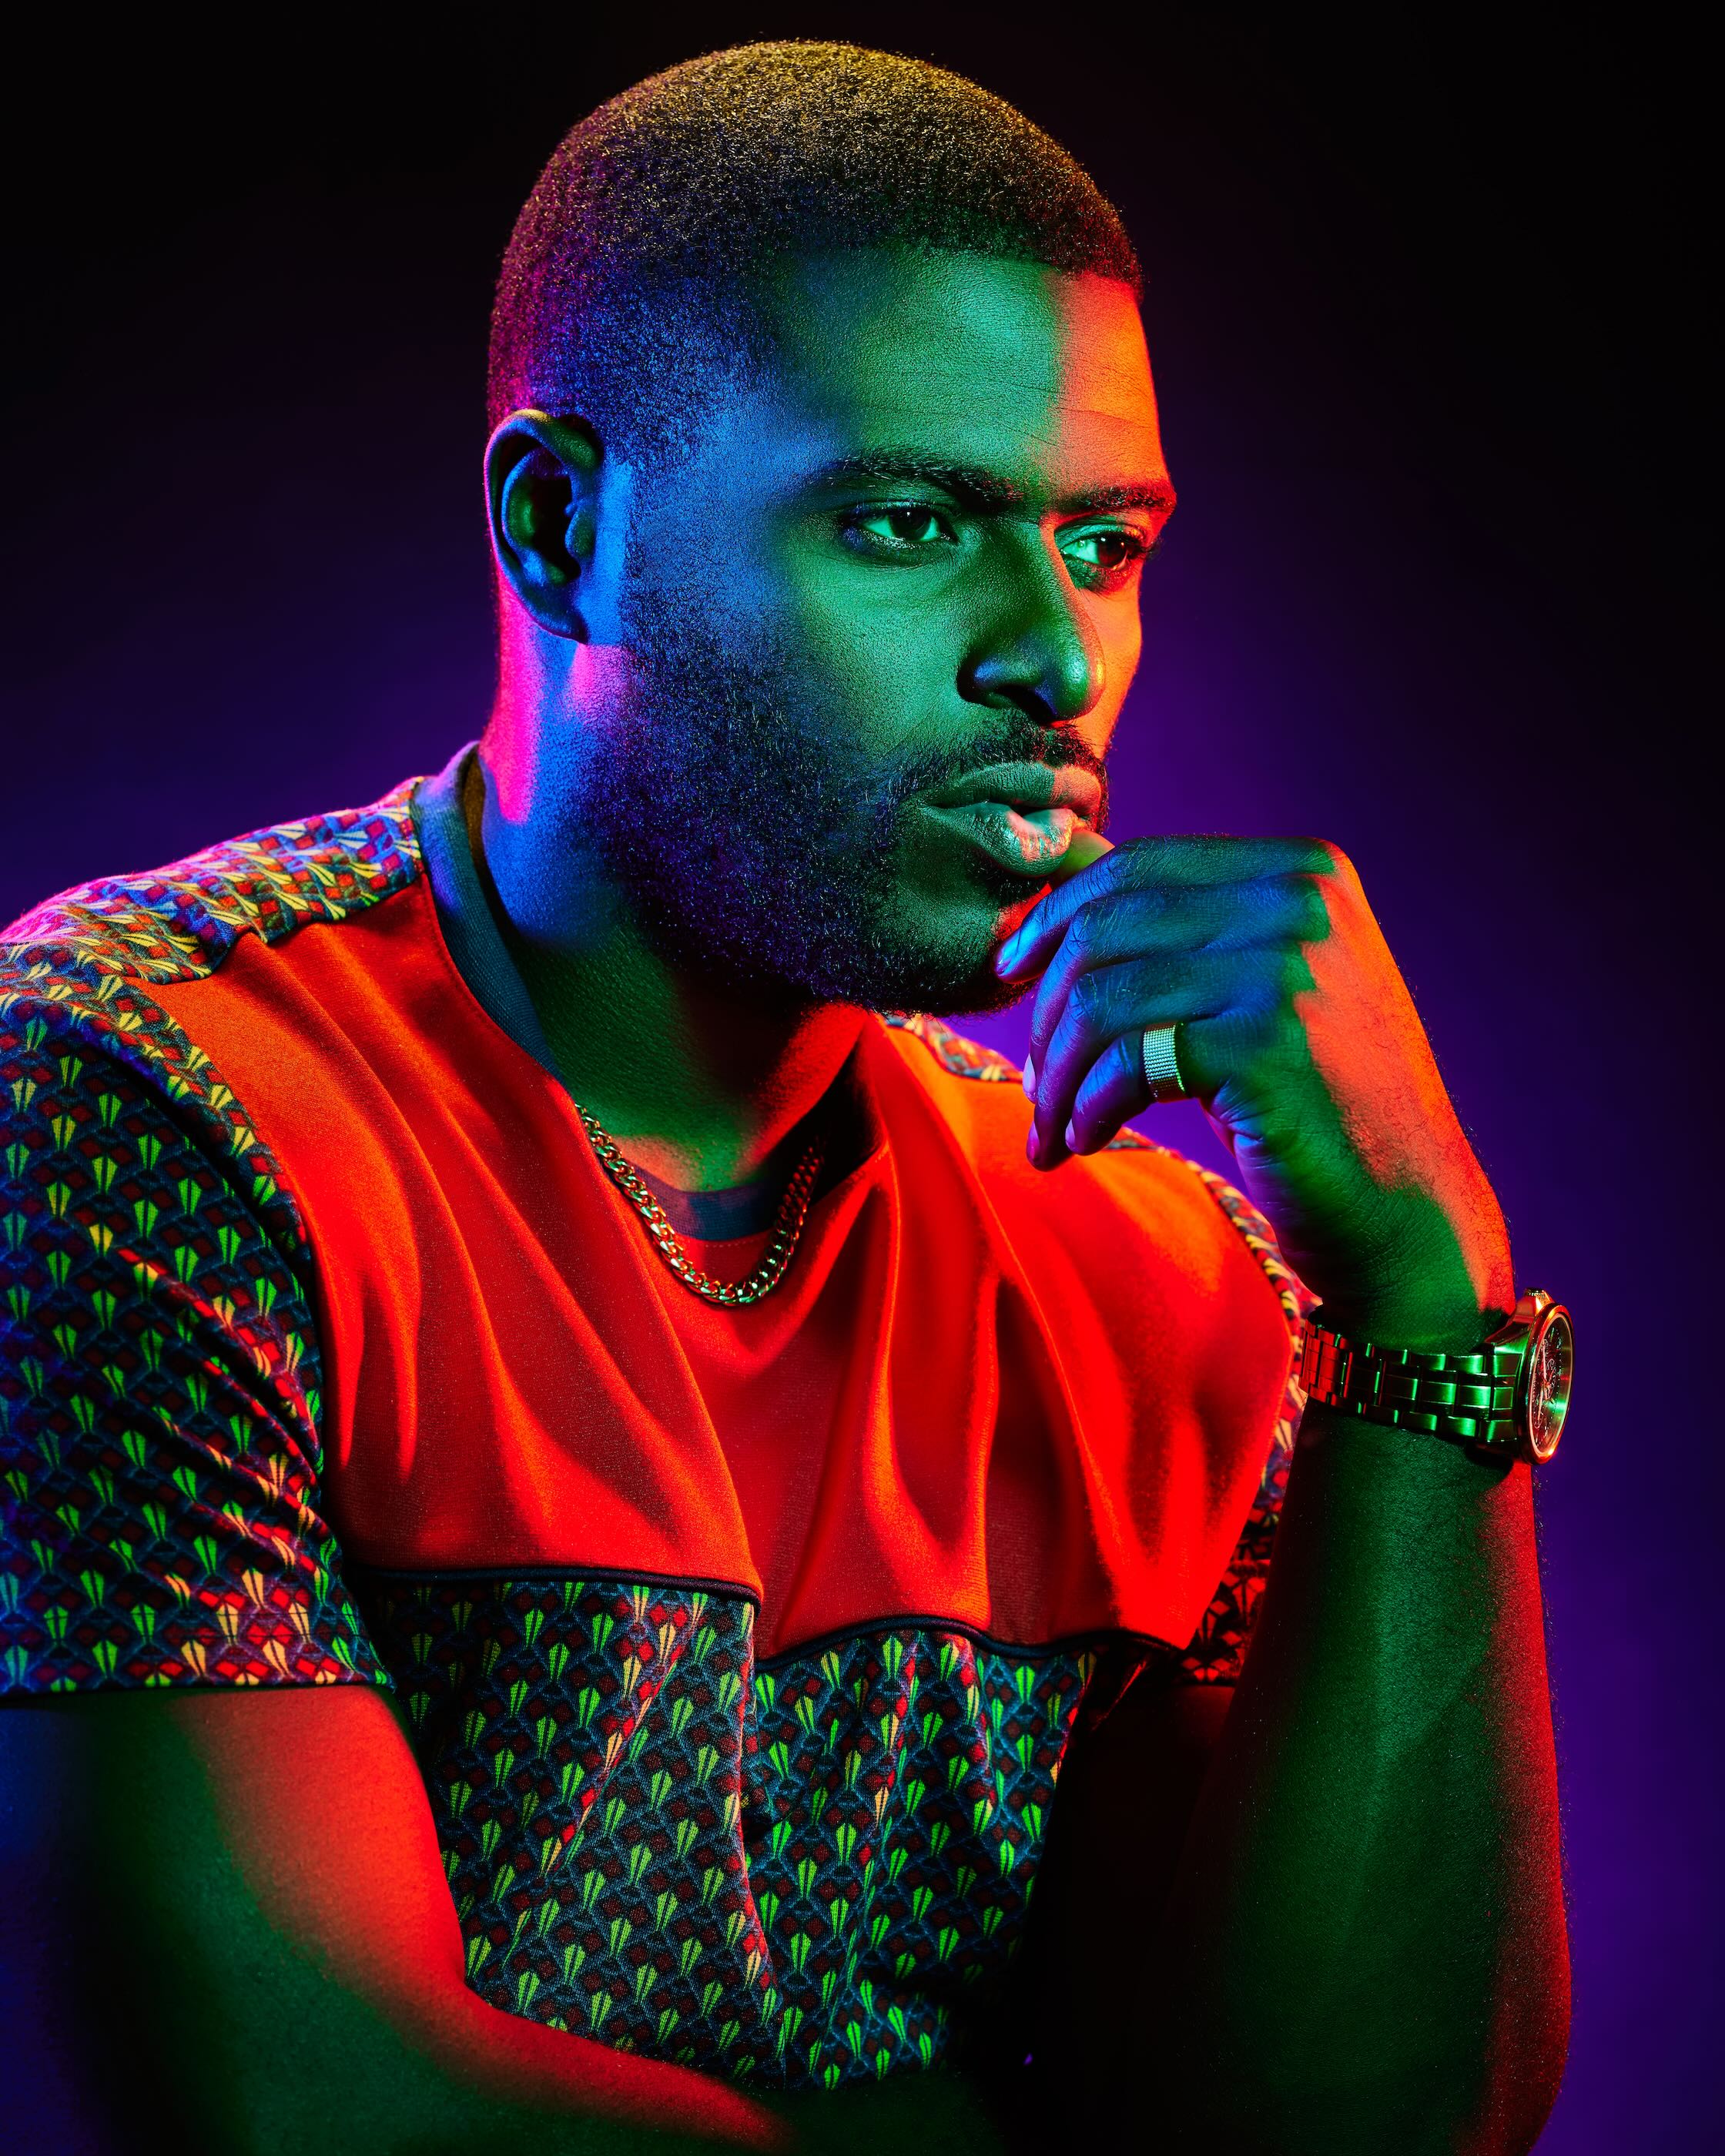
FINAL, BTS WITH GRIDS, BTS WITHOUT GRIDS
For Xander’s portrait, I opted for a setup with a light positioned over each shoulder, each equipped with a 30-degree grid. Additionally, I used a grid reflector with a 12-degree grid to illuminate his face. This arrangement not only provided high contrast illumination on his face but also cast a subtle highlight on the background.
Cucoloris Canopy
“Barn doors would have been invaluable when trying to achieve this look in a smaller studio with white walls.”
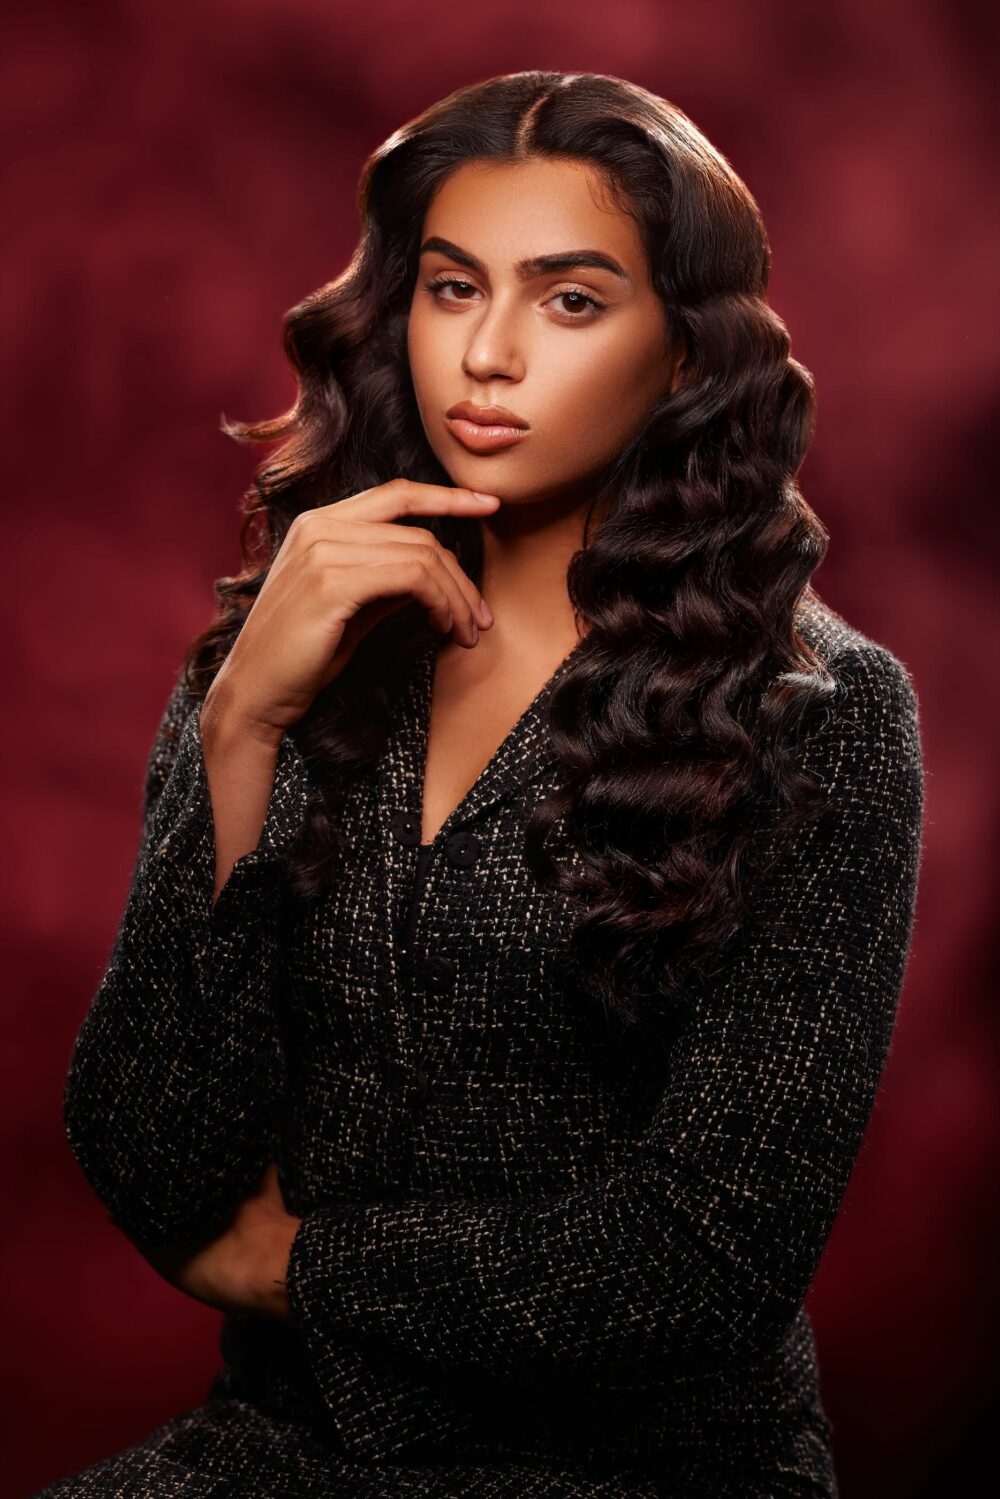
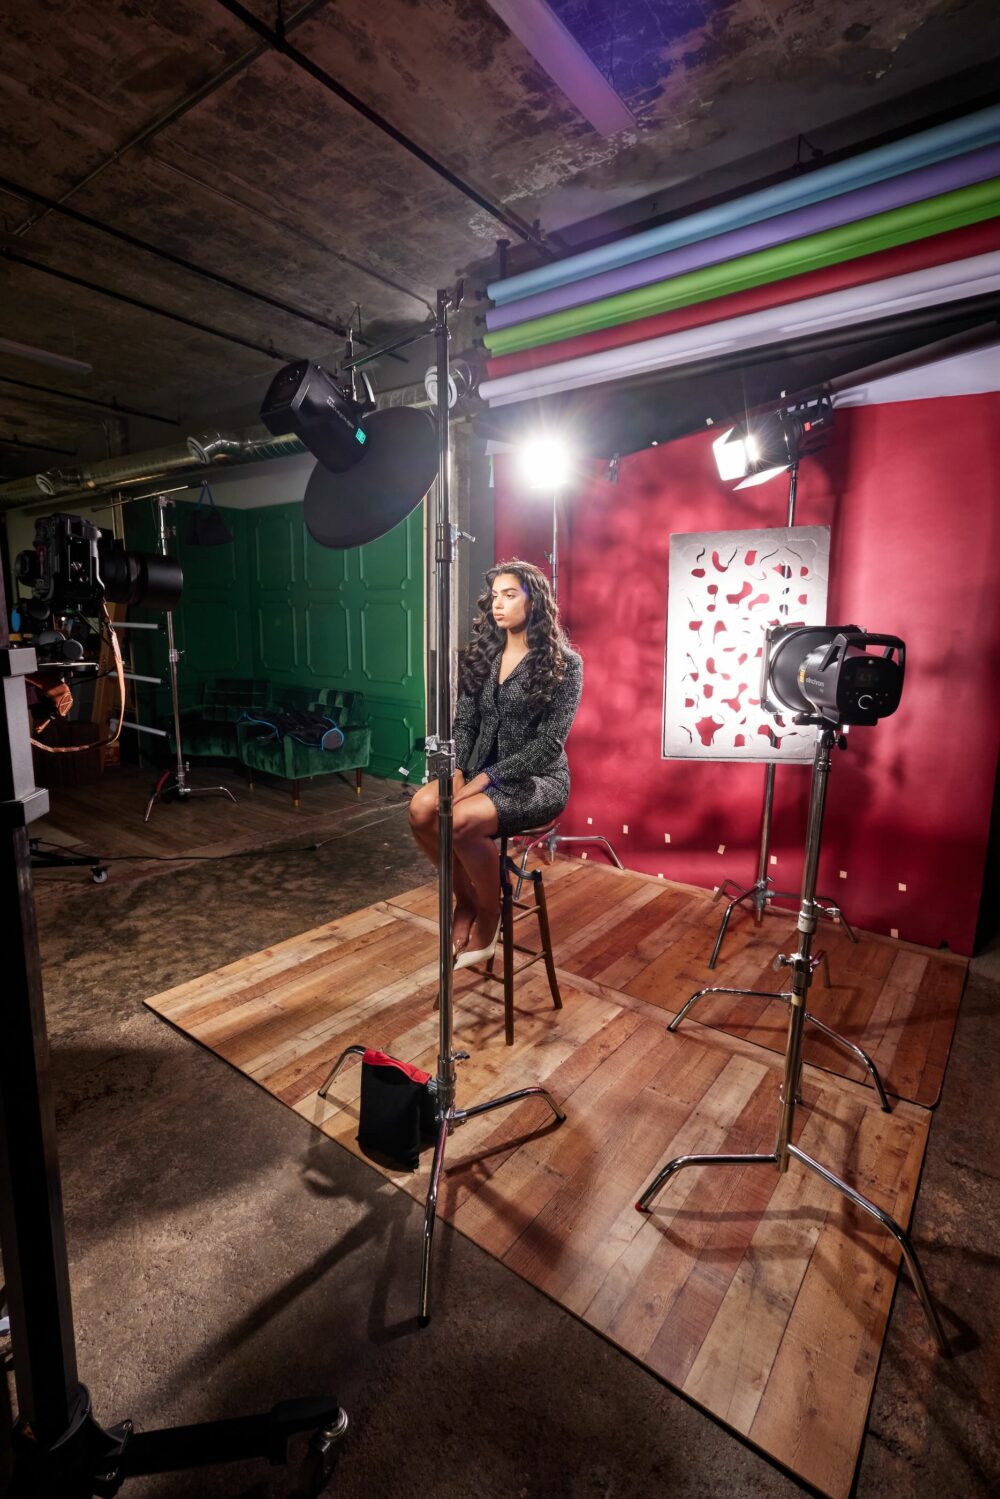
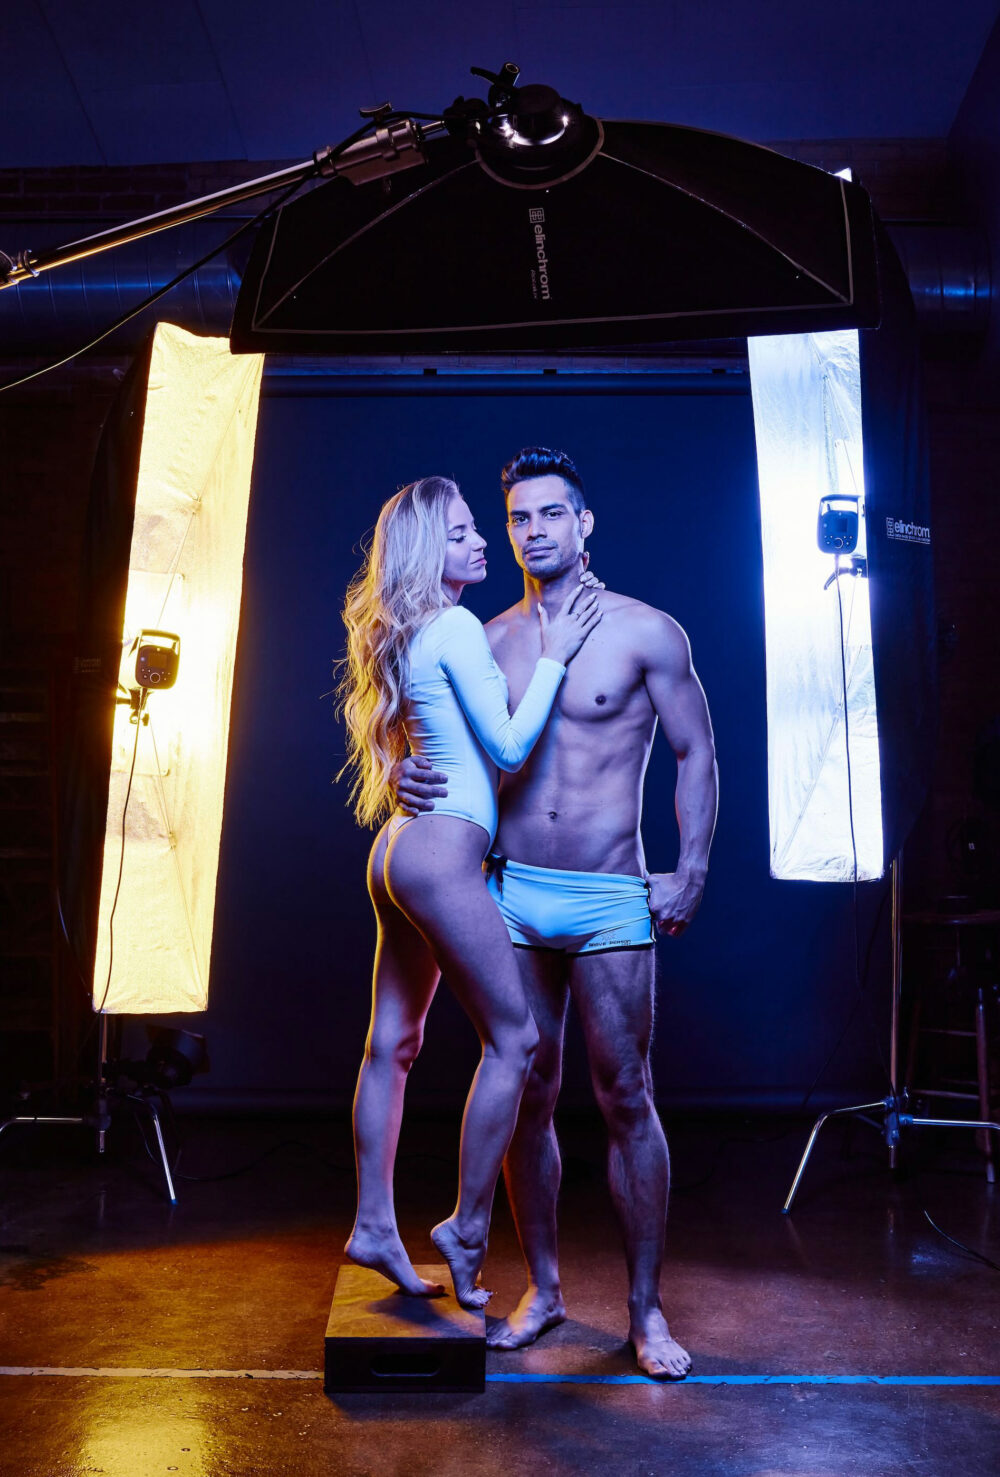
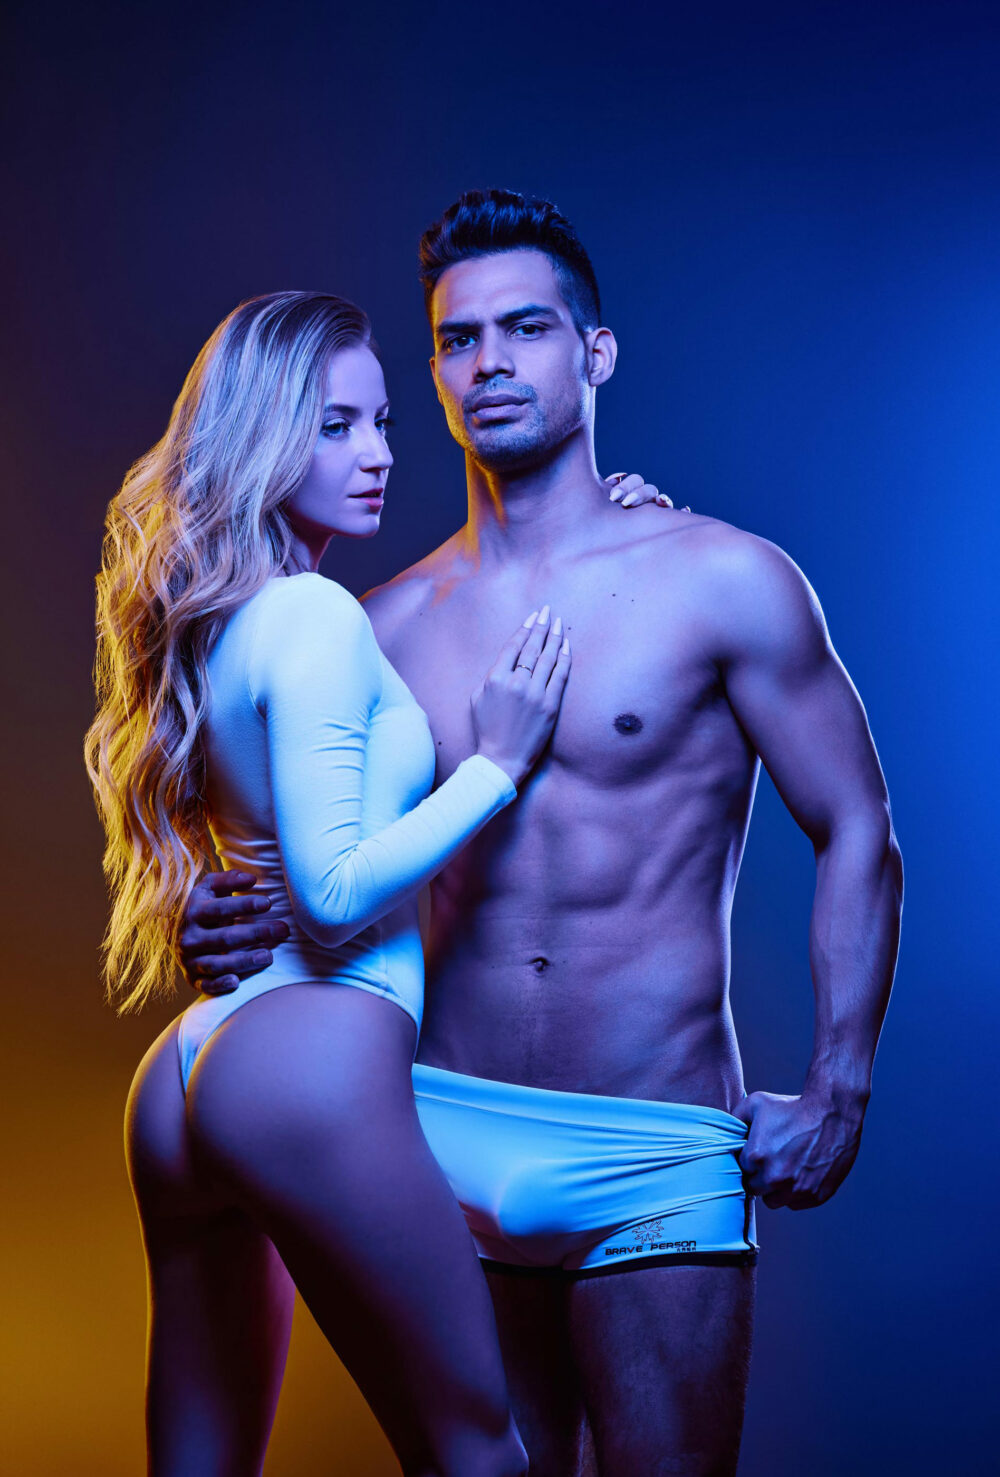
For this setup featuring Isabelle, I employed a 44cm Silver Beauty Dish on my main light, positioned 44cm from her face. I selected this modifier to craft a concentrated pool of high-contrast light.
Additionally, I placed a light over each shoulder equipped with a 21cm grid reflector. I used barndoors in order to restrict the beam so that it would only strike the top of her head and the sides of her arms, as well as to keep light from bouncing off the floor, wall and ceiling. This would have reduced the contrast in the final images. Barndoors would have been invaluable when trying to achieve this look in a smaller studio with white walls.
A third 21cm reflector equipped with barndoors was directed towards a pair of cucolorises to illuminate the background with what looks like dappled light shining through leaves. By utilizing the barndoors, I could precisely control the beam of light, ensuring it illuminated only the cucolorises without spilling onto the backdrop. While my cucolorises are homemade, commercial options are readily available. The same principles that governed the sharpness of shadows in the first look with Colleen also apply to shadows cast by a cucoloris.
Barndoors can also be combined with a grid to selectively light a narrow band of a backdrop, as demonstrated in this image featuring Sophia.
Chromatic Creativity
You can take your creativity to the next level with a set of color effects gels, such as the Elinchrom 21cm Color Filter Set, which includes twenty assorted gels designed to fit either the 21 cm Reflector or the base of the barndoors.
When using gels, the first consideration typically involves color harmony, which suggests that adhering to certain rules can achieve aesthetically pleasing color combinations.
One common approach is to select complementary colors, which are opposites on the color wheel. For instance, on an RYB color wheel (for physical objects), typical complementary pairs include Red and Green, Yellow and Purple, and Orange and Blue. On an RGB color wheel (for blending light), complementary pairs might include yellow and blue, red and cyan, and magenta and green.
You can further enhance your color harmony by drawing a triangle or square on the color wheel to select three or four harmonious colors. An online color harmony calculator, such as the one found here, can be a valuable tool for this purpose. You can reflect the colors you select on the color wheel in your choice of gels, props, or clothing.
When applying gels to your lights, ensure that the gel completely covers the flash tube to prevent daylight from escaping around the gel and de-saturating the gel’s colors. In a softbox, you may need multiple pieces of tape to secure the gels, whereas on a reflector, one or two pieces may suffice.
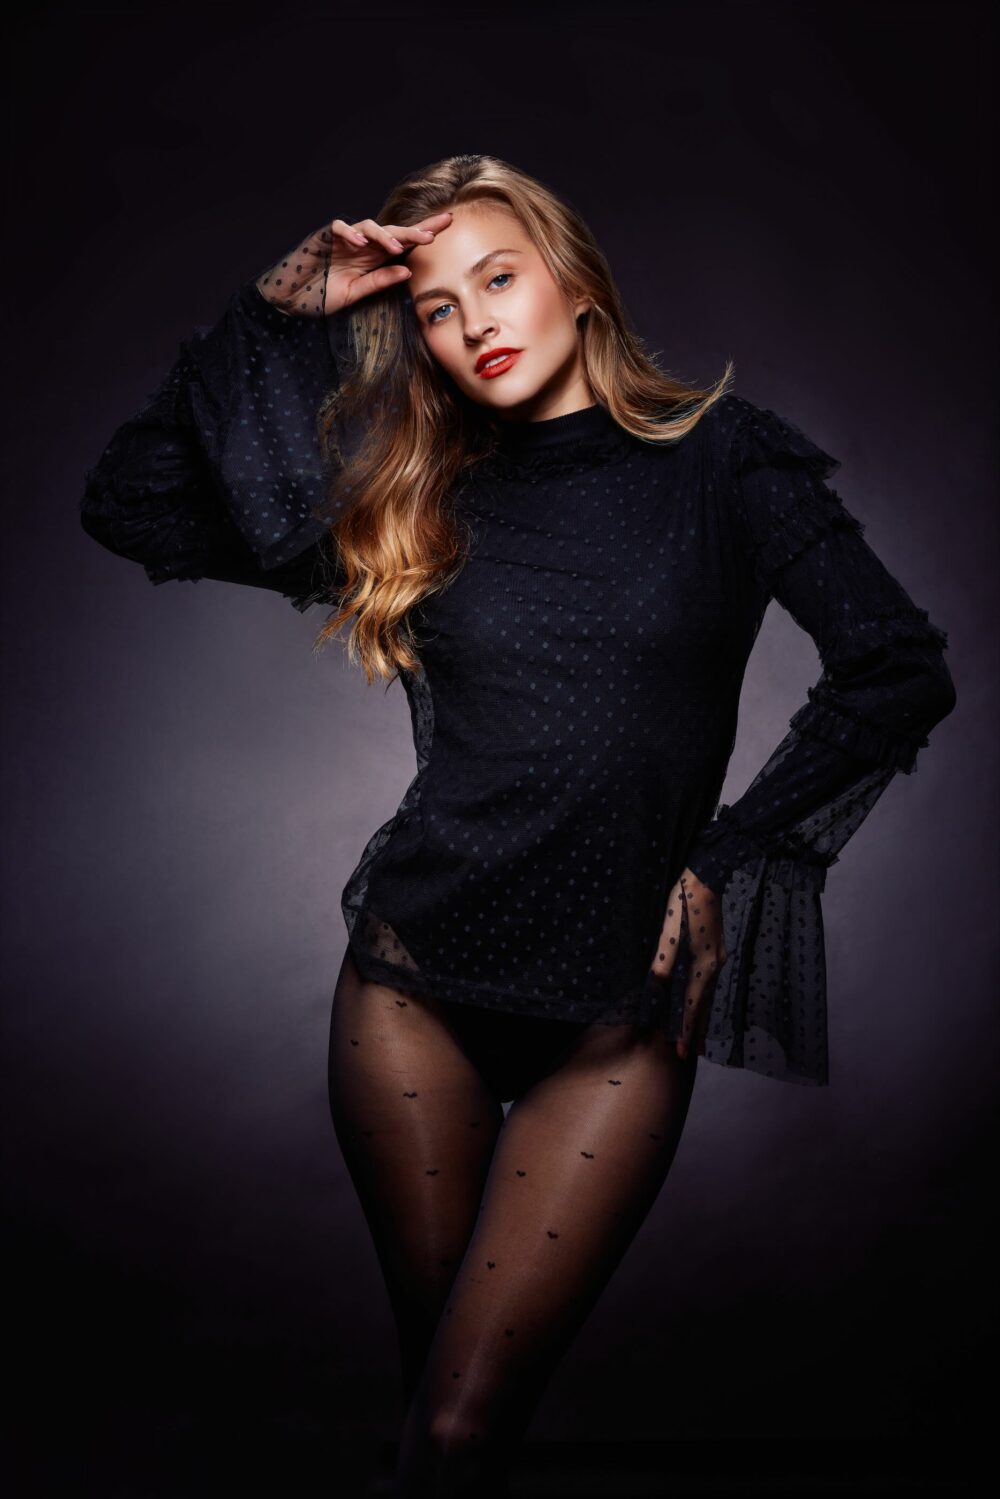
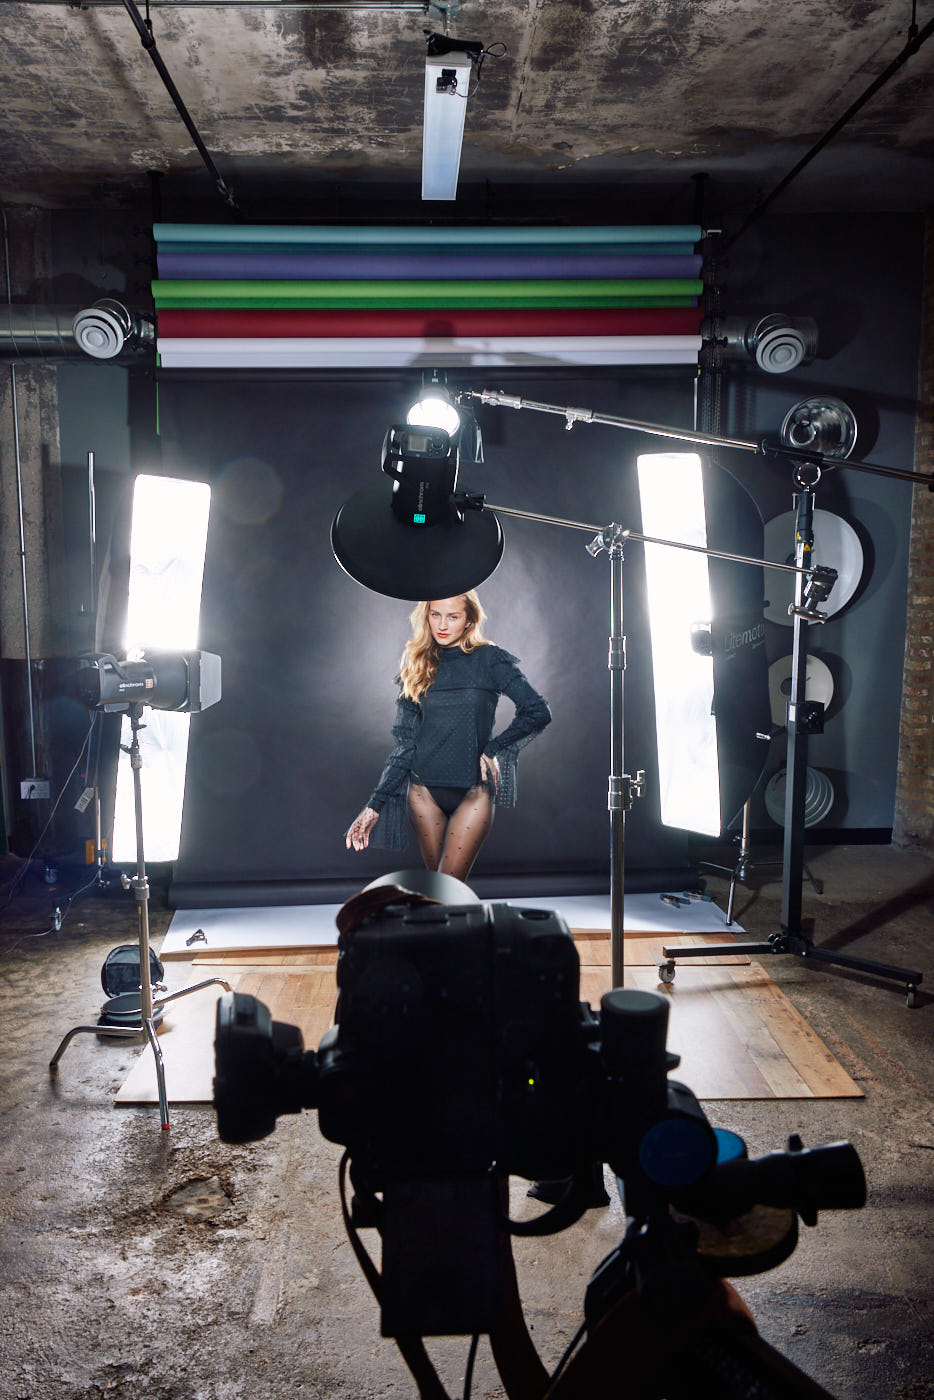
For this setup with Lauren, I arranged three lights side by side, each equipped with reflectors and fitted with red, blue, and green gels from the Elinchrom 21cm Color Filter Set.
Where the red and blue gels overlapped, I achieved magenta light; where red and green overlapped, I got yellow; and where green and blue overlapped, cyan emerged. However, in areas where the colors did not overlap, their respective hues remained visible. Additionally, I incorporated a touch of light from a strip box kicker and a hair light.
Notably, in areas where all three gels overlapped, the blue gel appeared brighter, resulting in a dominant blue hue on the background.
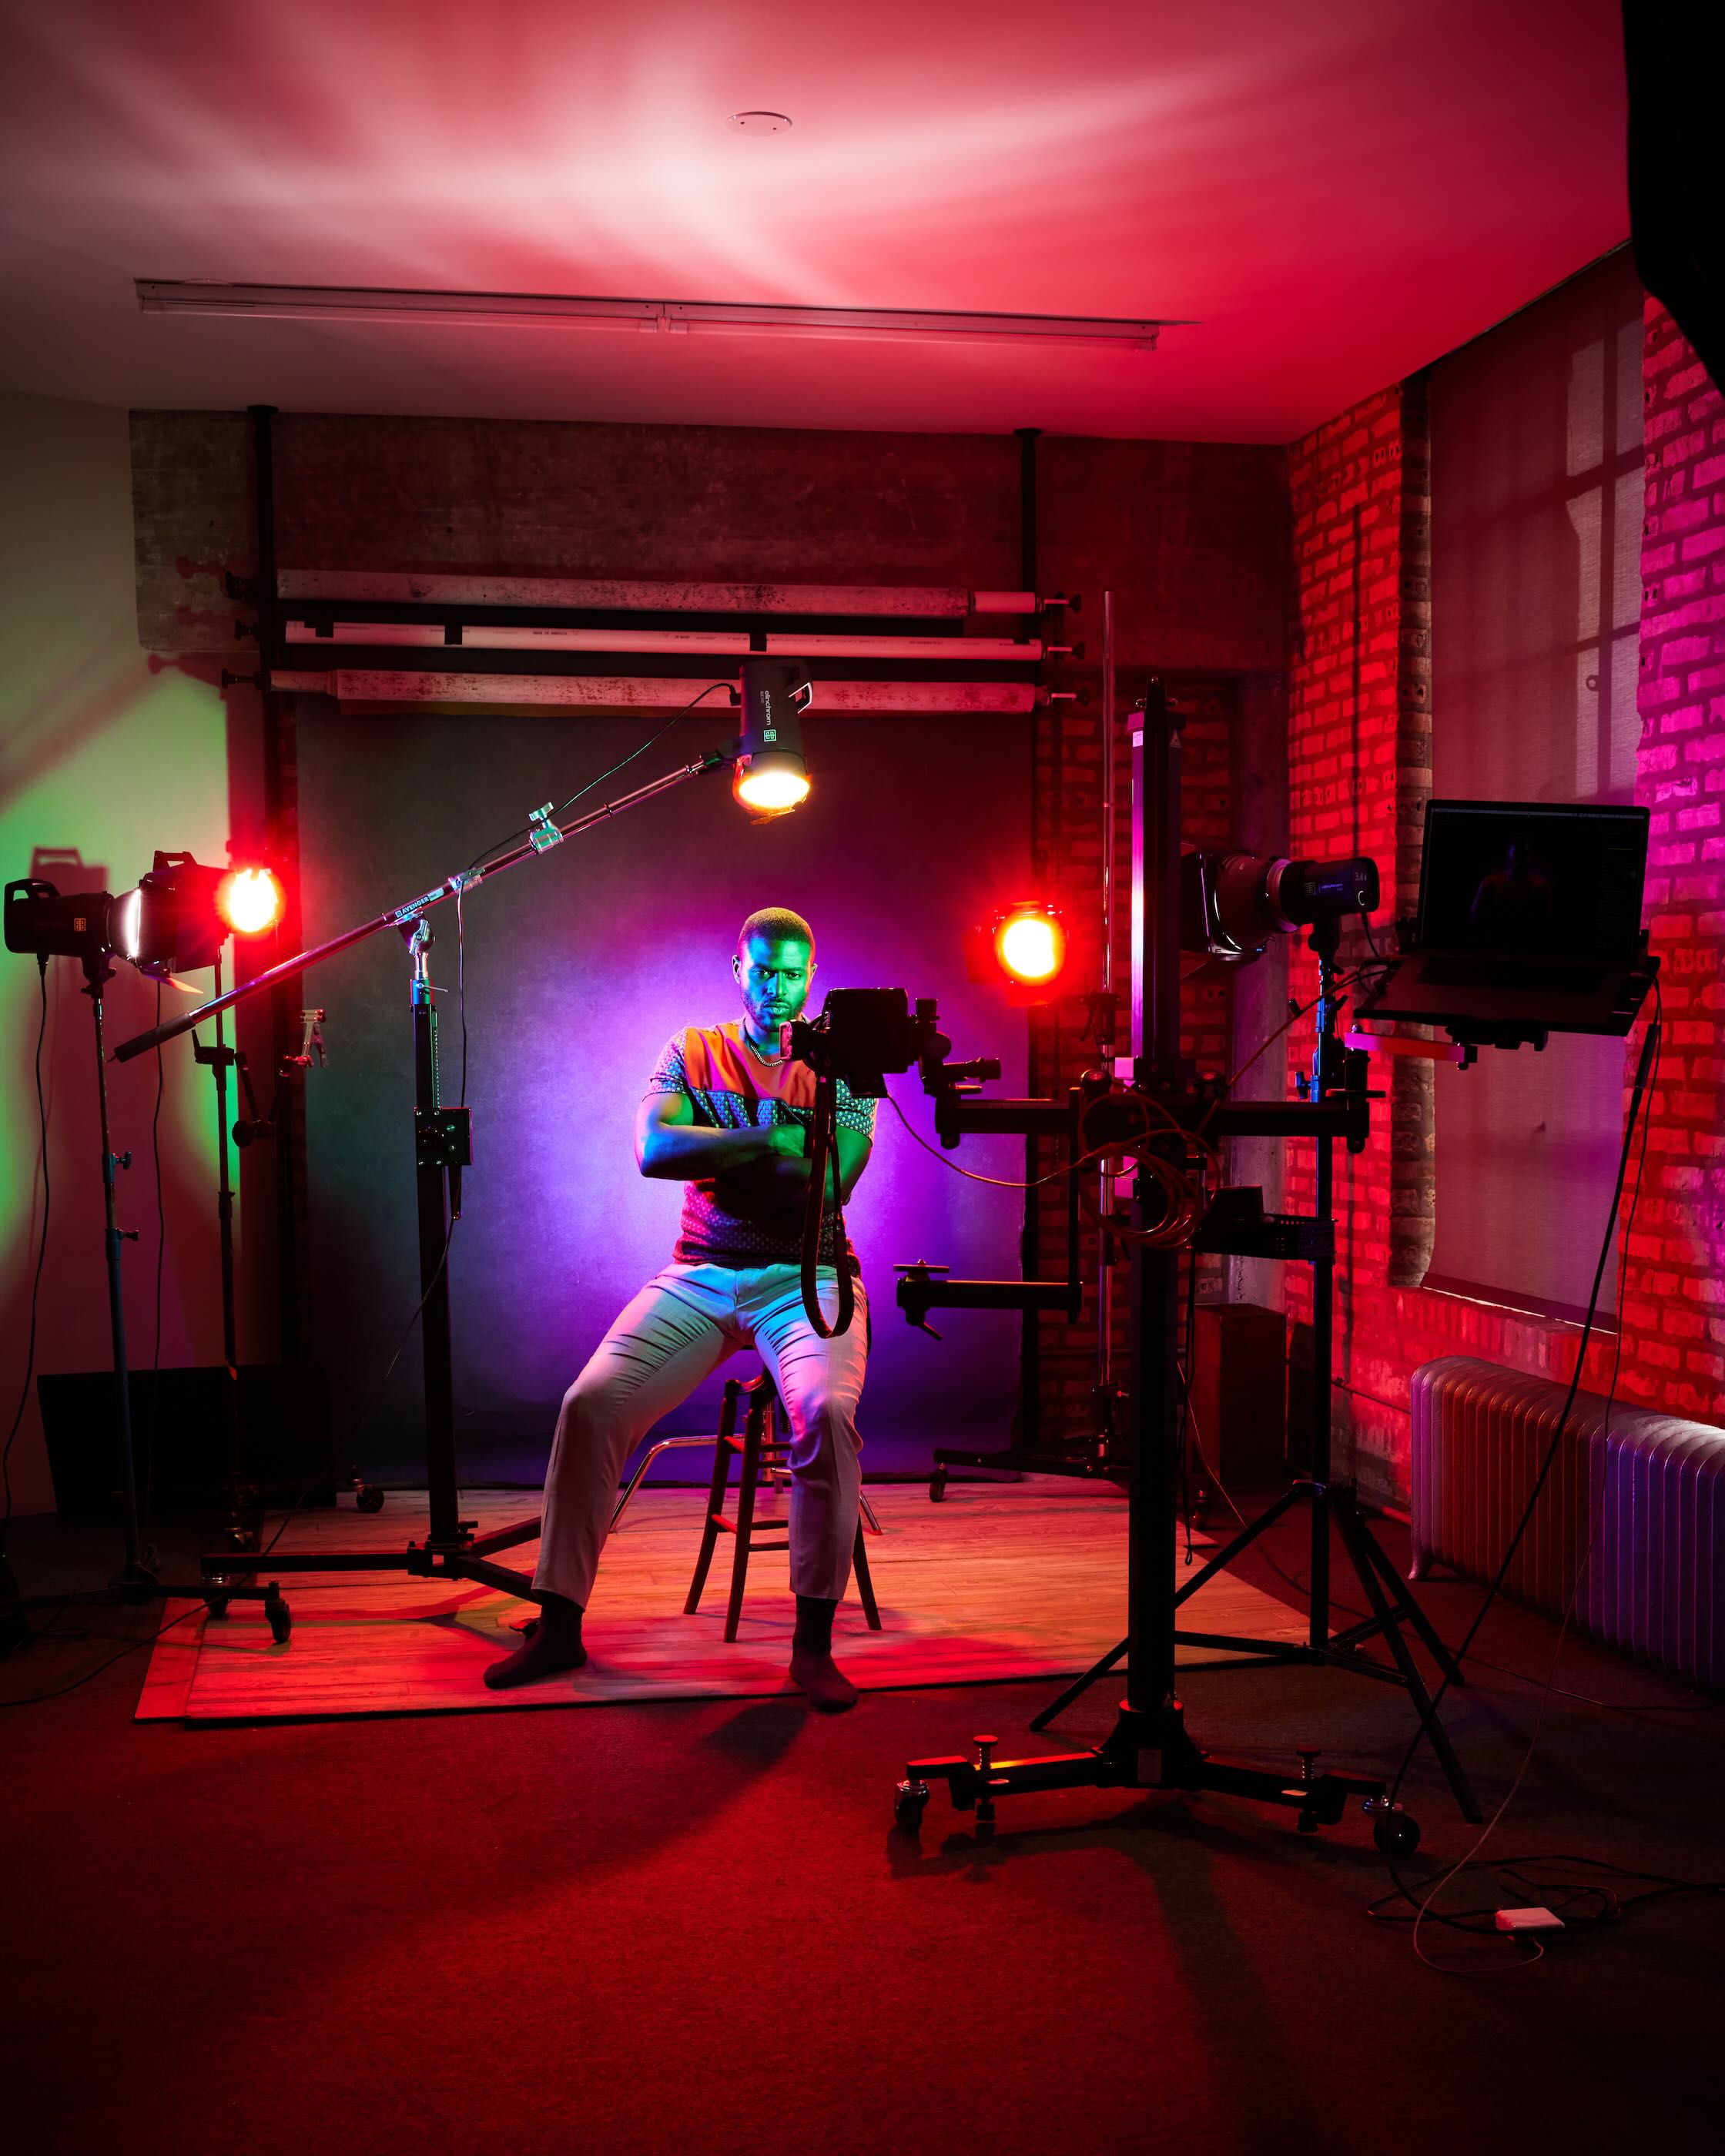
In this example with Tyler, I arranged the lights in RGB order from left to right, and I ended up with CMY shadows. The brightness of the lights was quite similar, resulting in a more neutral background where all three lights overlapped.
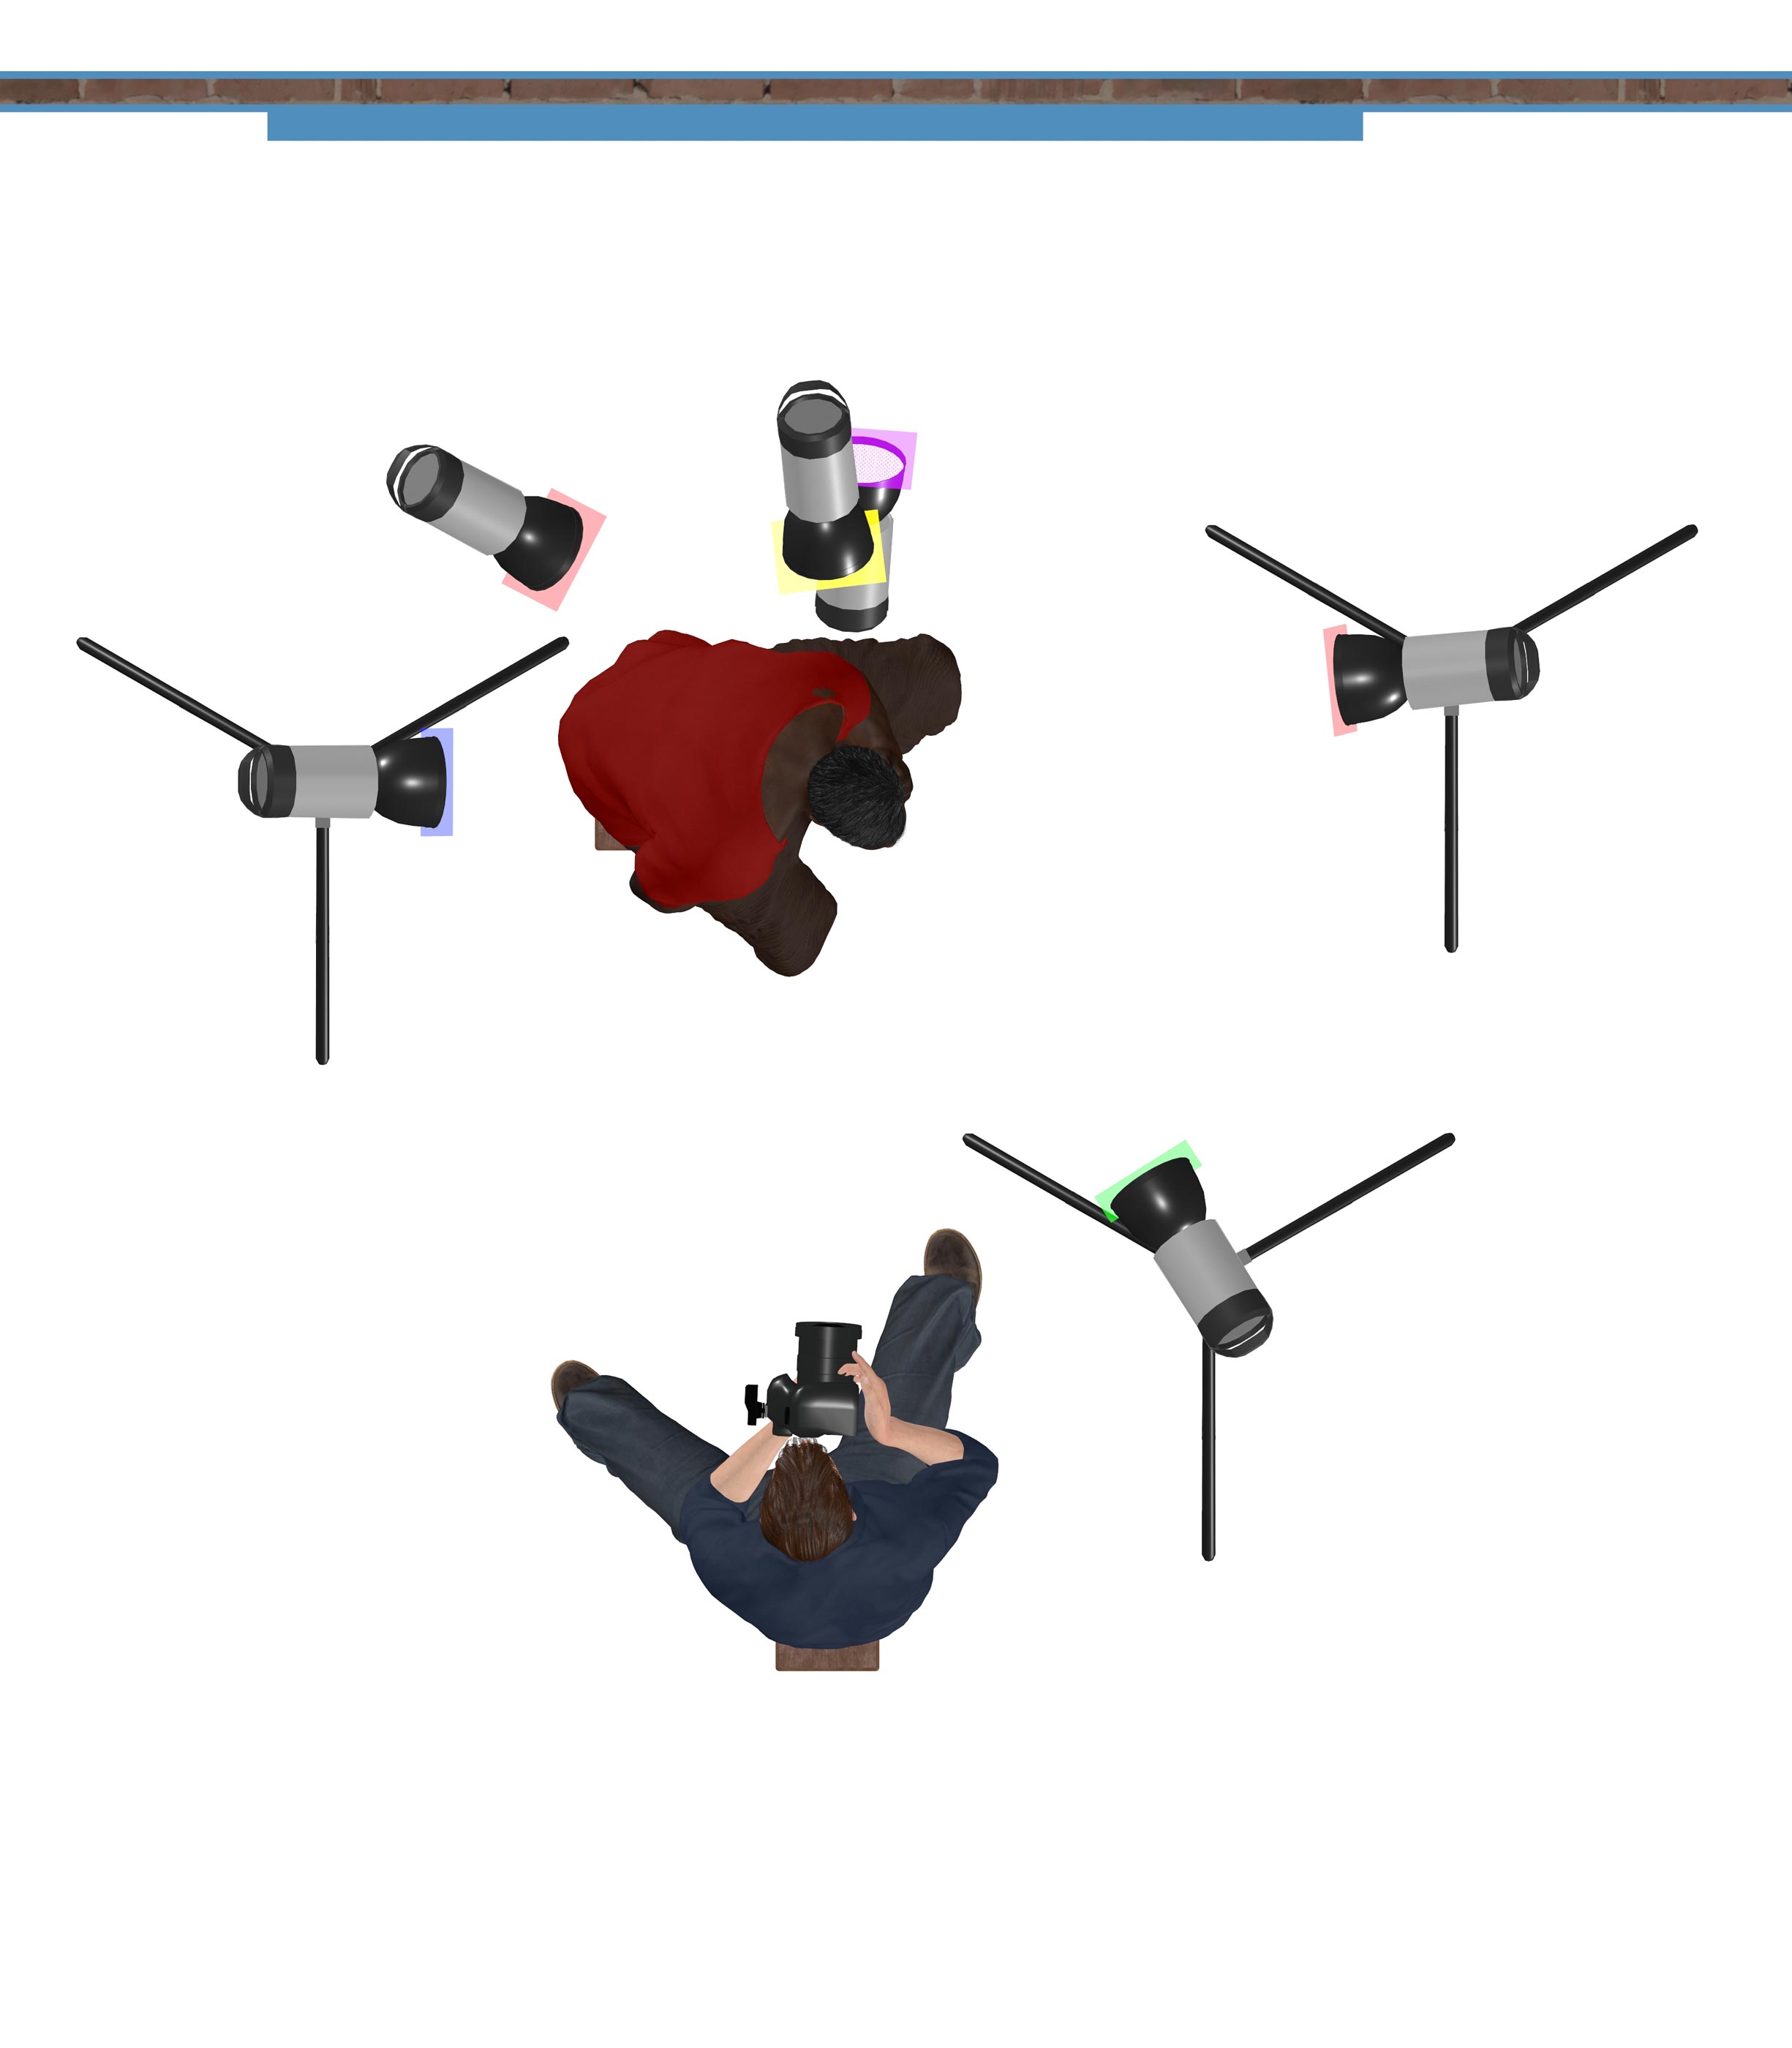
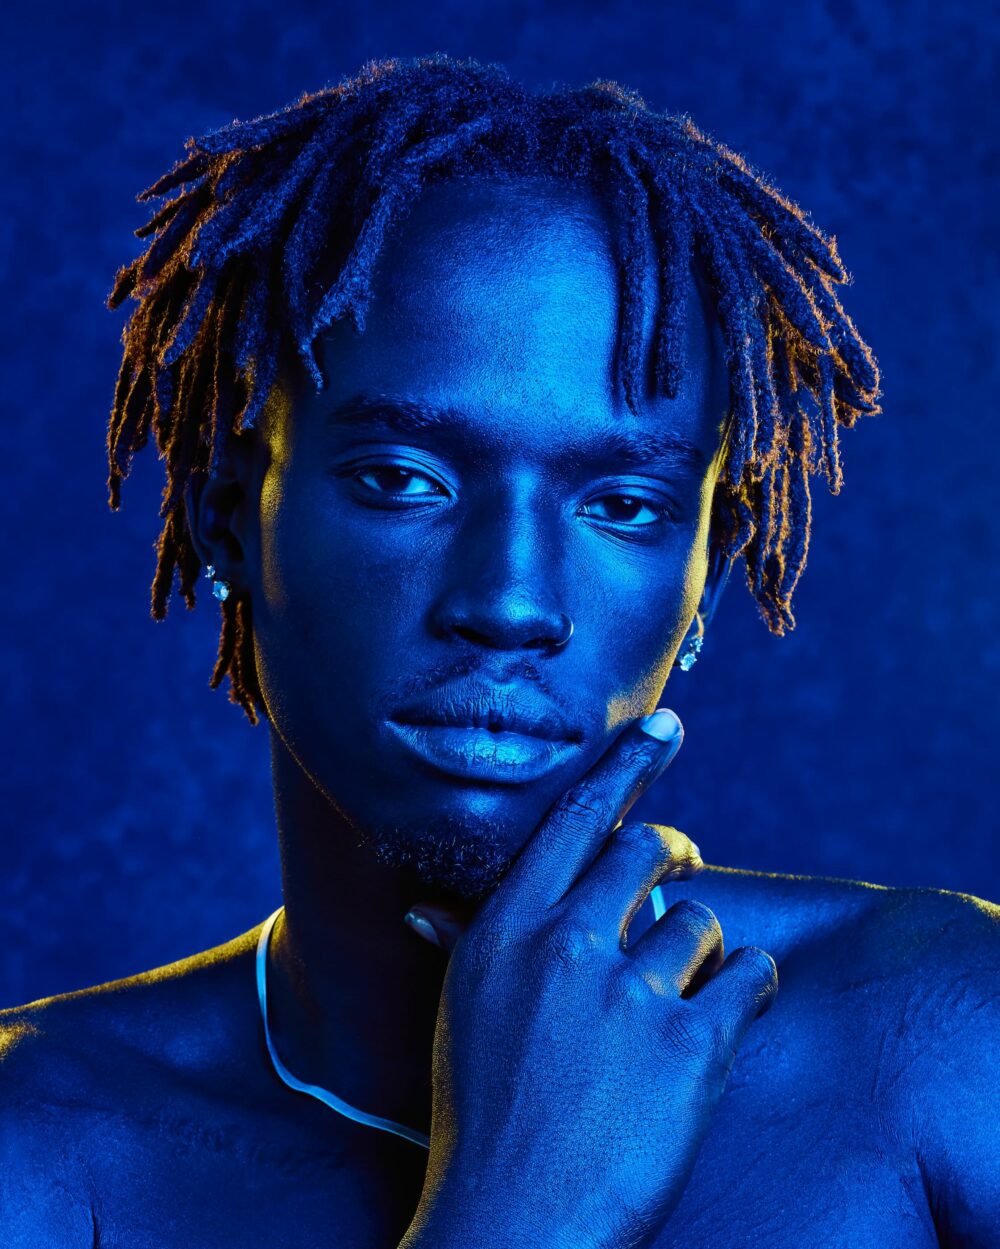
For Dyren’s setup, I employed a series of colored gels and reflectors to paint his face with the vibrant hues of the rainbow. Beginning from the light on camera right and moving clockwise as seen from the top down, I used a red gel, followed by green, blue, and then red on camera left. I added a yellow gel to illuminate his hair and a purple gel to enrich the background. As a result, his left side glowed with a warm orange tint, transitioning to green light on his face, blue on his right cheek, and finally violet on the back of his neck.
A deep purple bathed the background, complementing the golden glow on his hair.
Conclusion
By exploring essential accessories like reflectors, grids, barndoors, and gels, photographers can sculpt and control light with precision, elevating the visual impact of their images. Reflectors and grids enable precise beam control, while barndoors add versatility in customizing light spread. Gels introduce a spectrum of colors, enhancing artistic possibilities and stimulating visual narratives.
As demonstrated through practical examples with various subjects, the transformative potential of these lighting accessories becomes evident. From crafting dynamic shadows to painting portraits with vibrant hues, the interplay of light and shadow opens doors to endless creative possibilities. Whether capturing the elegance of a dancer’s movement or the striking features of a portrait subject, these tools empower photographers to shape light in ways that evoke emotion and captivate viewers.
Armed with the knowledge and tools outlined in this article, photographers are poised to embark on a journey of discovery, where each click of the shutter brings them closer to realizing their artistic vision.
With each new technique mastered and each accessory wielded with purpose, photographers unlock new dimensions of creativity, pushing the boundaries of their craft and leaving a lasting impression on their audience. Armed with the knowledge and tools outlined in this article, photographers are poised to embark on a journey of discovery, where each click of the shutter brings them closer to realizing their artistic vision.
Voir cette publication sur Instagram