28 March 2017
Studio
How to setup a Litemotiv
How to Set Up a Litemotiv Softbox?
With the right tips and tricks, mounting a Litemotiv Softbox is fairly easy.
In this video, we show you how to assemble, in the right way, a Litemotiv Softbox.
Assemble the Litemotiv Softbox
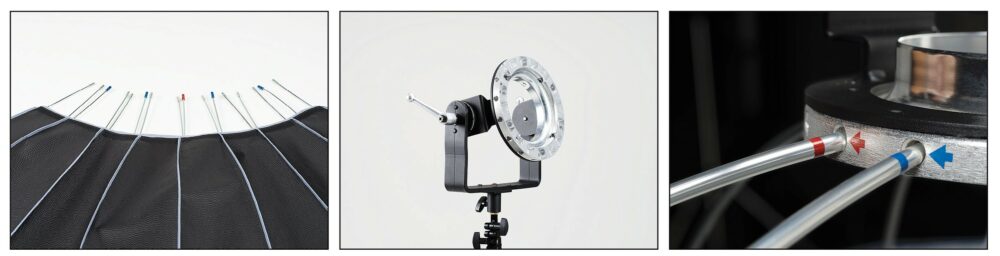
- Place the Litemotiv reflective cover with the included rods on a flat, clean studio floor, with the red coloured rod facing upwards.
- Now, use the Litemotiv Speedring Bracket and enter the red coloured rod into the receptacle with the same red colour.
- After this, please use first the blue coloured rods and enter them one by one, always opposing into the blue coloured receptacles, following the direction arrows. By using the opposing receptacles, the setup process is much easier to handle.
- When done, enter the remaining non-coloured rods into the non-coloured receptacles always opposing to the last you entered. Ensure that all rods have been entered securely into the Litemotiv Speedring Bracket.
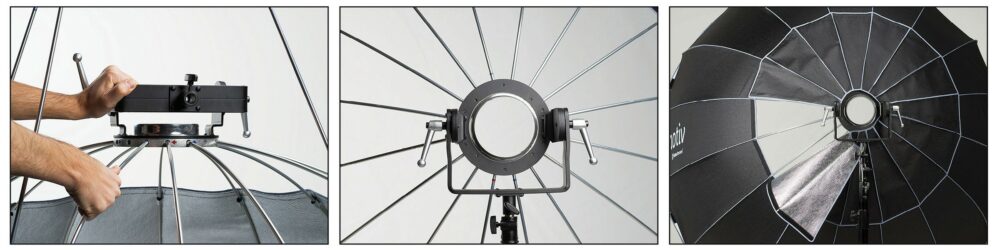
- Mount the Litemotiv softbox with the Speedring Bracket onto a strong and stable light stand. The bracket offers a standard 5/8 “ inch adapter socket, compatible to most common light stands.
- Now attach the black/silver cover around Speedring Bracket
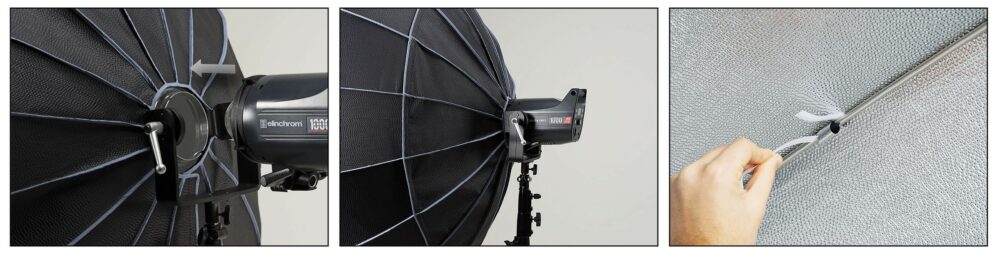
- Attach the flash unit and lock the breech-locking ring.
- Ensure that the unit is well attached to the Litemotiv Speedring Bracket.
- The Litemotiv can be used with or without internal and external diffusers, if the internal diffuser is required, find the internal Velcro strips.
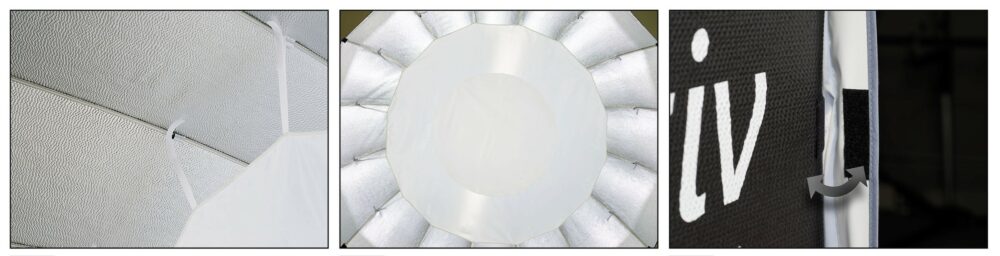
- Attach the internal diffuser.
- Centre the position of the internal diffuser.
- Now, if required the external diffuser can be attached with the Velcro parts on the outer black/silver fabrics.
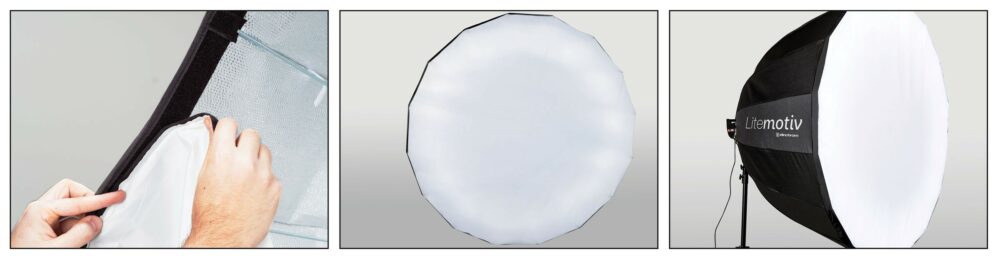
- This image shows how the external diffuser of the Litemotiv 120 can be attached to the
black/silver cover. - Litemotiv with external diffuser.
- The setup is now complete.