2 easy setups with Grids
To help you get started with grids, here are two easy setups for you to recreate.
What is a grid?
If you want to learn more about grids before digging in this tutorial, please have a close look at this article.
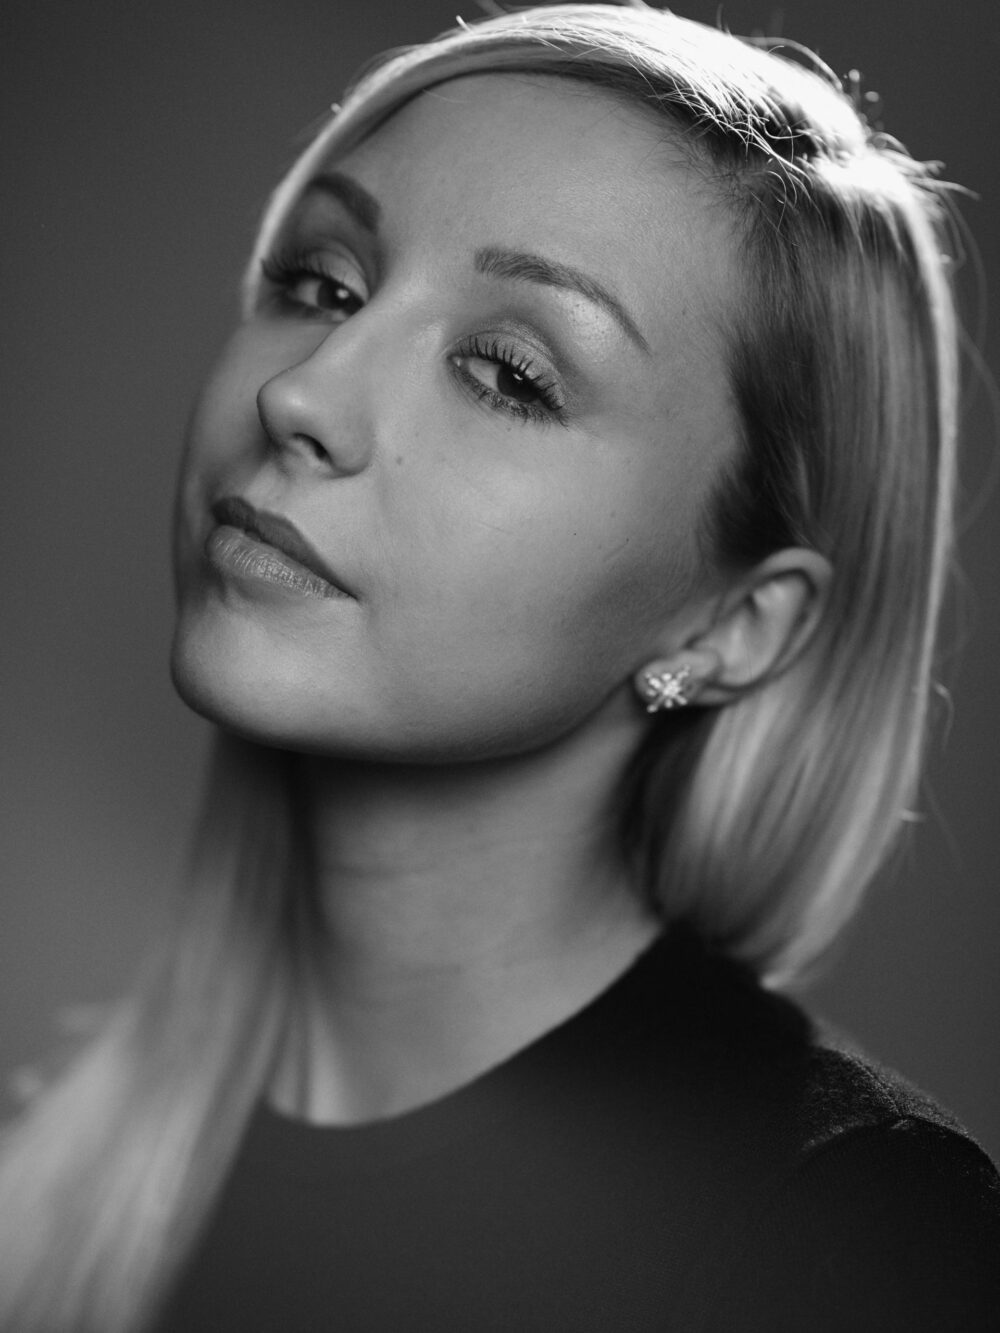
Backlit Portrait
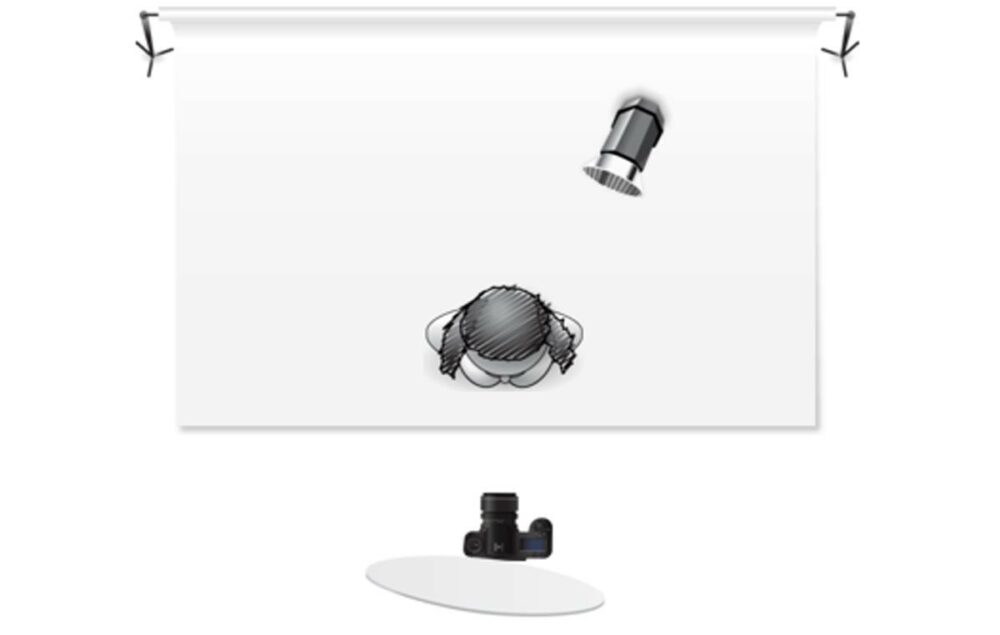
What you need
- 1x Flash unit
- 1x Grid
- 1 meter circular reflector
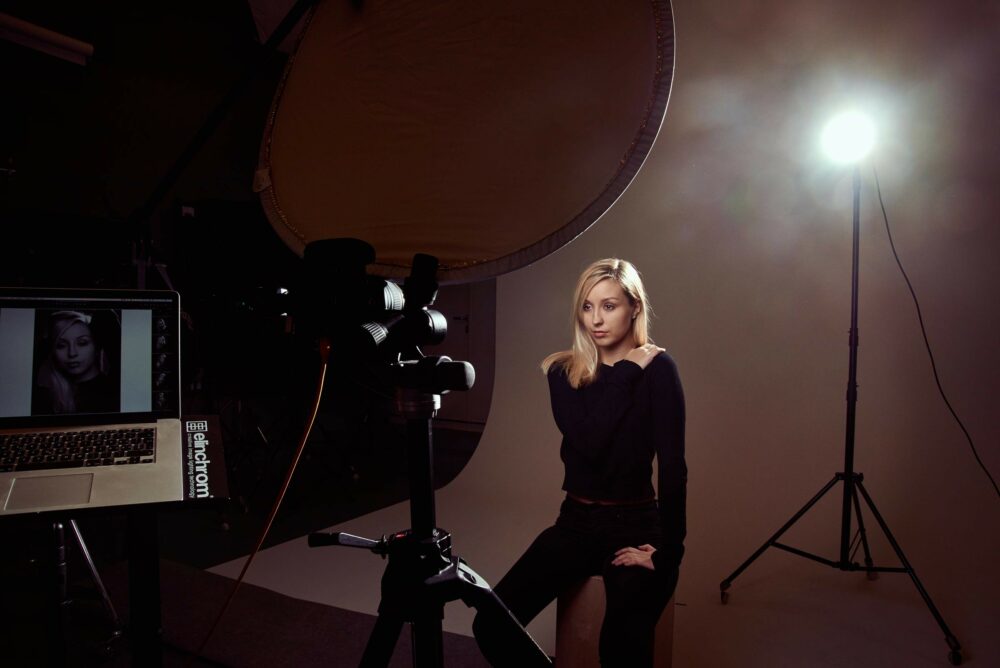
We placed the unit behind our model, up high, just like a hair light.
Emulate the sun
Use either the 12°, 20°, or 30° grid depending on your taste.
- I used the 30° to have a focused beam of light while still maintaining a bit of flare (use a tighter grid if you don’t want any).
- Then we place the reflector in front of our model, up high as well and angled so that it reflects the light beam on the model’s face.
- The aim is to emulate a fill without the need for a second flash.
Easy & Quick
In studio, it’s easy and quick to setup, and you can play with flare. On location, it is amazing!
Place a 1/2 or full CTO gel in front of your grid, and you end up with a portrait that looks like it was taken at the golden hour! I use it a lot when I shoot engagement sessions and weddings because the setup is incredibly easy and doesn’t require much equipment or an assistant.

4 Light Beauty Portrait

This setup is a bit more complex, but if you do it one light at a time, you’ll realize that it’s quite logical. It can easily be tweaked with more or fewer flash units.
Step 1
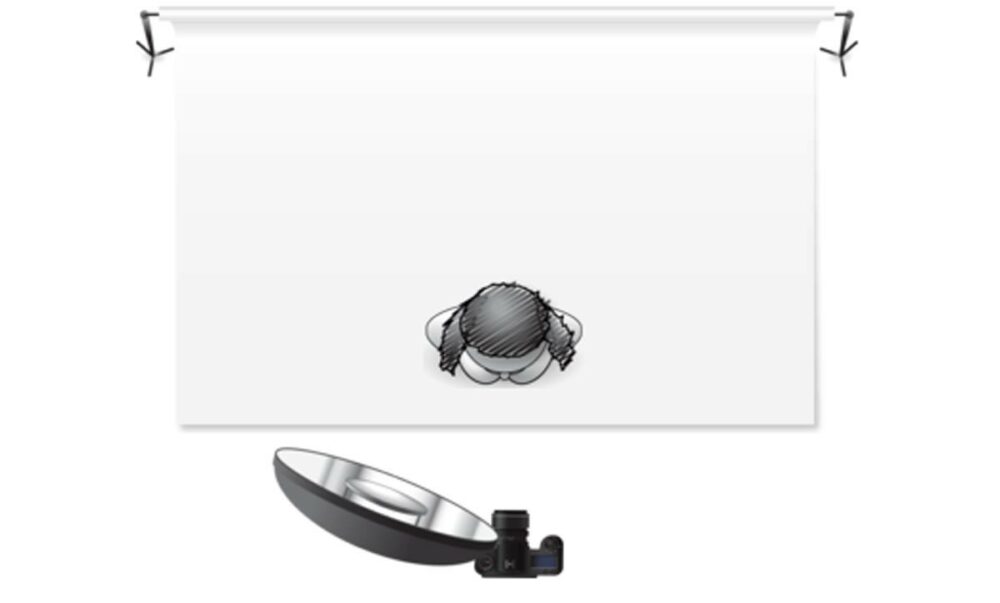
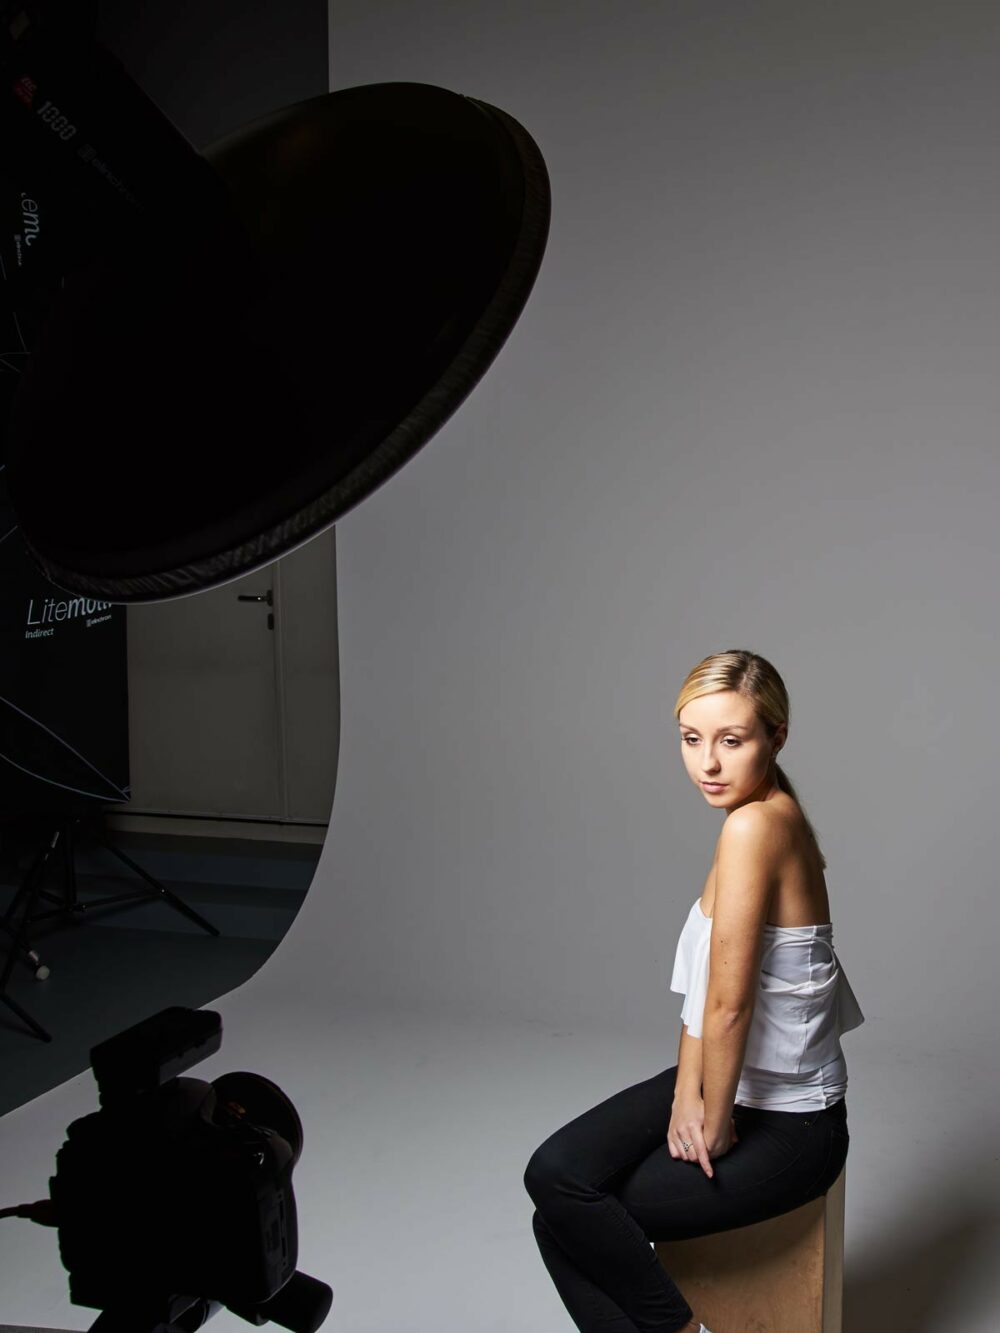
What you need
- 1x Flash unit
- 1x 70cm beauty dish
Our main light source is a simple 70 cm beauty dish, in front of our model. I used the silver one, with the diffusion sock, and the white deflector.
Start Simple
The result is nice, but nothing extraordinary.
The model’s eyes look flat, and the shadows could use a bit of fill light.
I could just place a simple reflector below her face, at waist level, but then I couldn’t move my beauty dish without affecting the fill light as well.
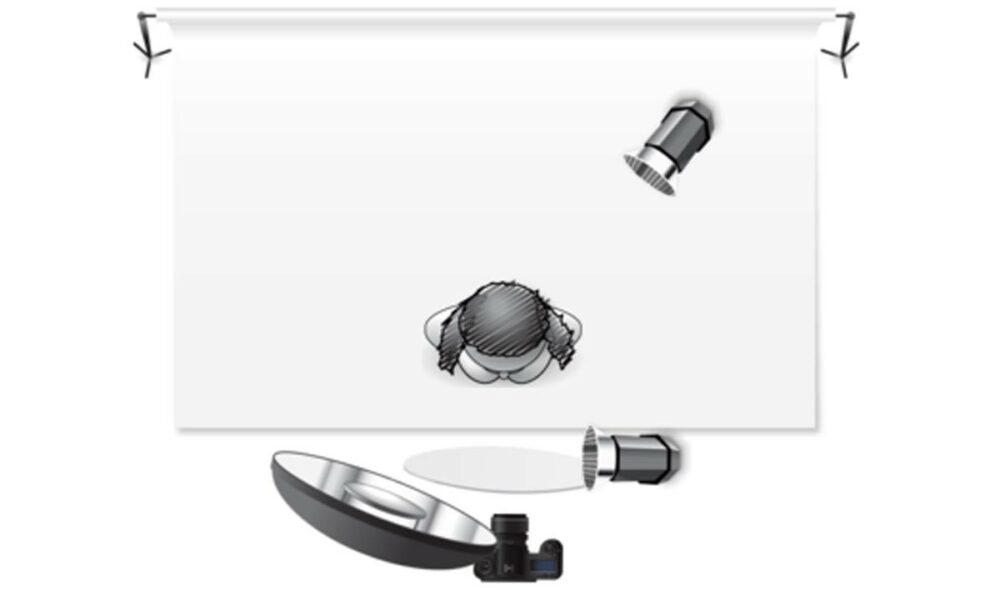
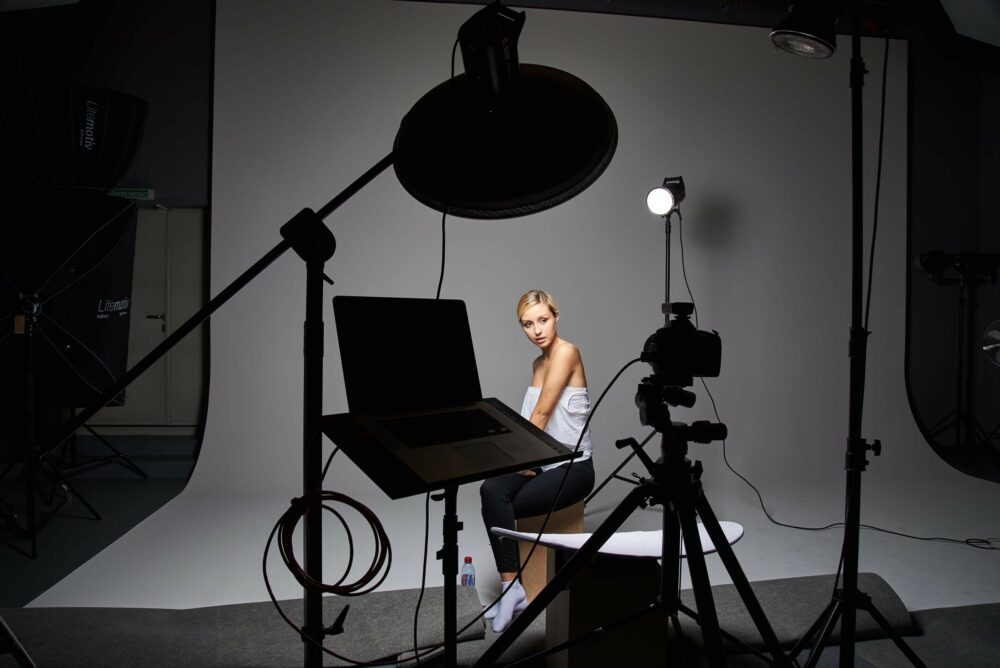
I could place a rectangular softbox, pointing upwards, at waist level instead, but the light would spill all over the place. Instead, let’s set a strobe with a 12° grid in front of the model, pointing down to a circular reflector that reflects the flash light into my model’s face.
The picture bellow will probably explain this better than my words.
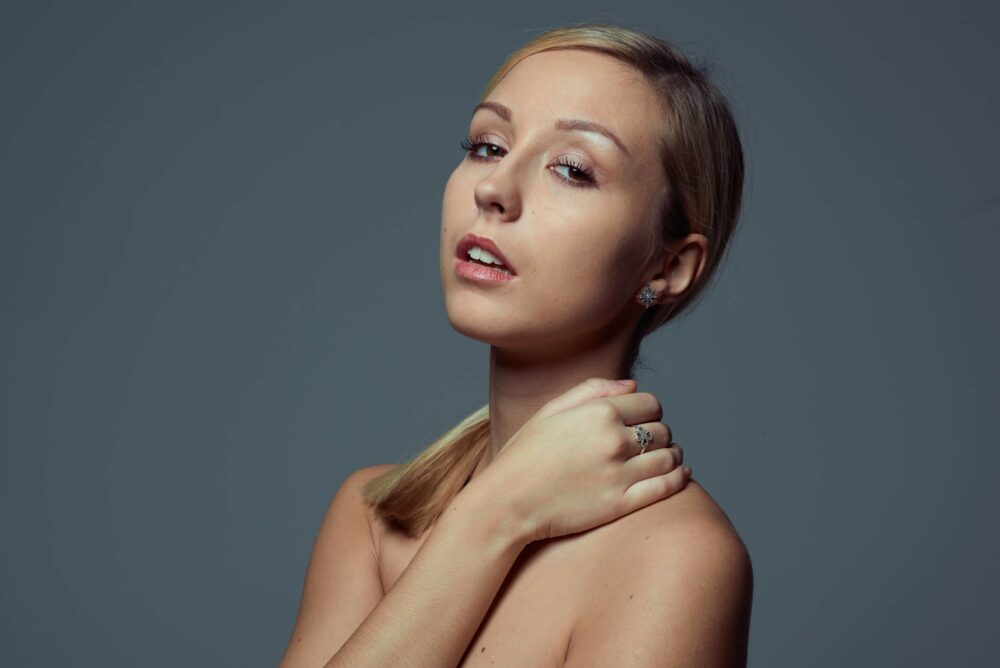
Step 2
What you need
- 2x Flash units
- 1x 20° Grid
- 1x 70cm beauty dish
- 1 meter circular reflector
Flatten the light
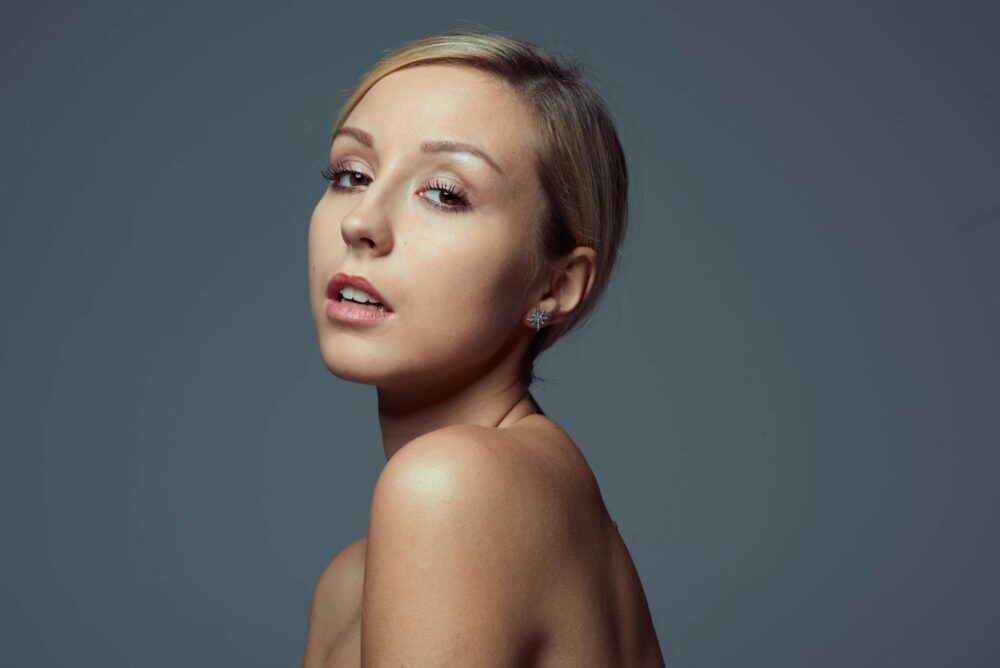
The light is much more flattering now and having a fill light also attenuates some of the skin texture issues I otherwise would have to clean up in Photoshop.
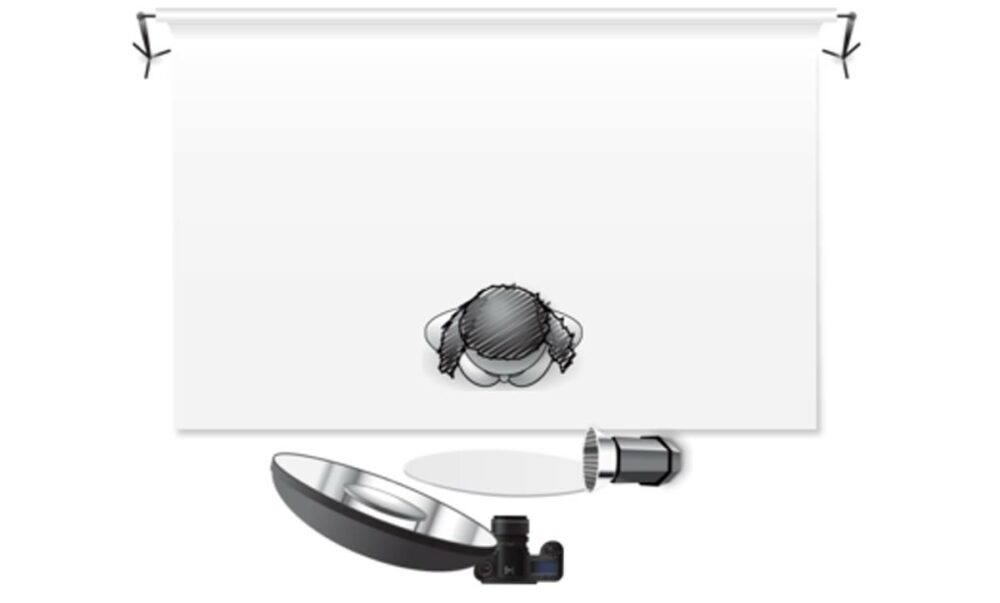
While better, it’s still not perfect yet. The overall image lacks dimensions.
So, like in our portrait setup, let’s place a hair light. The grid you chose here will depend on a few different elements. First is flaring and second is if the model has to move into different poses or not. I opted for a 20° grid, to give my model room to move a tiny bit while still avoiding flare.
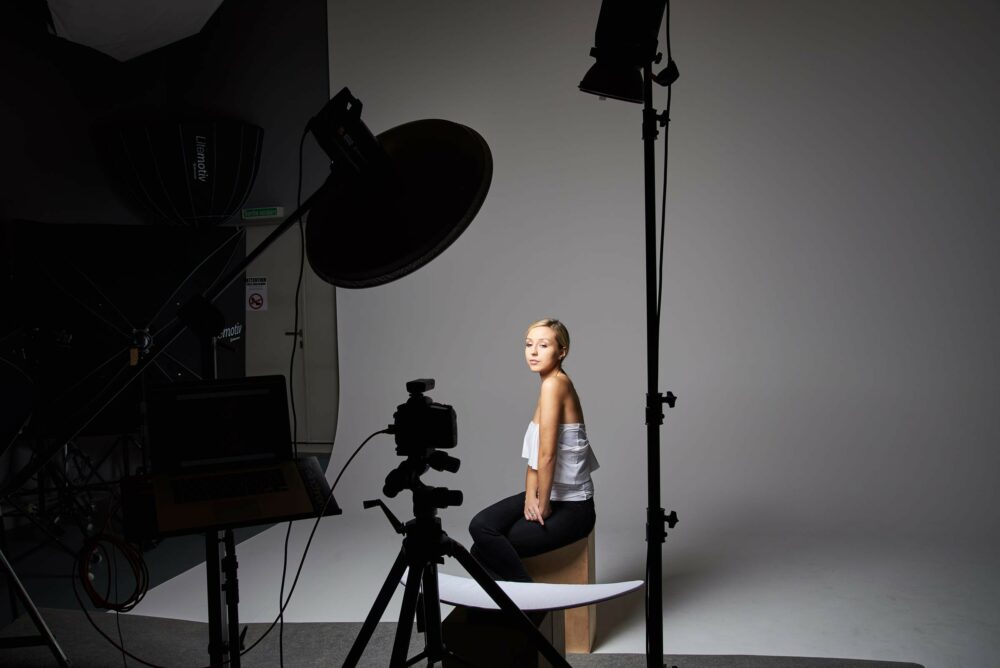
Step 3
What you need
- 3x Flash units
- 2x Grids
- 1x 70cm beauty dish
- 1 meter circular reflector
Add depth
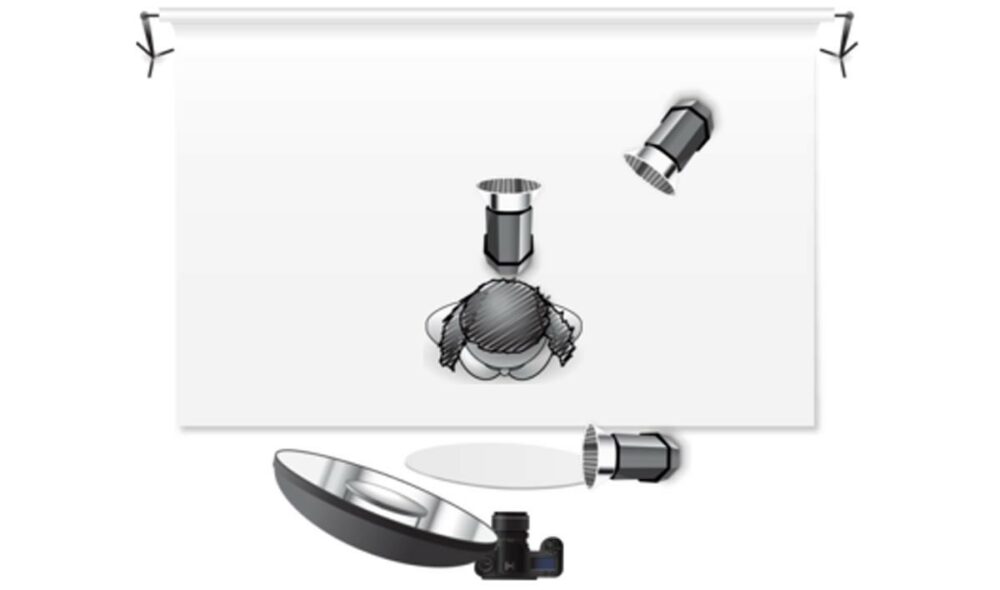
Still, the hair light is making things better, but the background is just flat and doesn’t have any interest here. So I decided to add a unit right behind my model with a 20° grid, lighting the background. It gives a beautiful glow to the seamless paper and gives more depth to the picture.
What you need
- 4x Flash units
- 3x Grids
- 1x 70cm beauty dish
- 1 meter circular reflector
Go further
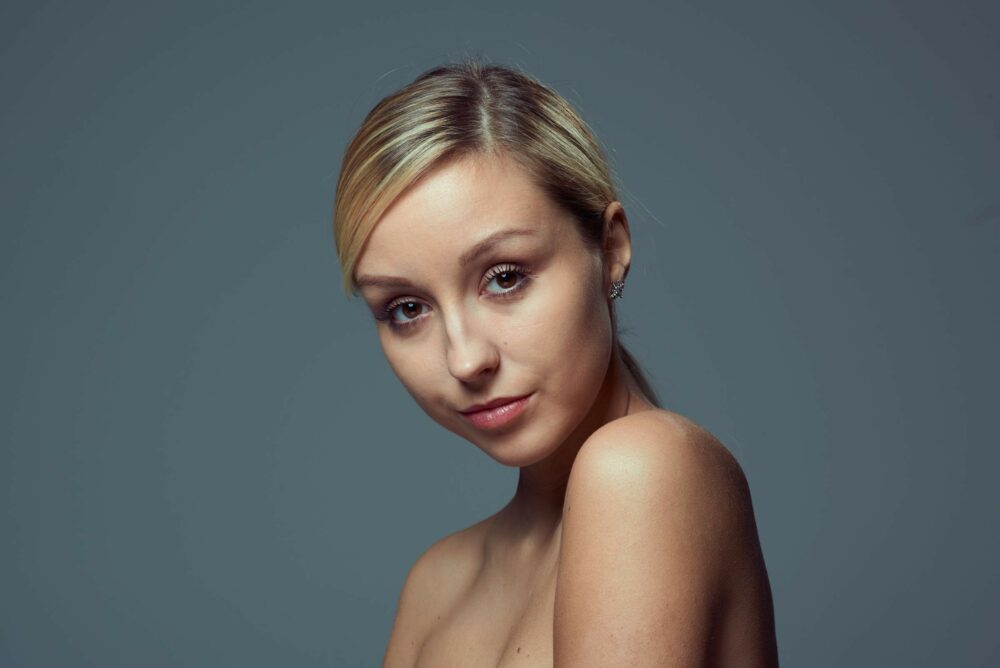
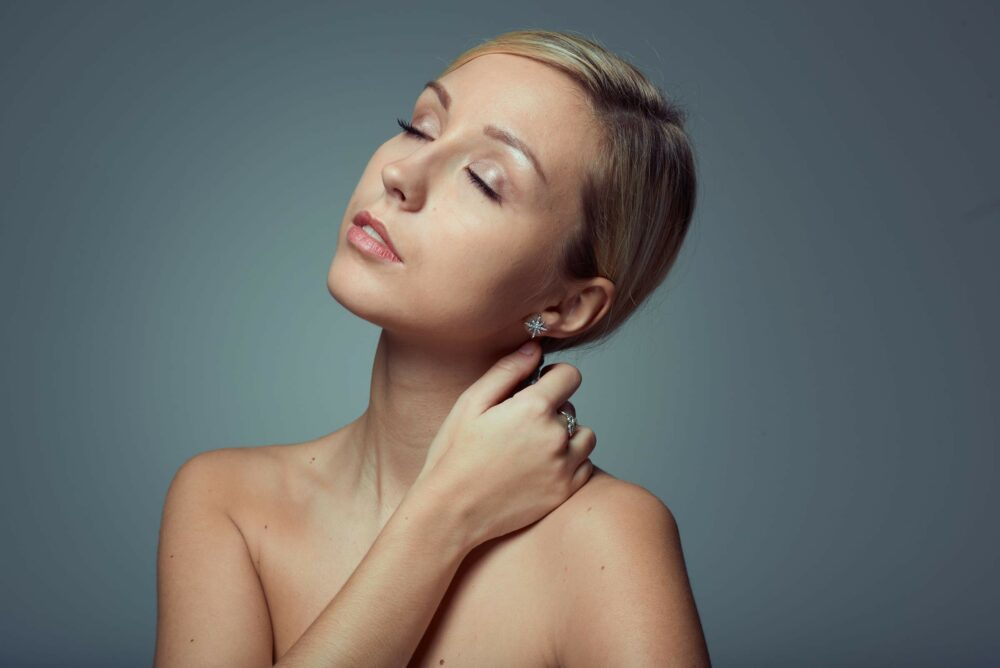
The face is lit correctly and the image has a bit of dimension. Yet, we could go further.
If you wish to add even more depth, you could add another back light, but this one lighting the model’s arm and shoulder.
Step 4
What you need
- 4x Flash units
- 3x 18cm Grids
- 1x 70cm beauty dish
- 1x beauty dish grid
- 1 meter circular reflector
More drama
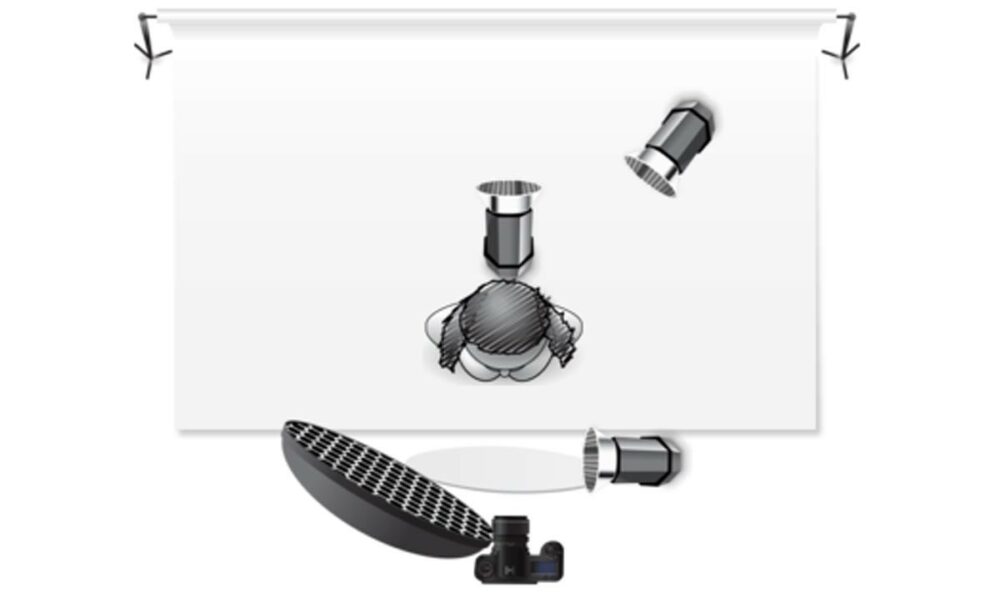
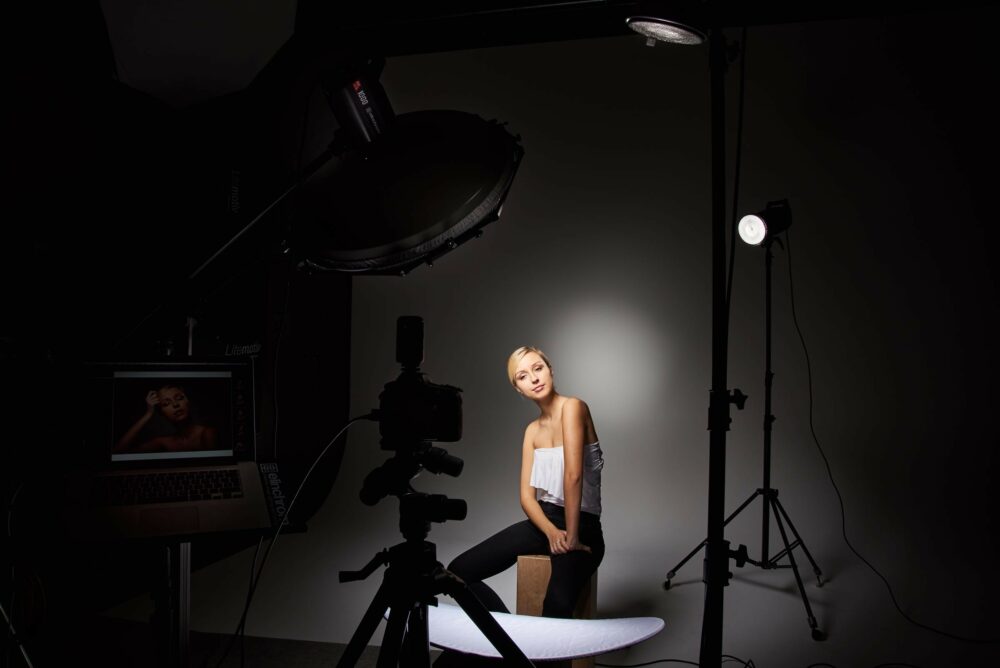
You could add a grid on your beauty dish to give more drama to the image.
With a grid on the beauty dish, less light will spill over the background, and a strong vignetting will appear.

Wrap Up
Both configurations will help you get started with grids and give you a sense of what can be achieved with them, both in studio or on location.
They are an excellent way to learn and to control your light better, as well as to create unique setups otherwise impossible.
Note
All pictures shown in this article have only been processed in Capture One. No further retouching was applied to alter the fall-off of light.
